Traditionally, we’ve been taught to think about exposure as a triangle with aperture, shutter speed, and ISO at each point. But I stumbled onto a new way to think about it which makes the relationship among the three easier to understand and makes a lot more sense: the exposure pie.
Basically, the whole pie represents a “correct” exposure with each of the exposure controls — aperture, shutter speed, and ISO — represented as slices of the pie.
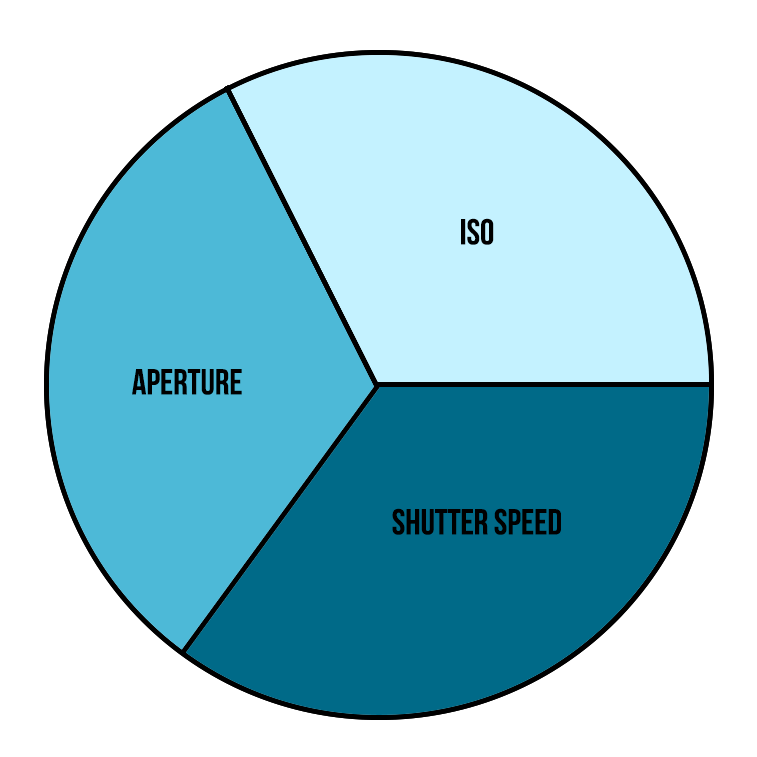
The goal in most cases is to get a correct exposure — a whole pie. If part of the pie is missing, it’s underexposed. If there’s more pie outside the circle, the photo is overexposed.
So how does the exposure pie work?
We’ll start with the exposure pie having equal slices of aperture, shutter speed, and ISO just like in the original graphic above.
However, that’s rarely the case since it’s always recommended to keep your ISO at its lowest setting for the cleanest image. So we’ll decrease the ISO to 100, which is native or base ISO in most cameras.
Now the ISO represents a smaller slice of the pie.
And our pie isn’t whole anymore. There’s that striped area in the pie that isn’t filled and so the photo would be underexposed.
To get a proper exposure, the aperture or the shutter speed, or a combination of both, needs to fill that void.
Let’s say that in this case, we increase just the aperture–we make it wider so more light can come in–to complete the exposure pie.
But what about when we’re throwing dirt or dropping leaves into the scene to create some movement?
If we wanted to freeze that action, then we would need a faster shutter speed. So we would make the shutter speed shorter.
Since that leaves a void in our exposure pie–and we still want to keep our native ISO for as little noise or grain as possible–we would have to open up the aperture to let more light in for a correct exposure.
I hope that you can see that looking at exposure as a pie rather than a triangle, helps you easily understand how these 3 camera controls really affect each other.
That way you can focus on using the aperture and shutter speed for the creative effects you want in your photo.
This kind of thinking also can open you up to using other techniques outside camera controls to achieve your creative vision like lighting and focus stacking, which we’ll get into later.
Here’s the video by Andrew Marr, who came up with this great way to teach exposure:
Download my free toy photography cheatsheets