
I use a lot of atmospheric effects in my LEGO photography and have used everything from Aerosol Atmosphere, the Micro Fogger, HVAC leak testers to facial misters to achieve them. But one effect I could never quite get was that slow-moving, thick, lingering fog.
I was lucky enough to get my hands on a recently launched fog machine that finally let me scratch that itch. It’s the Smoke S (affiliate link) from LENSGO.
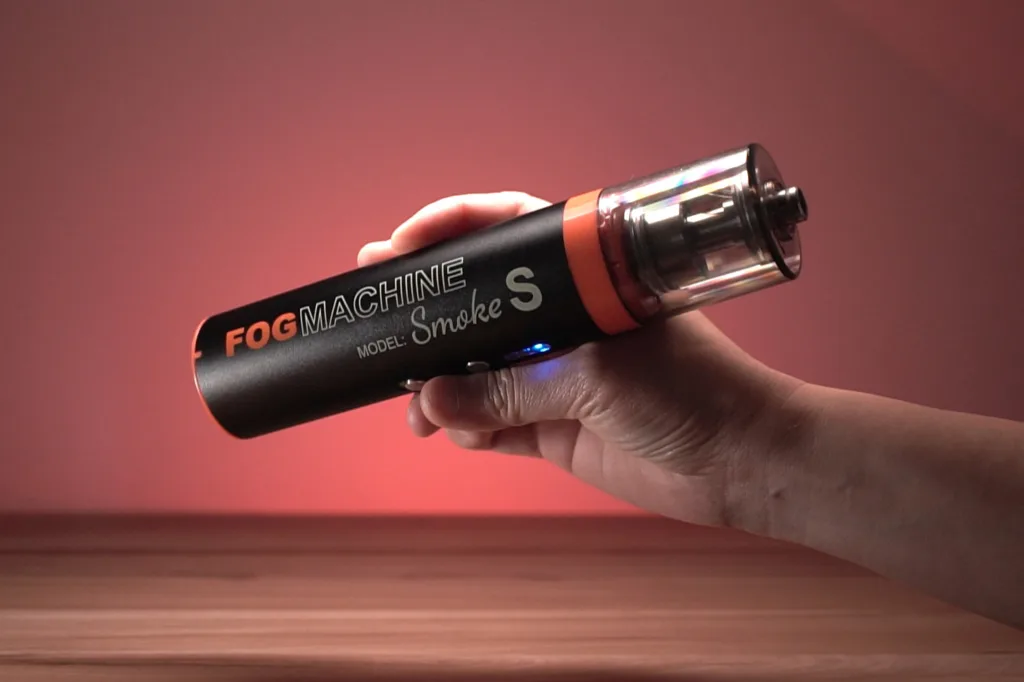
The Smoke S can create a few different effects but the one I was most interested in was the “dry ice” or “liquid smoke” effect.
Disclaimer: LENSGO sent the Smoke S to me for review but all opinions are mine. Some links are affiliate links and I will earn money if you use them to buy the products.
I reviewed it here but I’ll talk about a couple of specific photos that I created with the dry ice effect in this post.
Concept
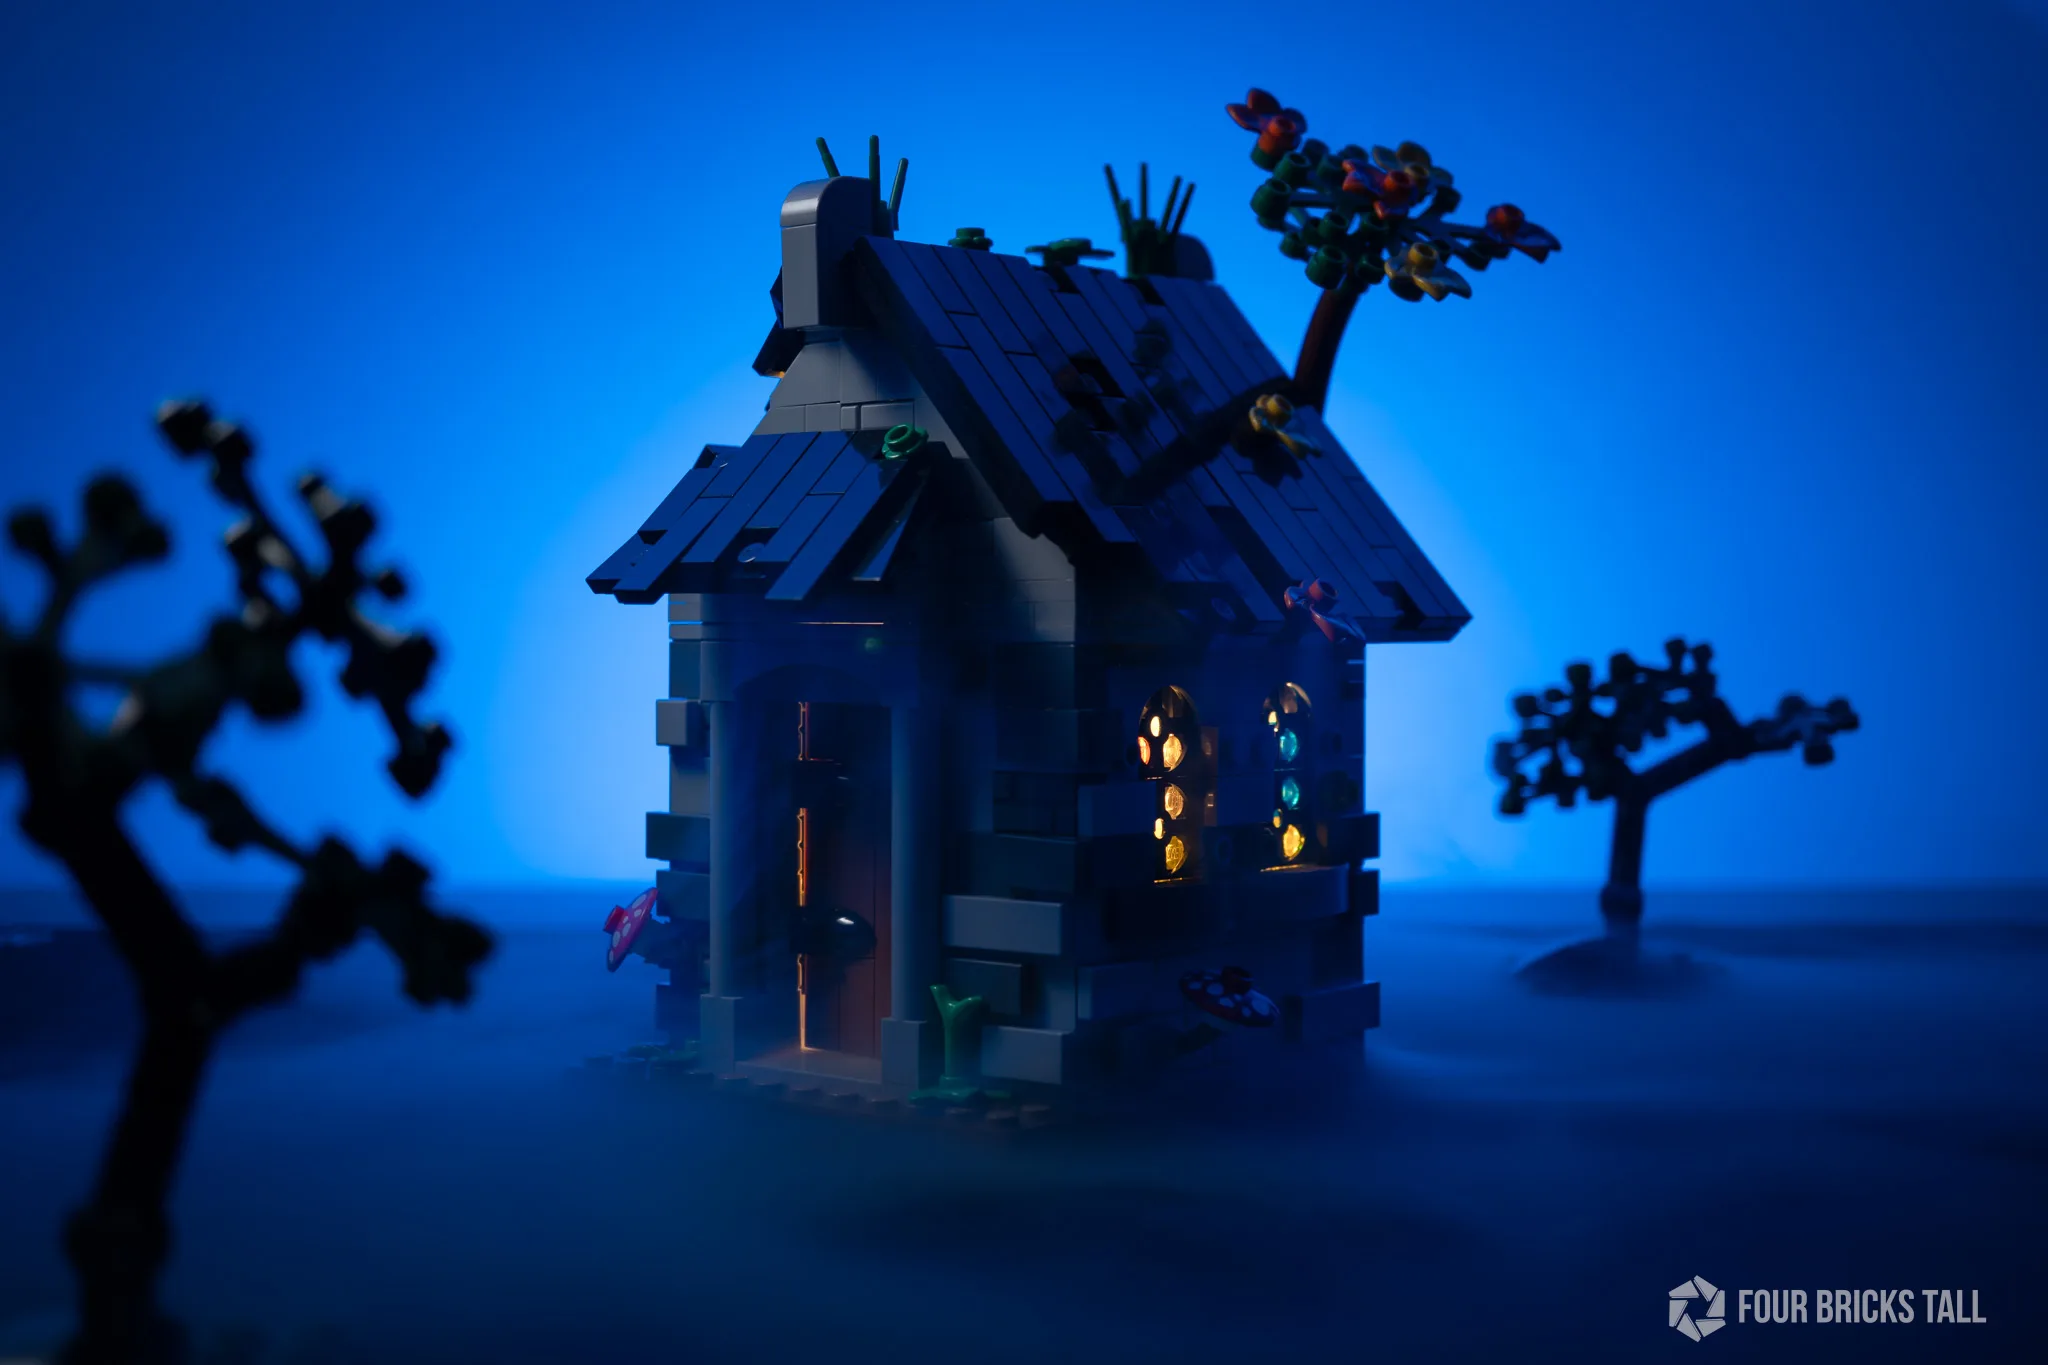
The concept for the chapel photo isn’t complicated– it’s just a proof– but it serves as a template for other more stylized photos I’ll shoot later.
I wanted to capture a building surrounded by a carpet of thick fog. I already had a chapel model built so I used that as the subject. It’s got an interesting shape which would be perfect for a silhouette and these stained glass window details for pops of color.
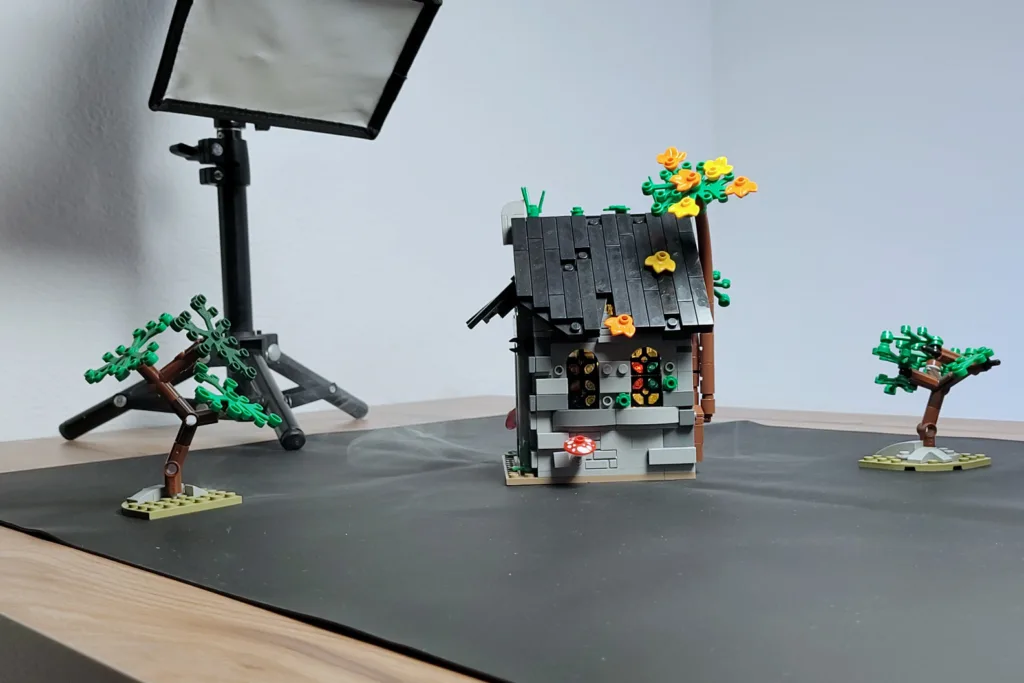
Since the photo was going to be relatively clean, I added some trees in the foreground and background to create some depth.
Lighting
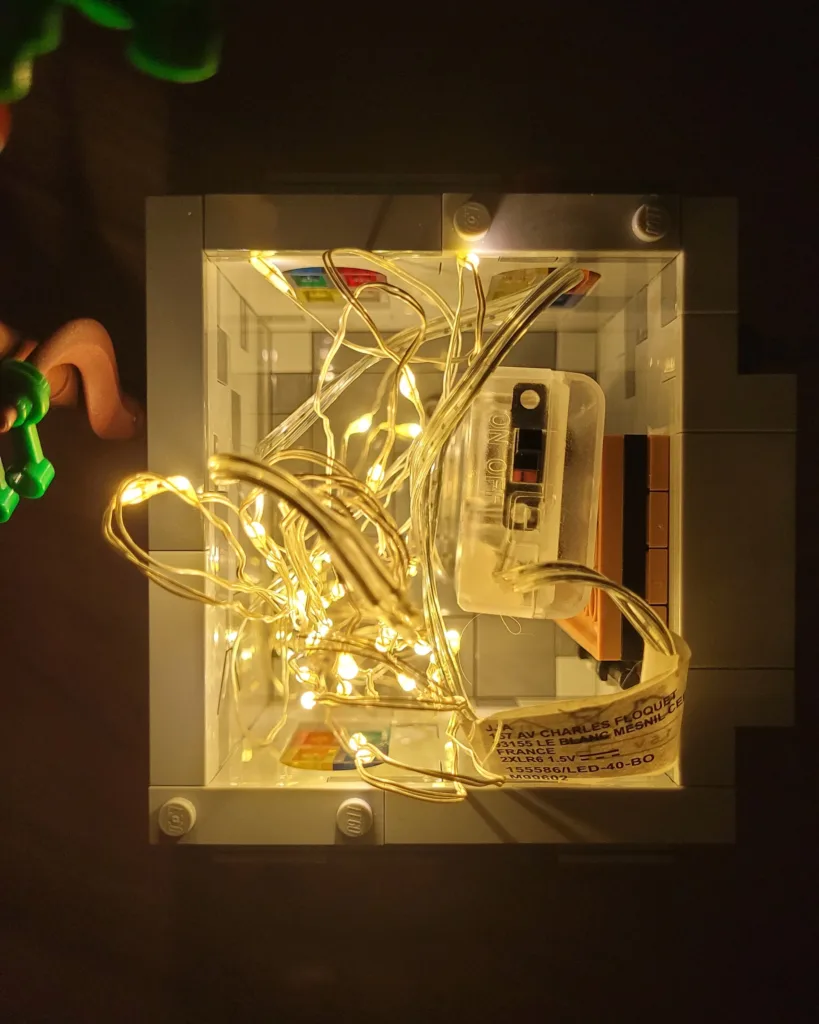
To get those windows lit, I just stuck a string of battery-powered LEDs inside the empty chapel. These are super cheap, readily available, and easy to use.

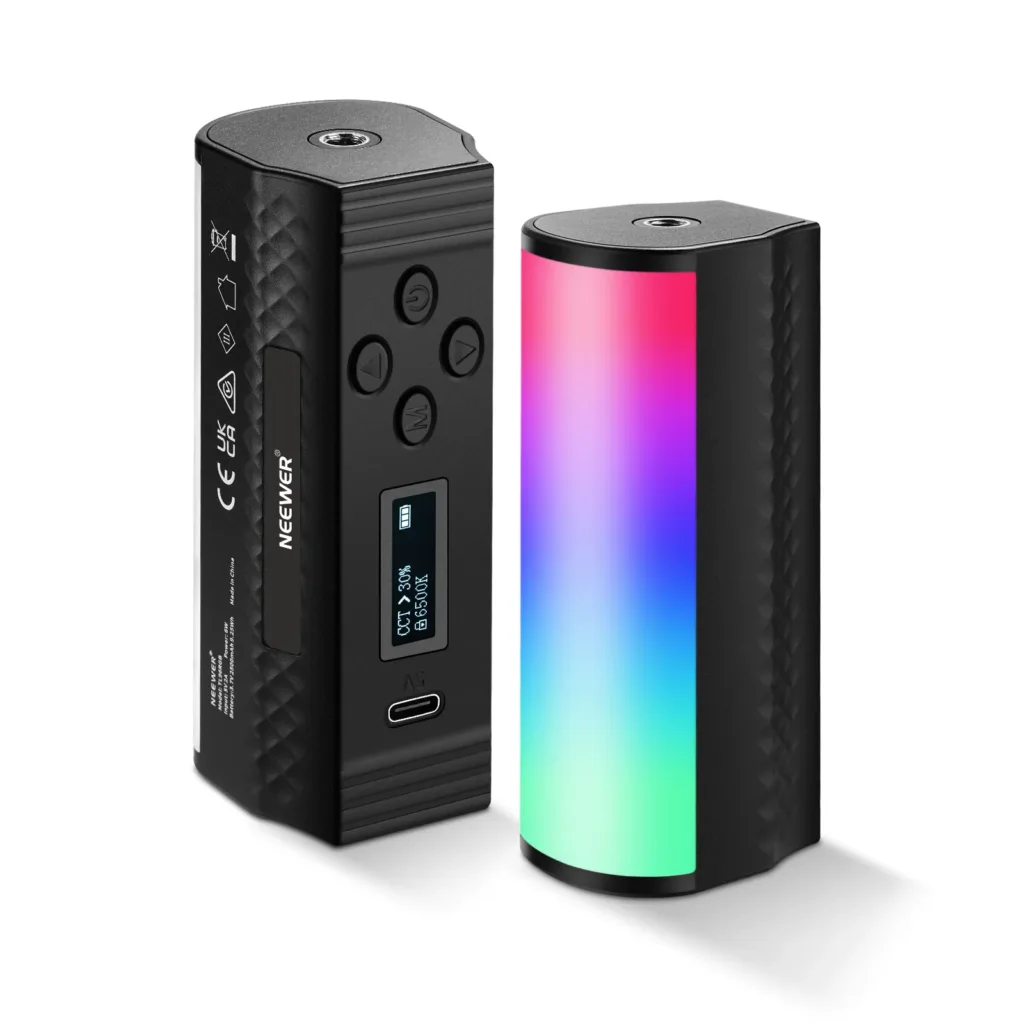
The next light I added was an RGB tube light behind the model and facing the wall. I used a Neewer TL96RGB Magnetic Handheld Light Stick (affiliate link) and set the color to a blue hue to suggest a nighttime vibe.
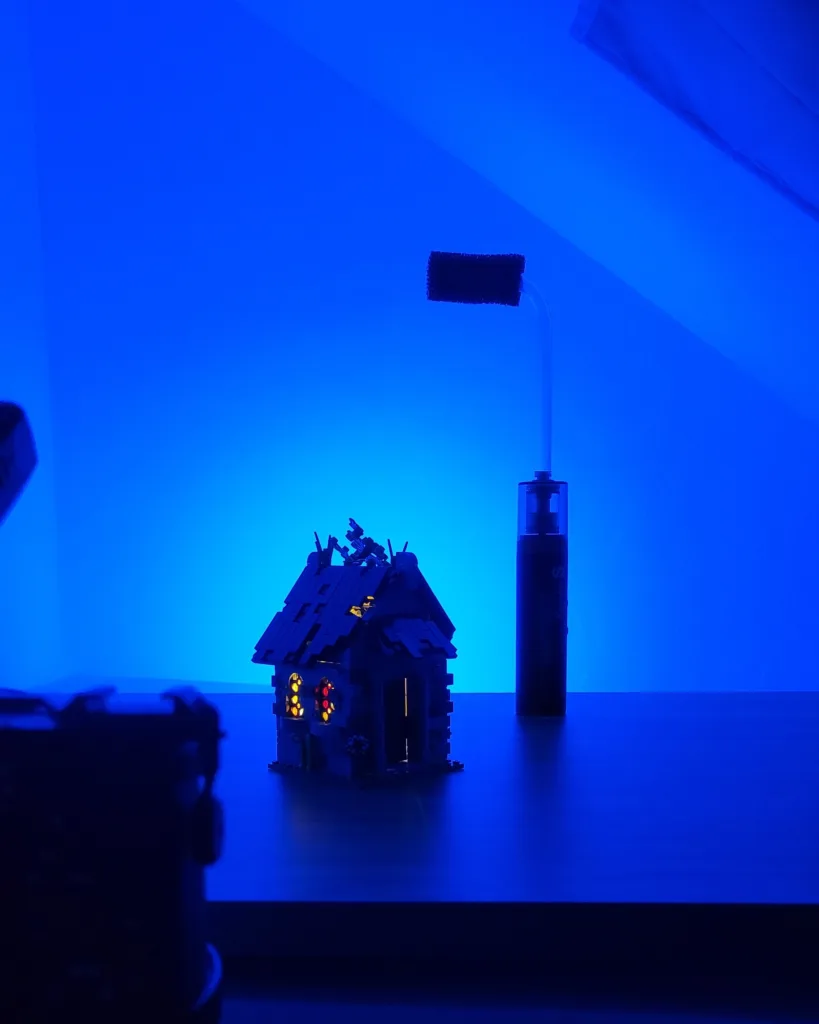
Lastly, I placed a standard flash with a small softbox on camera left to light up the chapel.
Shooting
I used my Sony 30mm f/3.5 macro lens to get a wider field of view and set my camera to f/5, 0.5″ shutter speed, and ISO 100.
I only needed half a second exposure time to register the LED lights inside the chapel. Then I just adjusted the brightness of the RGB light in the background by eyeballing it.
The flash doesn’t get affected by shutter speed so I just set that to its lowest power setting of 1/128 and then raised it in one-third stops until I liked the result.
Once I got the lighting I wanted, I just added the hard elbow and liquid smoke filter accessories to the Smoke S, powered it on, and moved it slowly around the chapel.
Editing
In post, I cleaned up some stray smoke tendrils and covered up some light leaks in the model. I used a mask in Lightroom to raise the exposure on just the chapel as well as the windows.
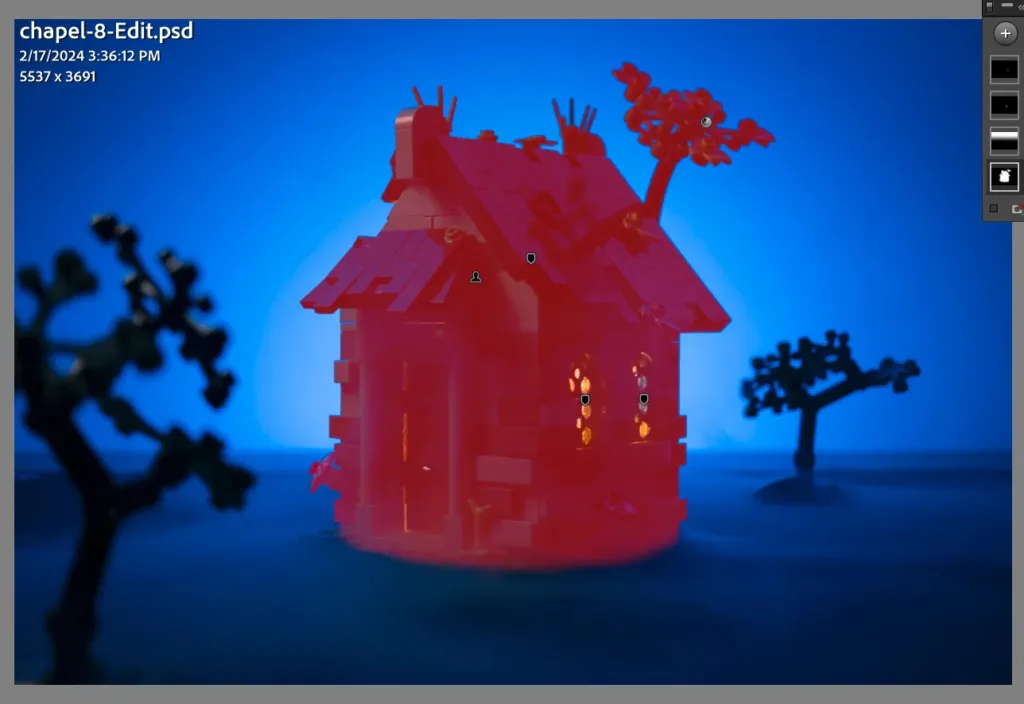
I could’ve done a better job in-camera by increasing the power on the flash but I missed it at the time of shooting.
This was a simple photoshoot set up to demo the Smoke S’s dry ice effect. It’s a pretty cool device because I didn’t have to juggle one more timing or speed issue– atmospheric effects– to get the fog effect.
For a full review, check out my video on YouTube: