
Photos of LEGO in a wintery scene can be pretty stunning, but not everyone lives in a part of the world that gets snow. Luckily, creating a cold and snow-covered diorama is quick and easy.
I’ll walk you through this photo of a LEGO Viking setting up a campfire in a wintery forest, from coming up with the concept, making the diorama, and using composition techniques for better storytelling.
Making the forest diorama
The winter forest set was something I made just as a background for a larger LEGO model and had planned to reuse later as an environment, so I’ll start this how-to with instructions on making the diorama.
The things you need to create the wintery forest for your LEGO photos are:
- small branches of varying thickness
- thick styrofoam board
- baking soda or other white powder
- (optional) glue
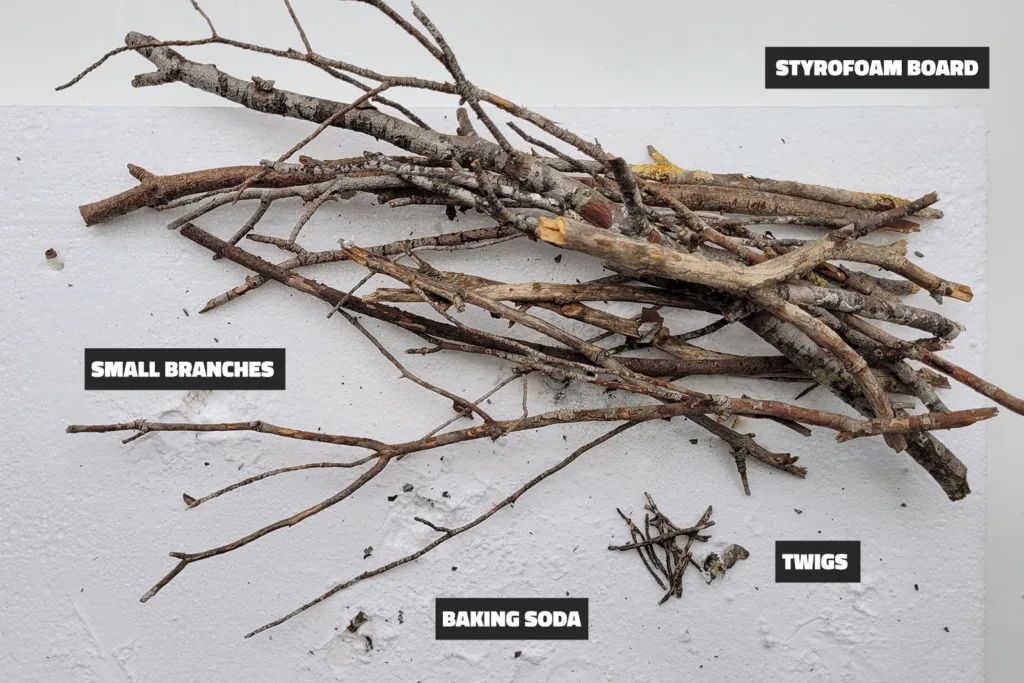
When you’re out collecting small branches that have fallen on the ground, search for ones of different widths so your forest has some variety and looks more interesting. Ideally, the thickest branches should be about the same as your index finger. Those look about right for minifig scale.
If you plan on shooting vertically or much wider scenes, then gather longer branches. I took branches that were about the length of my elbow to the tips of my middle finger, and those turned out to be much taller than I needed for a landscape format. But better safe than sorry!
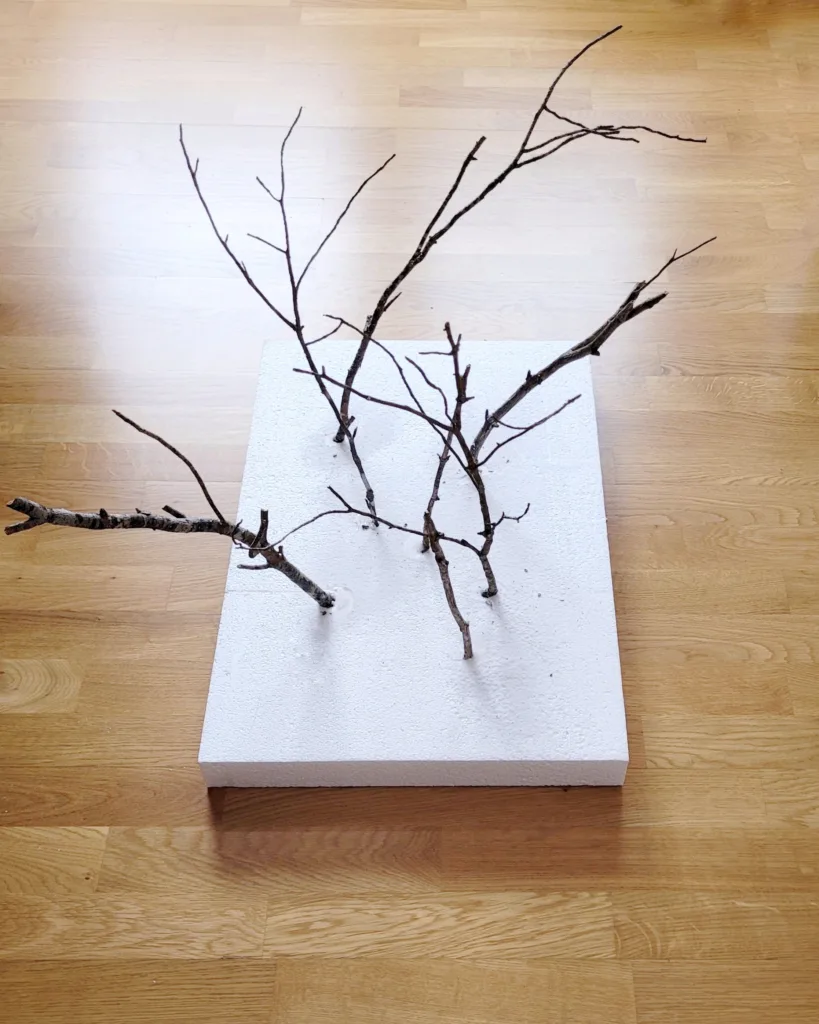
Before inserting them into the styrofoam base, I broke off the tips of a few of the branches and set them aside to use as props and foreground interest in the photo later.
Then I just stuck the branches into the styrofoam. I used a piece of styrofoam that came in some packaging, so it had a recessed bottom instead of being one thick board. The thinner branches stood up with no problem, but I had to use glue to reinforce the thicker branches since the styrofoam couldn’t hold them in place on its own.
If you buy styrofoam from a hobby or crafts store, it will probably be consistently thick though. But if you could reuse something you have at home already, then great! Check boxes of electronics to see if you have styrofoam on hand.
After letting the glue dry, I moved the diorama to my studio nook for the messy part. I sprinkled some baking soda from a stainless steel shaker to evenly spread finer dust over the entire scene.
Sifters from the kitchen work great too– I just prefer a shaker because I only need one hand to use it and it’s less messy. If you don’t have a shaker or a sifter, carefully place spoonfuls of baking soda on the styrofoam and then use a lens blower, syringe, straw, or anything that pushes out air to smoothen the powder out. I always have one of these things within reach whenever I work with powder so I can erase footprints or indentations after moving things around.
I like baking soda for snow rather than flour since it’s whiter and is slightly easier to clean up after. In my experience, flour is slightly yellowish and tends to get all over the place because it’s lighter. But use whatever you have: baking soda, flour, cornstarch, confectioner’s sugar, or any other powder.
After I got the forest set up, it was time to add the subject, props, and other objects that supported the concept.
Concept and composition
When coming up with ideas for LEGO photos that are more than minifig portraits, I ask myself who is doing what, where, and why. The answers help me form a concept which then informs what I need for the shot.
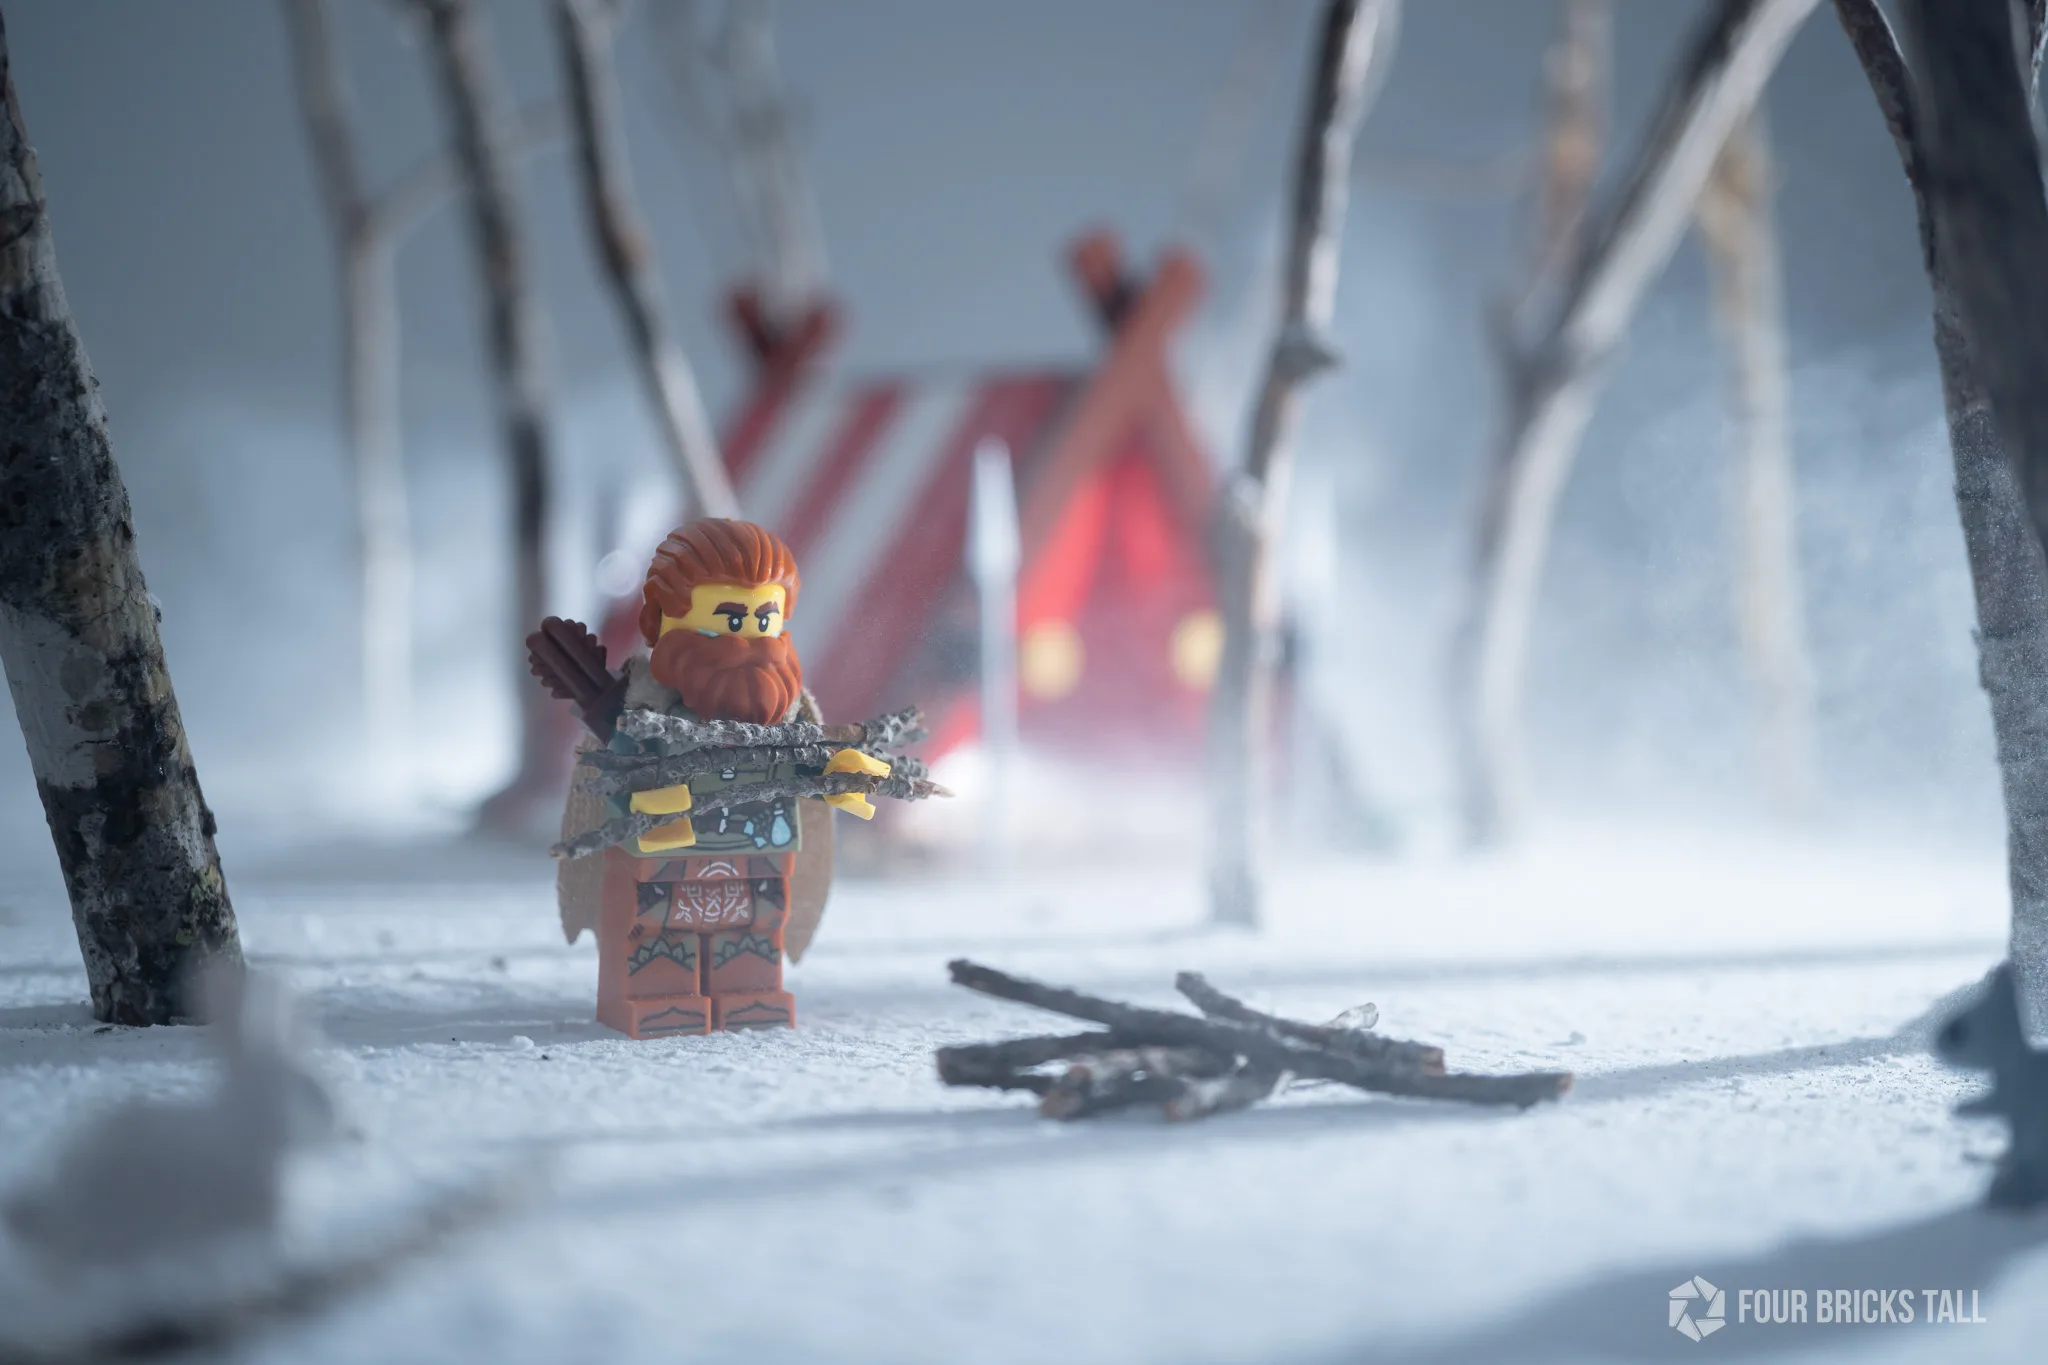
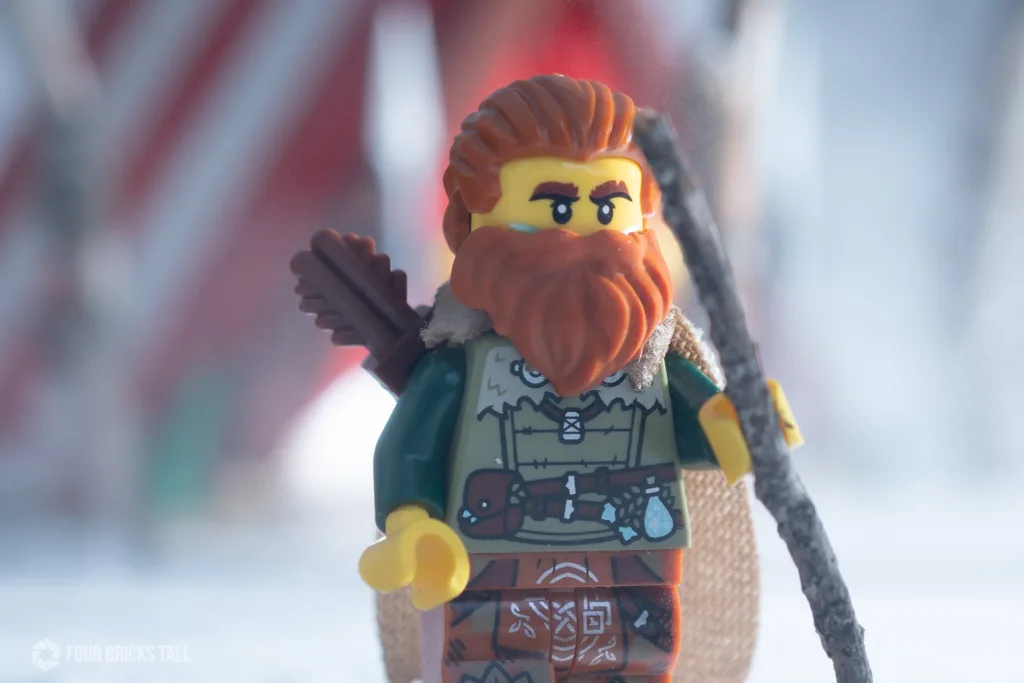
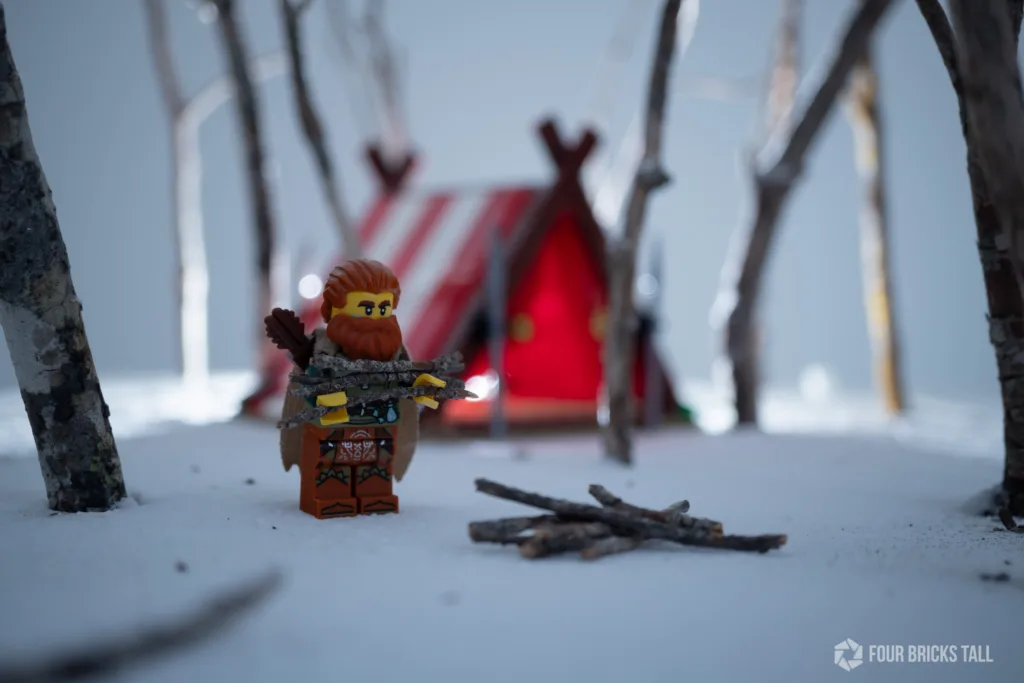
The concept of this LEGO photo was a Viking setting up a campfire outside of his tent in the middle of a barren and snowy forest to provide light and heat.
Who? A Viking. Doing what? Setting up a campfire. Where? A barren and snowy forest. Why? For light and heat.
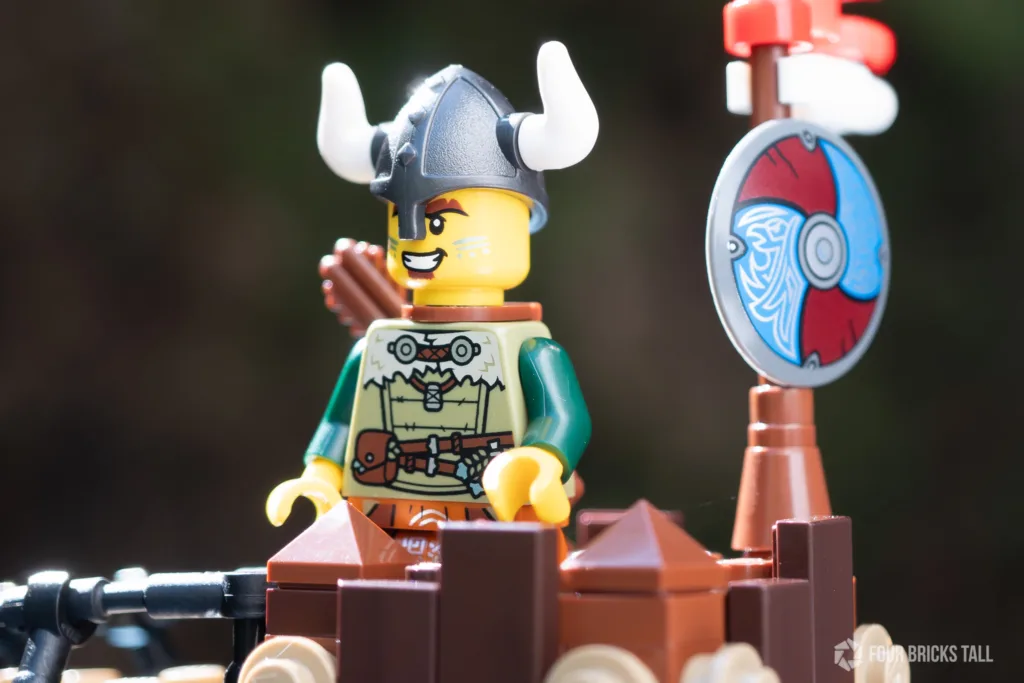
I had the forest ready, so I needed the “hero” of the shot– the Viking– as well as a campfire and tent.
I picked the archer from the Viking Village 21343 set as the hero and added a different hairpiece, a beard, and a cape to make him look like an experienced adventurer.
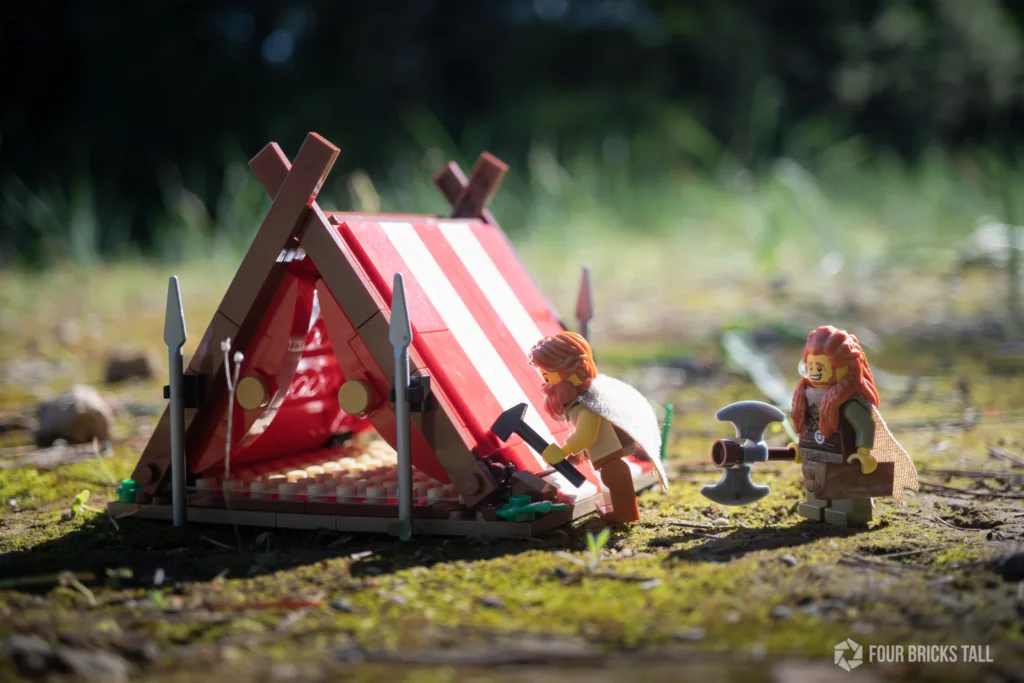
The Viking tent is a MOC I already had previously shot and kept on display since last winter.
Finally, the campfire is composed of the twigs I snapped off the branches. I arranged these in a neat pile, then used a few as props for the Viking, and a longer piece as foreground interest.
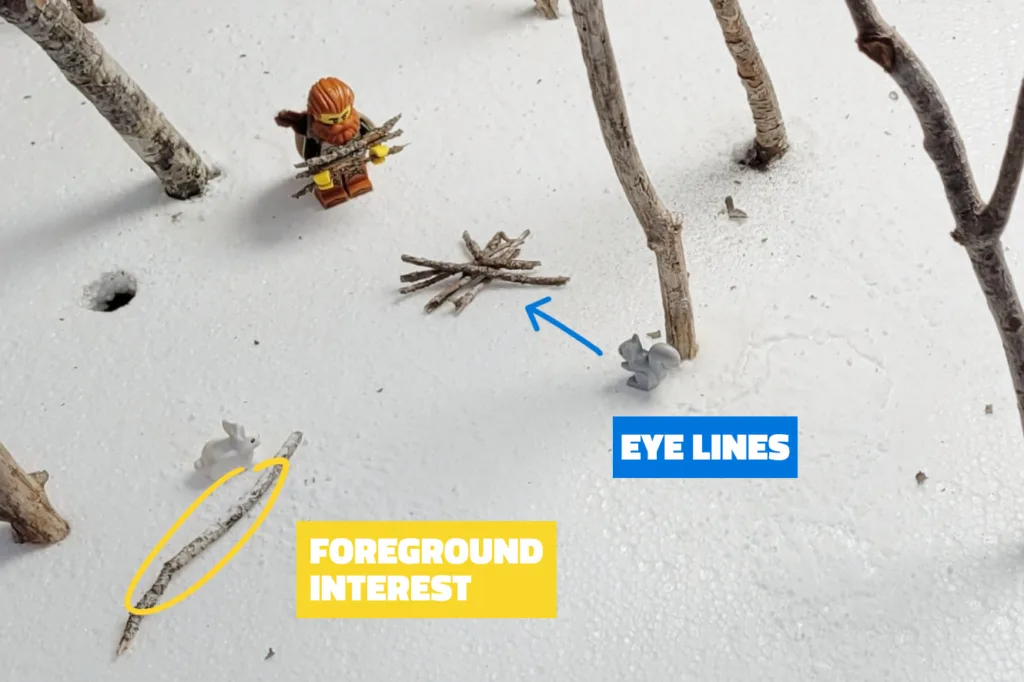
Foreground interest is something you include in the lower part of the scene closest to the camera that helps lead the viewer into the rest of the scene. It’s a very effective composition technique!
I also added some dinner options animals in the scene for more foreground interest and to create more eye lines.
Eye lines are a kind of leading line, another composition technique, that guides a viewer’s gaze. It’s hard to not look at where a subject’s eyes are pointing so this is a great tool for storytelling.
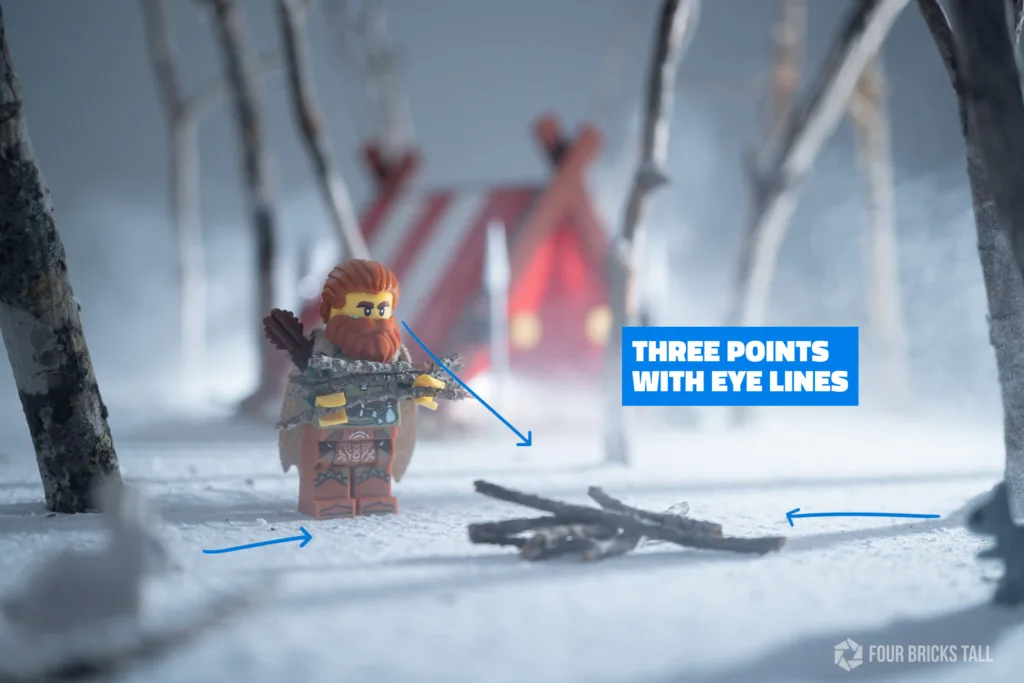
Graphics are another composition technique I intentionally used in the photo: I reinforced the triangle shape of the tent with the placement of the eye lines.
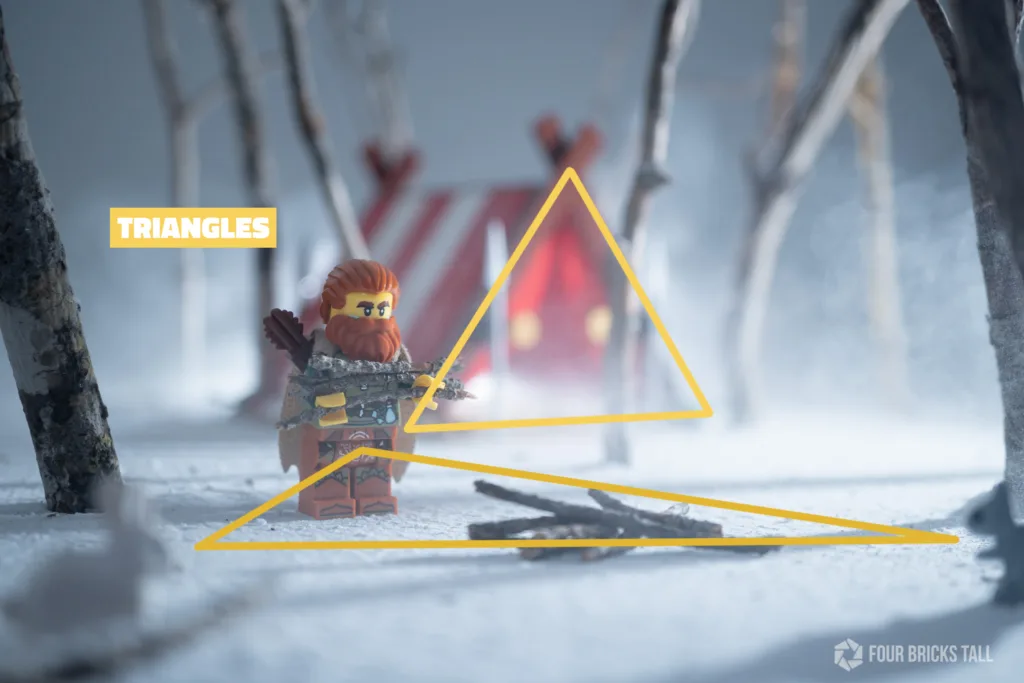
One more composition technique I used was color contrast: cool vs warm. Winter is a “cool temperature” meaning it looks more blue. You can see the cool areas in the photo have a bluish color. I contrasted that with the reds, oranges, and yellows of the Viking and the tent.

To recap, foreground interest, eye lines, graphics, and color contrast were the main composition techniques I used in this photo. Another one is the rule of thirds: I have the subject off-center and along the imagined first vertical line.
There are a couple of things that I might have done differently to improve this composition: I’d remove that branch behind the Viking because I generally don’t like trees growing out of heads. And I’d rotate that leftmost branch 90 degrees so it framed the photo better.
Atmospheric effects and lighting
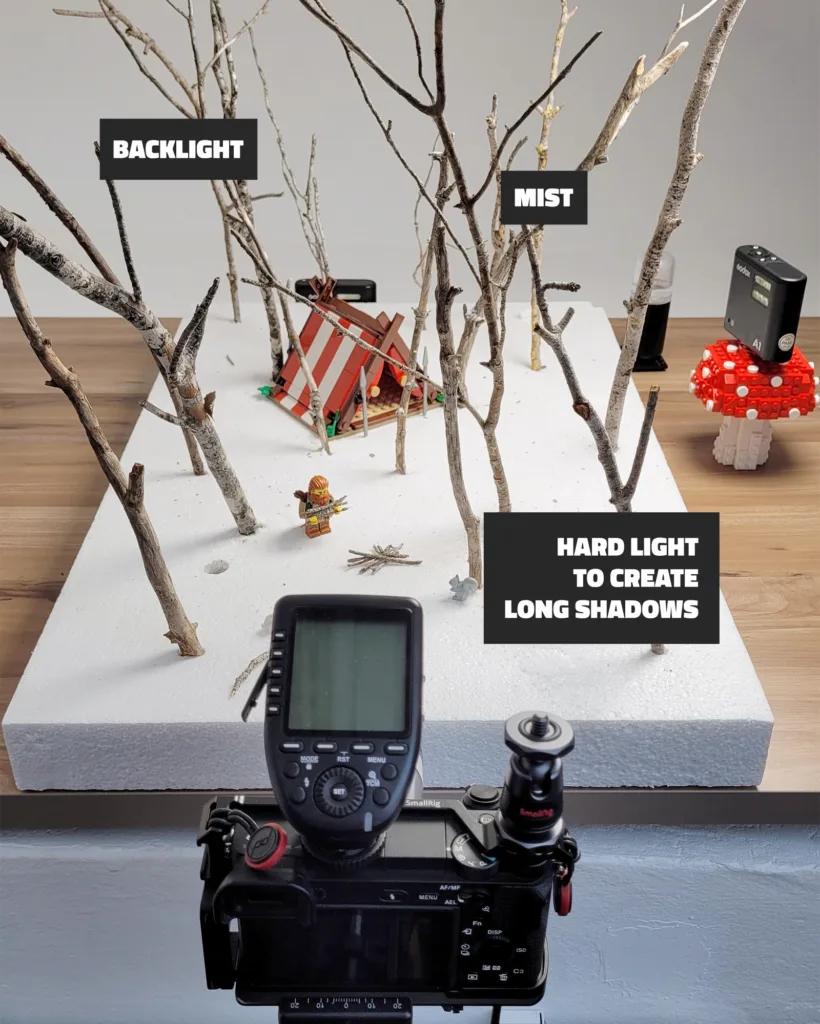
To create the foggy atmosphere, I used my trusty nano facial mister and some small bare flashes.
The mister was positioned so that the nozzle faced the side of the tent, sending mist in that direction. One flash was placed behind the tent, out of view, to give the tent some separation and to illuminate particles from the mister.
When a light source hits minuscule particles in the air from behind or the side, they become more visible. It’s possible to do this with continuous light too, not just flash: it’s more about the placement of the light– behind– as well as having a darker background.
I prefer to use flash over LEDs though because it’s a lot easier to control the light and manage the mist. It’s simple to get a dark background with a flash, for one thing, but I also don’t need to have the mister running, causing condensation to build up on bricks or minifigs. I only need mist when the flash goes off, and that’s an extremely short duration of time. One quick burst of mist during the flash of light.
When using continuous light sources like LEDs which aren’t as powerful as flashes, you typically have to dial in a longer shutter speed setting to get a brighter exposure. That’s why the mister needs to run for a longer time too, and that’s when condensation becomes a problem. One solution is to move the mister further back from the scene or get a mister that’s less powerful (or low batt).
The other flash was placed to the side to create long shadows from the “trees” and light the subject.
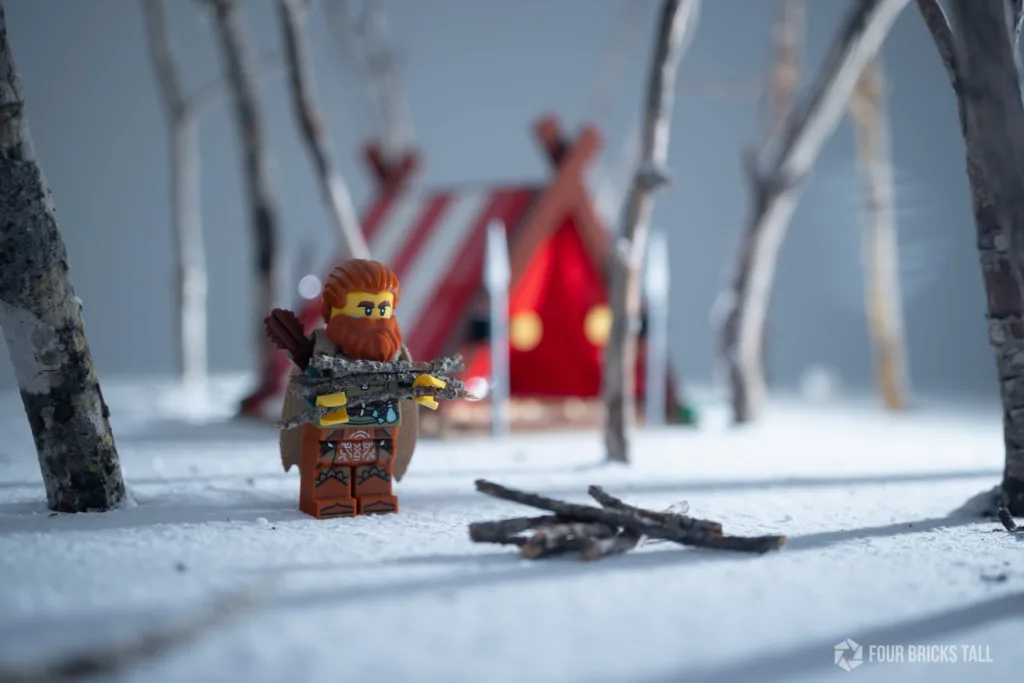
Even though I used hard light sources, the light on the Viking was softer because of the diffusion from the mist.
And that’s how I got the shot.