
Composition, the visual arrangement of elements, is the bones of your photo. See how I started with a simple composition and changed it so that it served the story better.
Composition
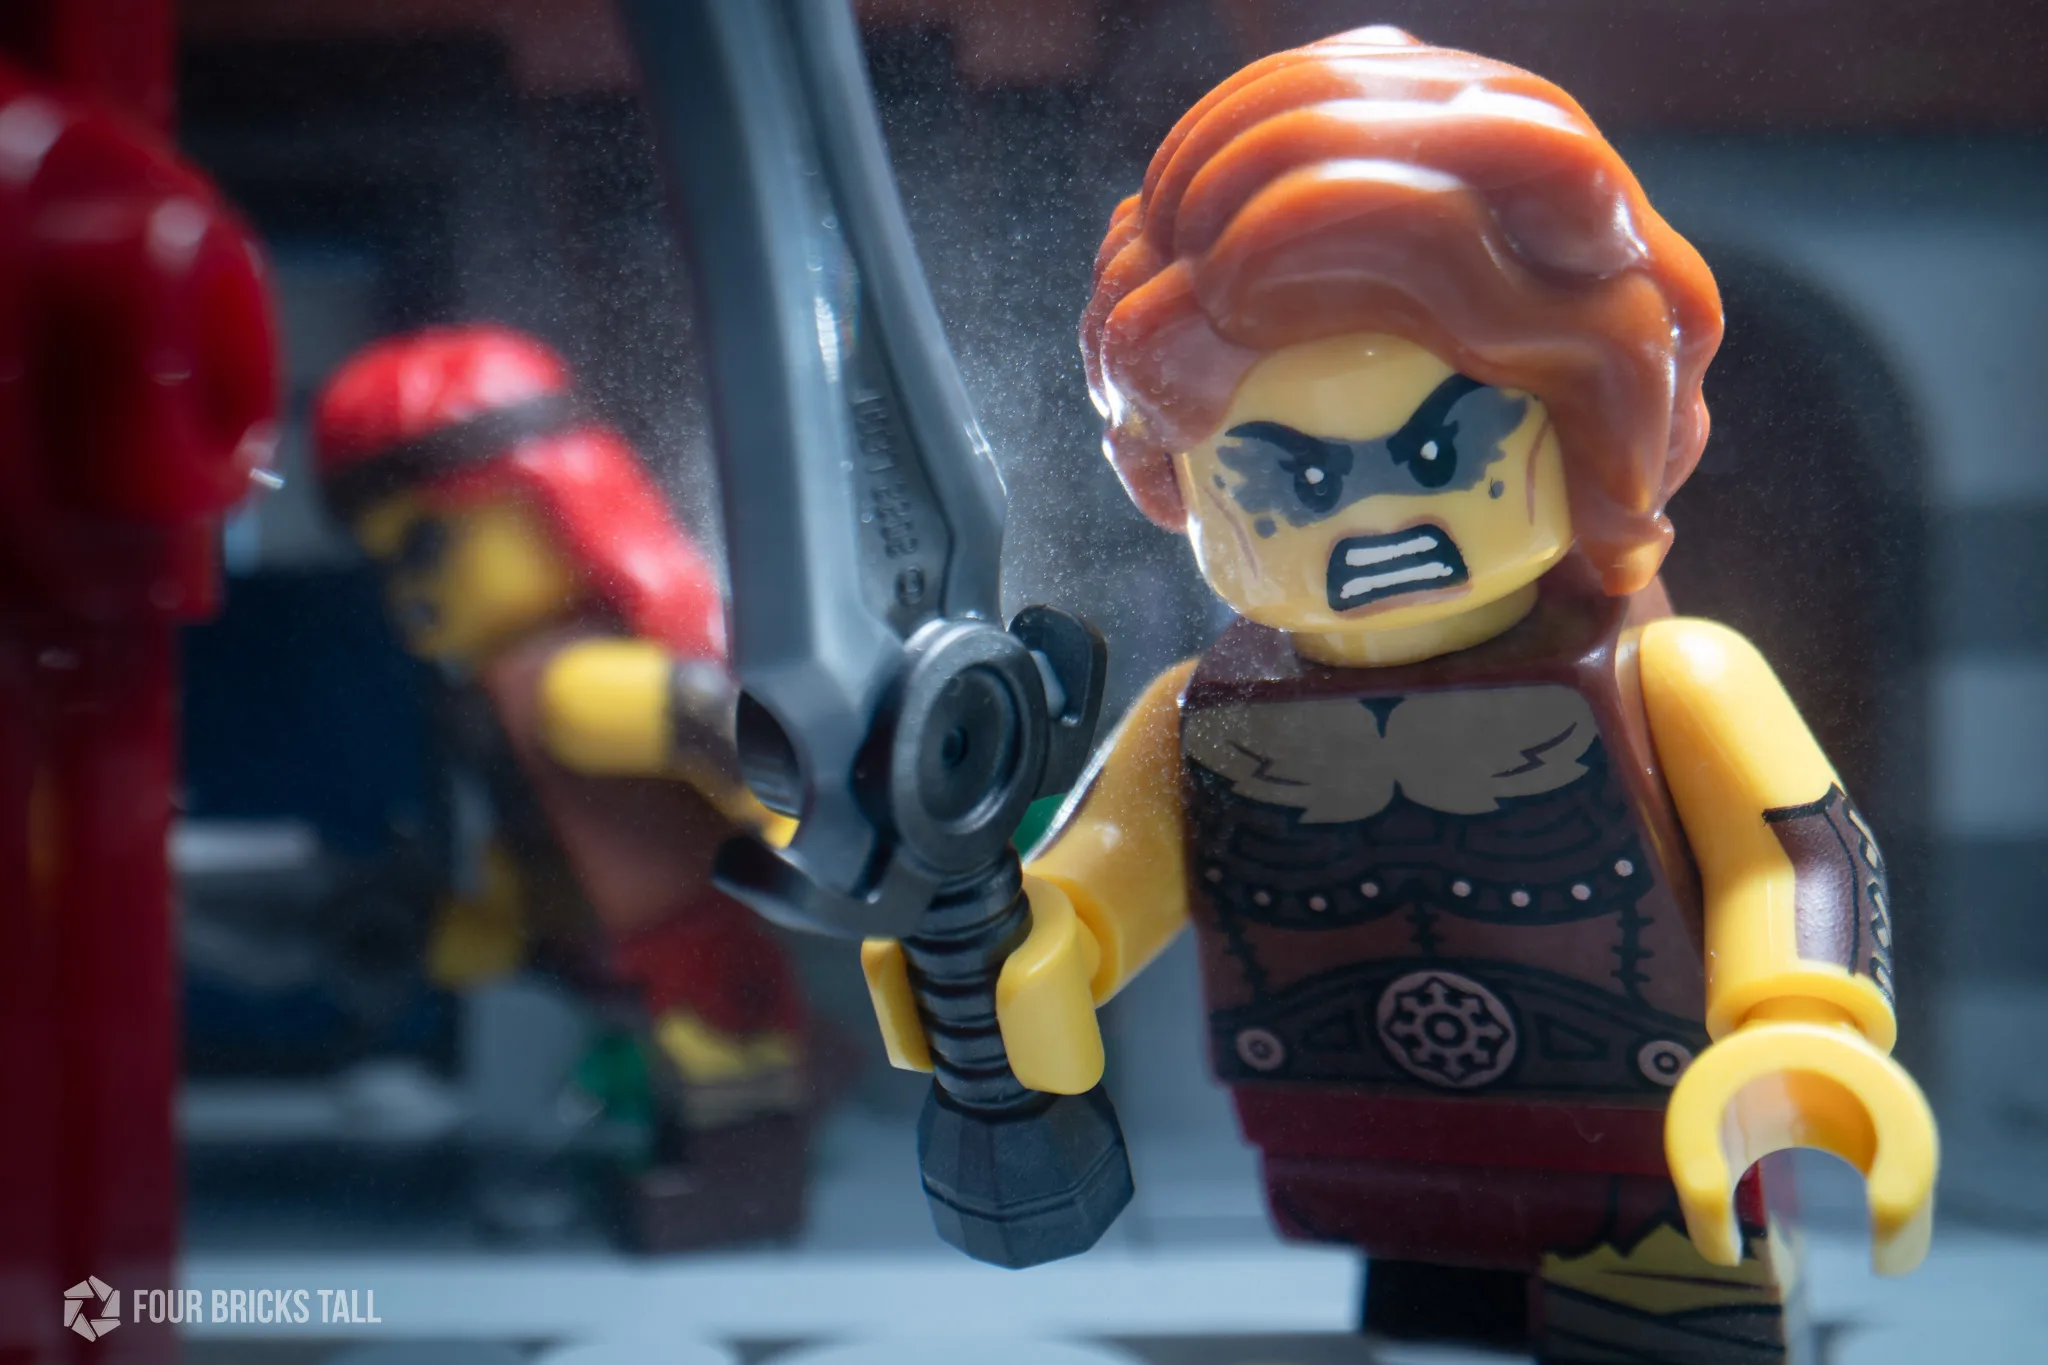
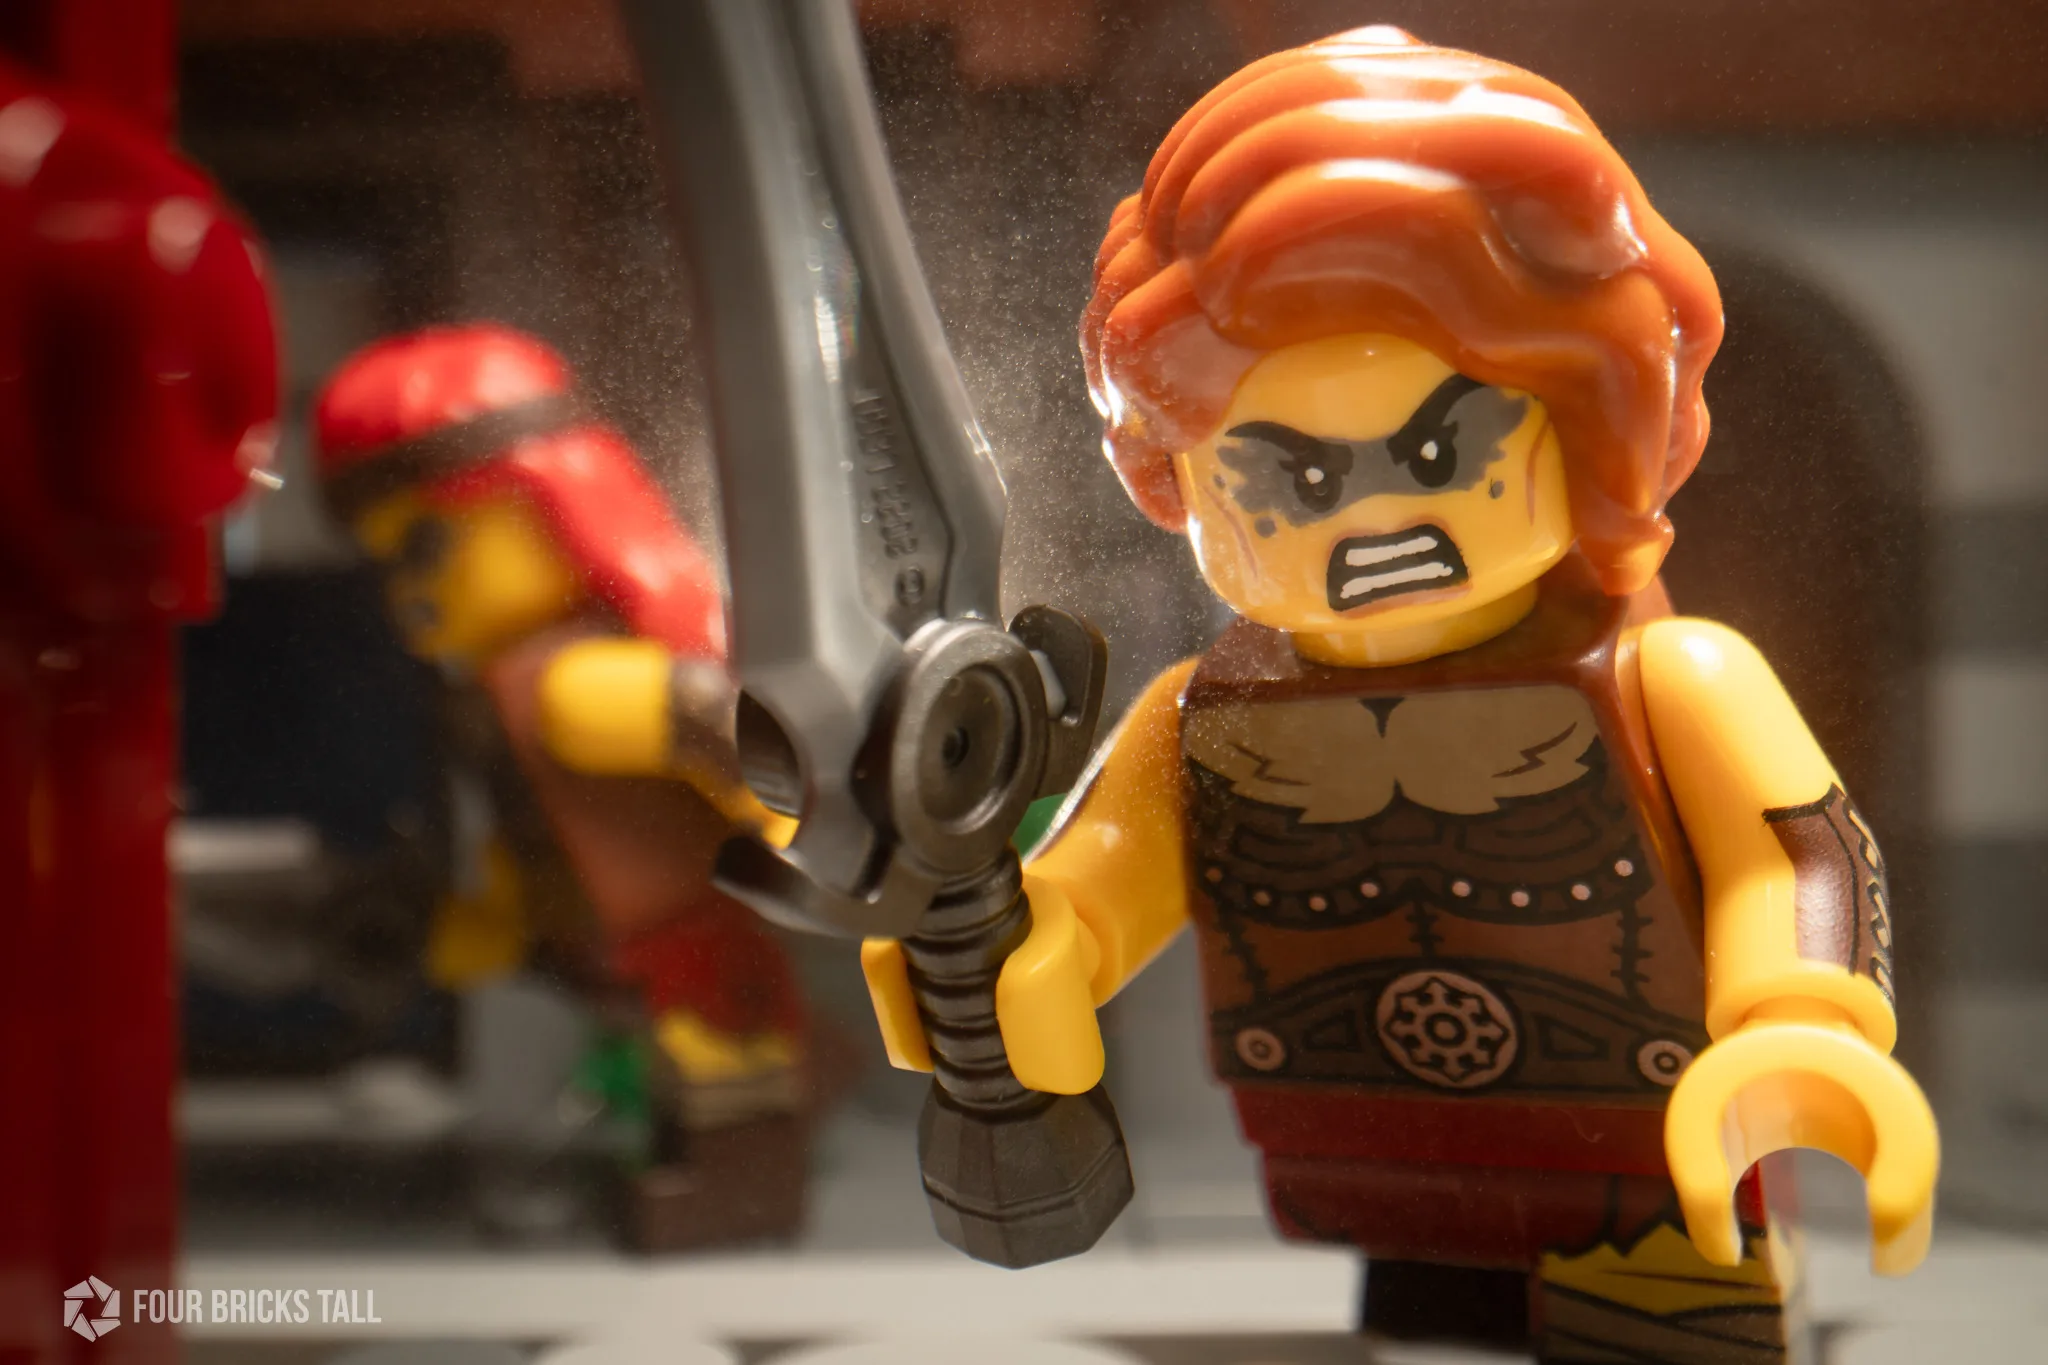
The concept or “story” of this photo was about a fierce barbarian charging through a door from the perspective of inside a medieval house.
I started the session with a very simple composition: center and fill the frame with a close-up of one minifig. To give the barbarian an even more menacing demeanor than her expression and pose already convey, I positioned the lens slightly lower than her eye level and tilted it up a bit.
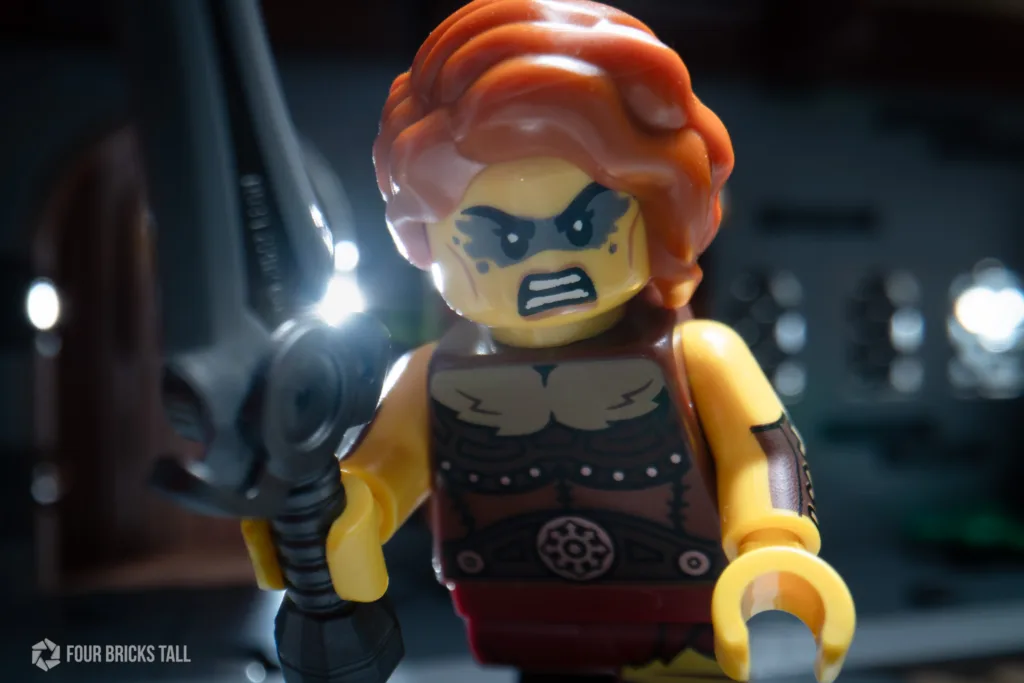
The photo was ok, but it didn’t give me the feeling that this was a raid on a house. I couldn’t even tell it was a house she was trying to enter.
So I pulled the camera back a few centimeters until the red door of the house came into view. I also slid the background left and right to find a section that would give the viewer a better idea of where this was all happening: a medieval town.
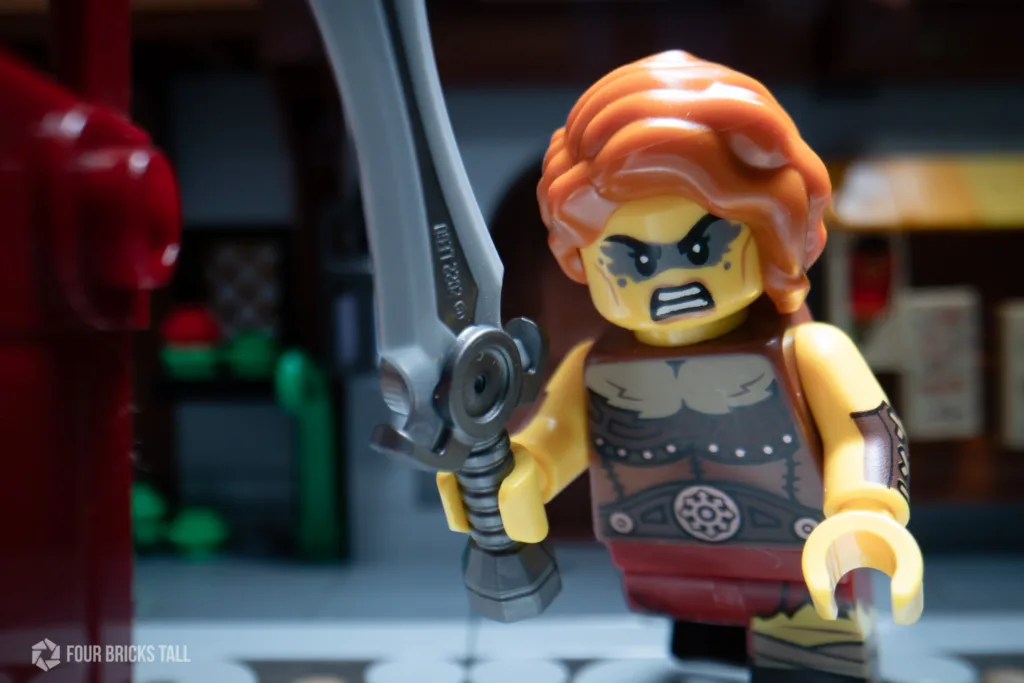
This composition worked a lot better than the first one. But then I thought I should up the action and story by adding another character to the scene. It’s not much of a raid if there’s only one raider.

I slid the background again so that there was a window behind the sword that I could then throw light through with a bare flash for dramatic backlighting. Then I added the second raiding barbarian in some of the empty space and sprayed a little mist.
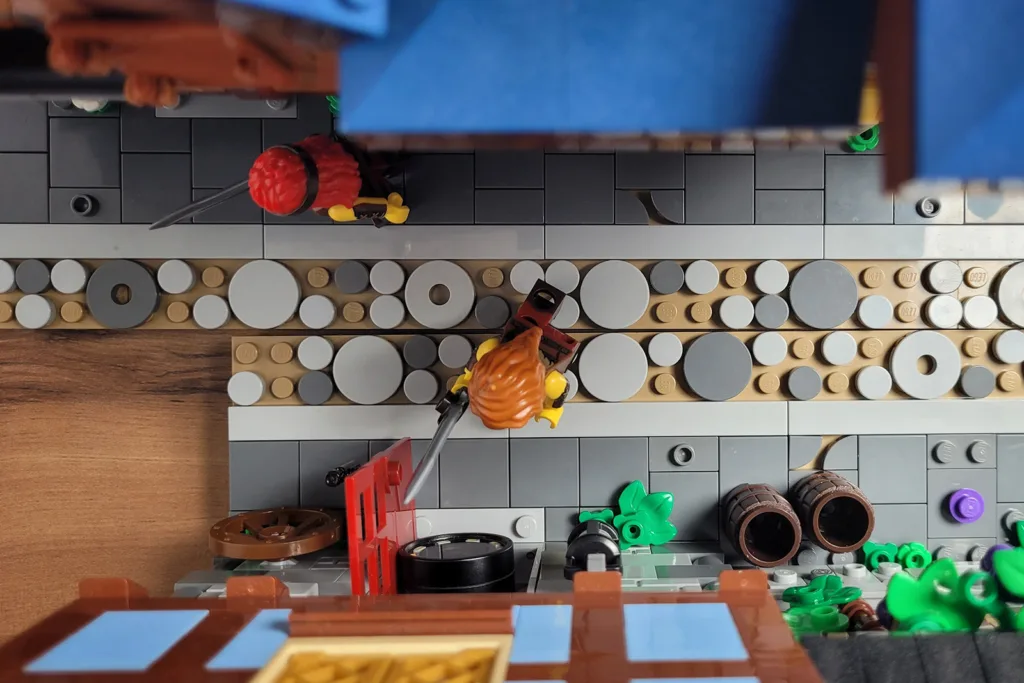
That’s how I ended up with the final composition. Lighting and atmospheric effects add drama, but it’s the composition that sells the whole concept in the first place.
Lighting
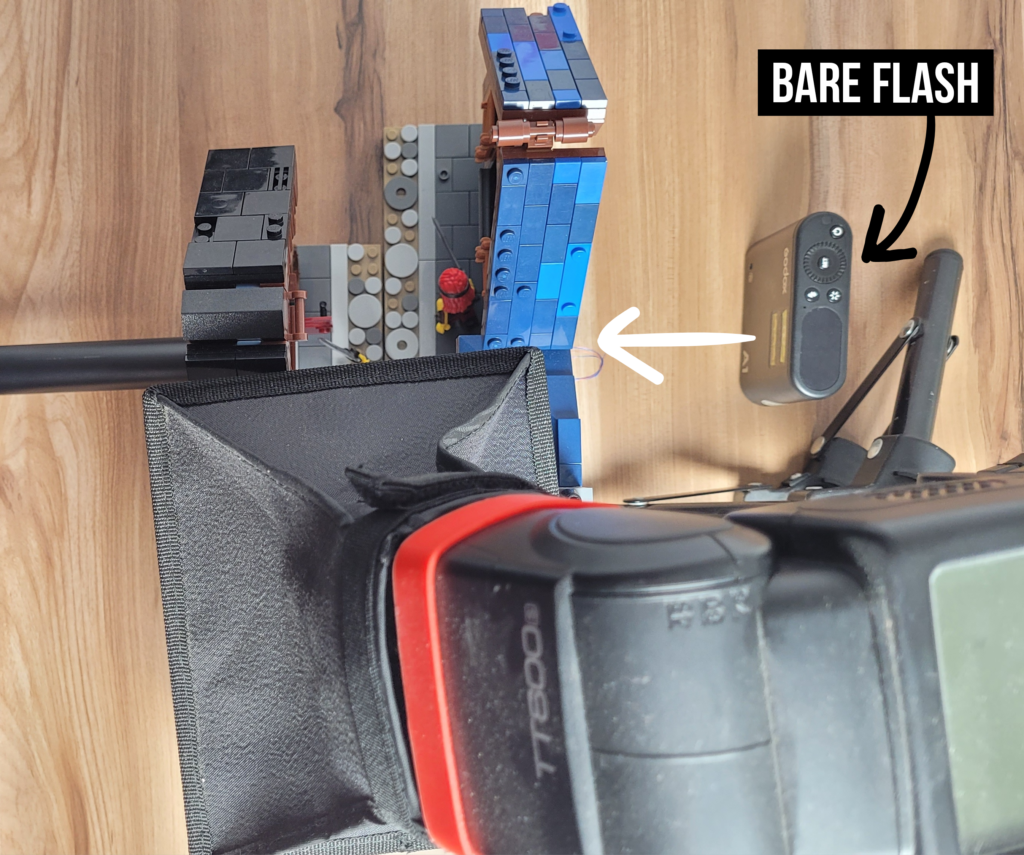
For the main light, I had one standard flash with a small softbox overhead to give general illumination to the scene. I placed a bare flash camera right at low power to lift shadows, and another bare flash behind Galen’s Row to backlight the sword through a window.

Editing
I changed the color temperature of the photos in Lightroom to make them a cooler blue. I also increased the exposure on the main subject by about half a stop using a mask since I didn’t get enough light on her with the key light.
Lastly, I added a slight vignette because I like the edges just a bit darker.
And that’s how I got the shot.
Thanks for the break down! I enjoy these so much, they really make me wish I wasn’t in the middle of a project so I could just go and take some photos of my minifigs. xD
I’ll do more breakdowns in the future. Perhaps with some graphic overlays as well. Thanks for reading!