
Toy photography has always been dominated by portraits of figures, and for good reason: it’s fun to bring familiar characters to life through posing and lighting.
LEGO photography, too, is saturated with portrait-type photos of the iconic four-brick-tall minfigure, however, that’s starting to change as more LEGO photographers begin to harness the strength of the toy’s central premise: building.
What sets LEGO toys apart from other toys is that you can world-build within its system. Official LEGO sets and MOCs (“My Own Creations” or custom models) of all sizes can be used to create mini worlds for minifigs or as subjects themselves.
In this article, we’ll take a look at the different types of LEGO photography from bokeh minifig portraits to shots of MOCs outdoors. No matter your camera gear, technical skill, or shooting style, there’s a LEGO photography type for everyone.
LEGO minifigure photography
From snapshots of traveling minifigs taken with a phone to “bokeh-licious” portraits shot with macro lenses, minifig photography is probably the most well-known type of LEGO photography. The adorable tiny toys can be compelling subjects, especially since a lot of them are wacky out-of-the-box and you can easily swap parts to create new characters.

This type of LEGO photography is also the most accessible: minifigures are easy to find, cheap, and pocketable and most phone cameras can get in close and deliver great image quality. These two things are all you need to get started with LEGO minifigure photography.
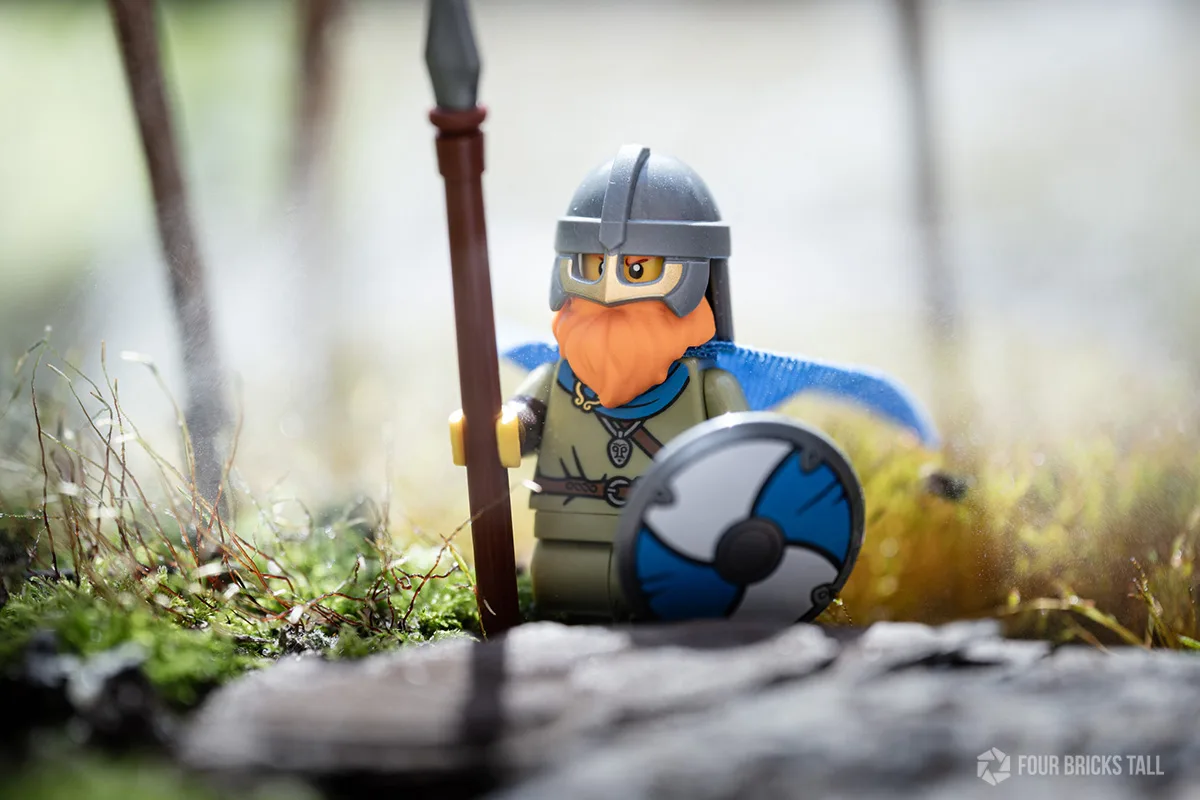
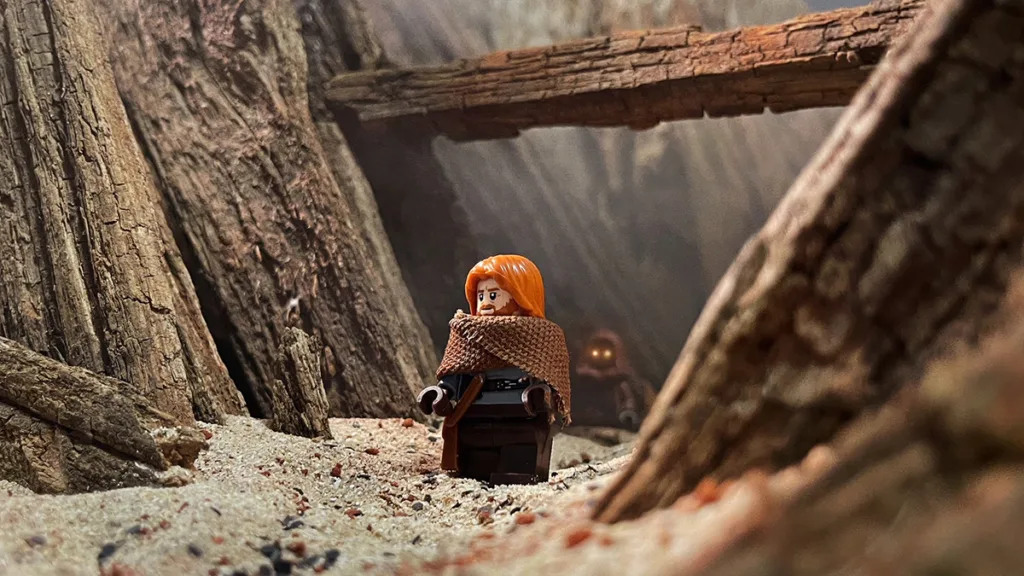
Mini natural worlds
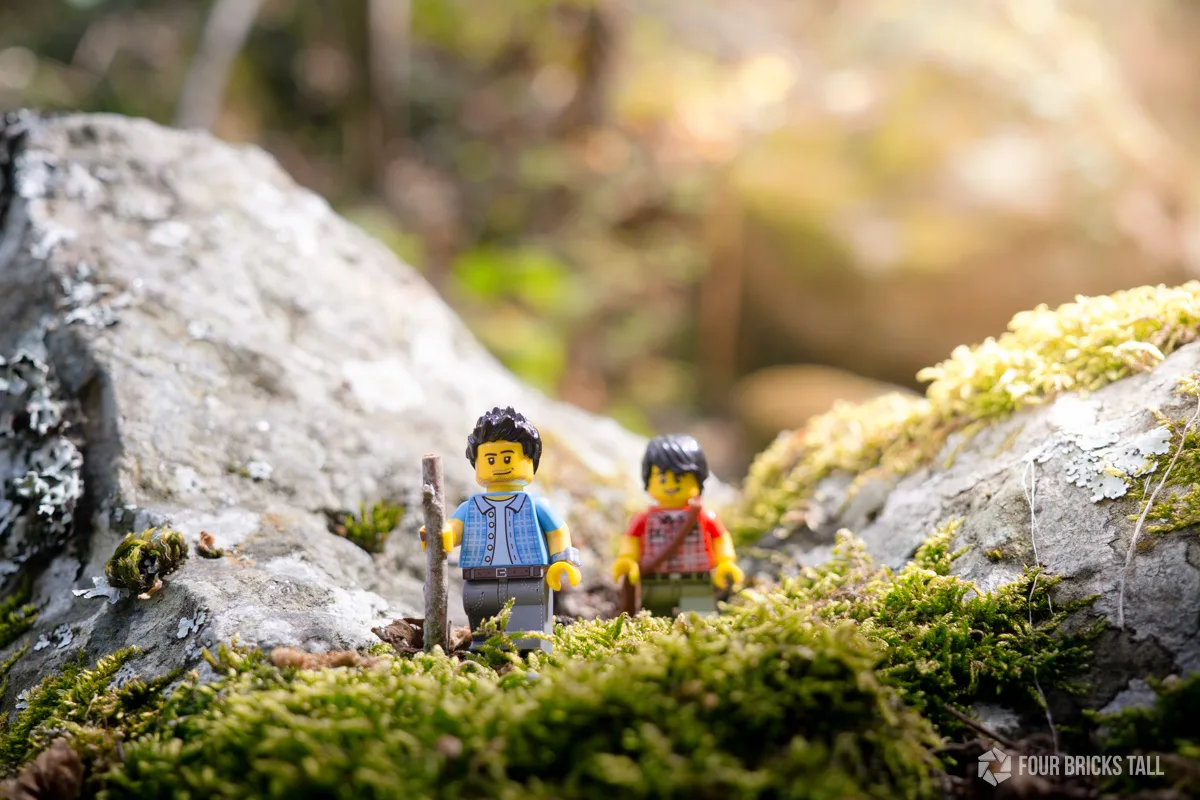
The most common way to photograph LEGO minifigs is outdoors during the day to take advantage of natural light and locations. Rocks and moss scale especially well to minifigs and create a mini world for them.
Traveling minifig photography
Still outdoors and during the day but not necessarily in natural environments, travel is a popular theme where custom minifigs are typically used as stand-ins for the photographer.
If you’re near a LEGO store, there’s usually a Build A Mini tower inside where you can mix and match parts to create a custom minifigure. Unfortunately, you need to buy 3 minifigs for about $9.99 and the selection is limited. BrickLink and Pick a Brick are your best friends for getting what you need to make a better LEGO version of yourself– a “sigfig”– but they can be overwhelming for the uninitiated.
Most of the time, you’ll end up with an out-of-focus skyline or monument if you have the minifig close to your lens, but it’s still a fun and easy way to document your travels and tie everything together thematically.
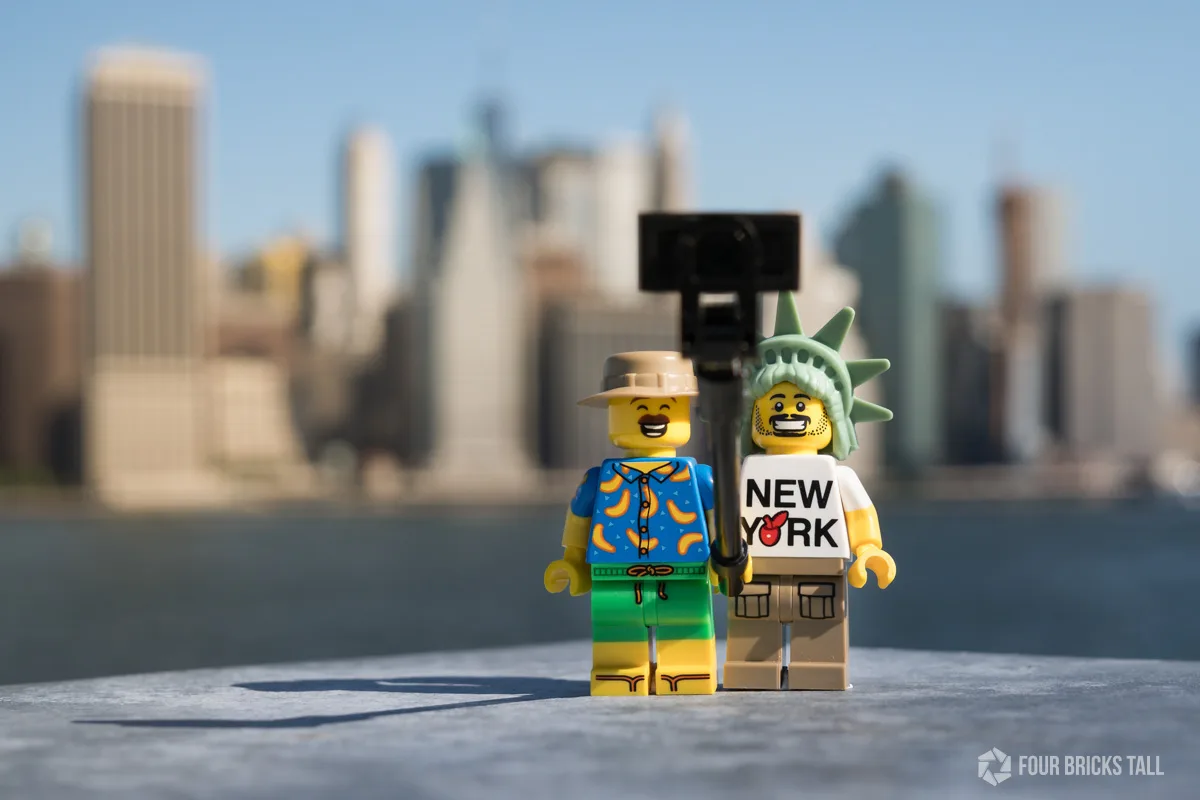
Phone cameras are great for traveling minifig photography because they can capture more of the view easily and minifigs are so tiny and light that they won’t weigh your bag down. Shooting is pretty spontaneous so this type of LEGO photography won’t slow you down either while you go sightseeing.
Dedicated cameras with a walkaround lens like a standard zoom lens or a 30mm prime also work great.
Natural bokeh portraits
Other minifig photographers like the simplicity of a single minifigure isolated against an out-of-focus natural background instead of including details of the environment. These dreamy and whimsical photos are often taken with a macro lens or even a standard lens with close-up filters or extension tubes attached to increase magnification.

This is a slower type of photography than traveling minifig photography but can be just as spontaneous or serendipitous. That’s part of its charm.
Taking bokeh portraits outdoors is slower because you have to frame and focus more carefully. However, finding a location can be easier because it’s mostly about looking for specular highlights in leaves, water, or other glistening things rather than adding context.

Any camera with a decent standard lens that can open to at least f/2.8 can work for this type of LEGO minifig photography. However, bokeh is a function of the lens design, particularly its iris size and the number and shape of the iris blades, so just because a lens can open to a wide aperture doesn’t mean it will render bokeh well. But “well” is subjective.
For phone photographers, a strong out-of-focus effect is harder to get due to the slim design and tiny components, but there are a few ways to get a more shallow depth of field with a phone camera. Creating bokeh balls isn’t impossible but they would be tiny.
Natural bokeh portraits are great if you like creating a dreamy aesthetic in-camera with a simple subject and scouting for specular highlights outdoors. Slowing down, focusing on the task at hand, and exploring nature are part of the workflow of a natural bokeh portrait photographer.
Both travel snapshots and natural bokeh portraits are fun and easy ways to get into LEGO photography. You don’t need to build anything or carry more gear than your phone or mirrorless/DSLR camera and a minifig to create some great photos.
Everyday objects
Another easy type of LEGO minifigure photography involves creating Toy Story-like concepts where minifigs exist in a human-scale world. Your house or apartment becomes the environment.


Quotidian things like rolls of newspaper and food containers can be diverted into something else like a cozy cubby or a swimming pool. It’s especially effective to use a few LEGO accessories and small brick-built models to combine the human and LEGO worlds better.

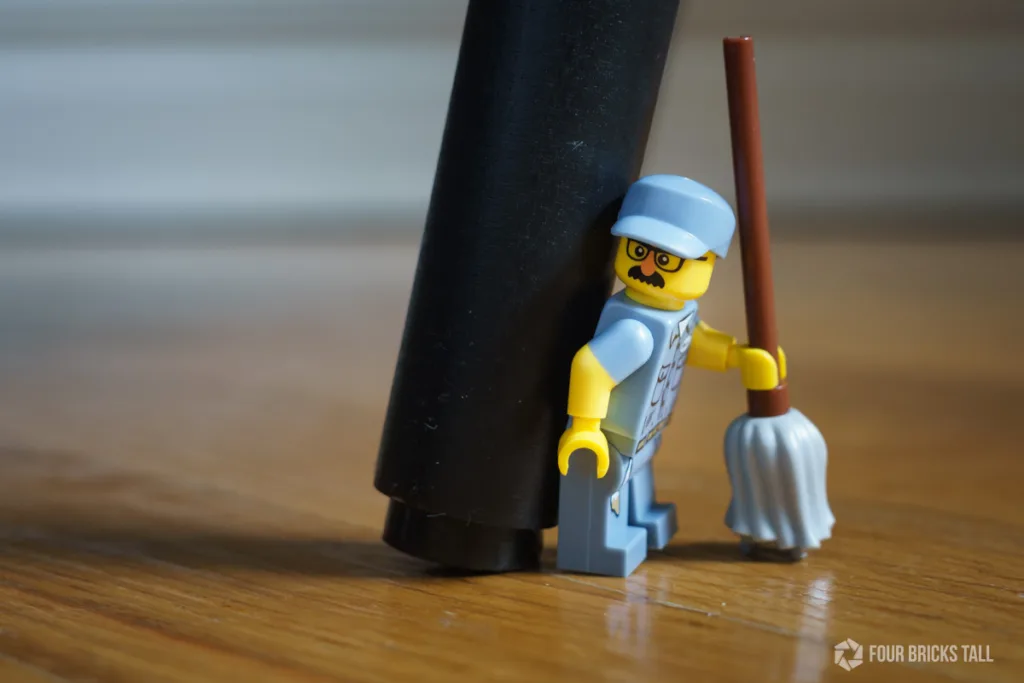
I would be remiss if I didn’t drop in the “object-as-hat” cliche here as well. Here’s a photo I took for the LEGO CON video about getting started with minifigure photography:
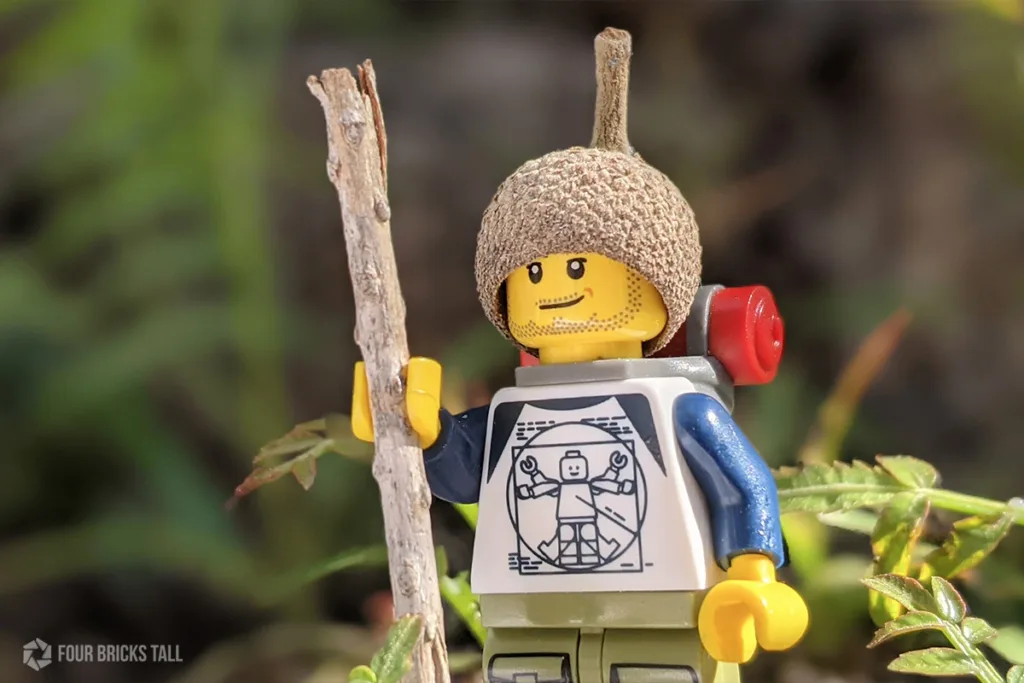
This kind of photography opens your eyes to seeing objects as what they might be rather than what they are. It’s playful, creative, and doesn’t require a lot of bricks. Anyone can do it with any kind of camera– the acorn hat was a demo with my phone.
It’s the LEGO version of miniature train model photography like that of Tanaka Tatsuya or Derrick Lin.
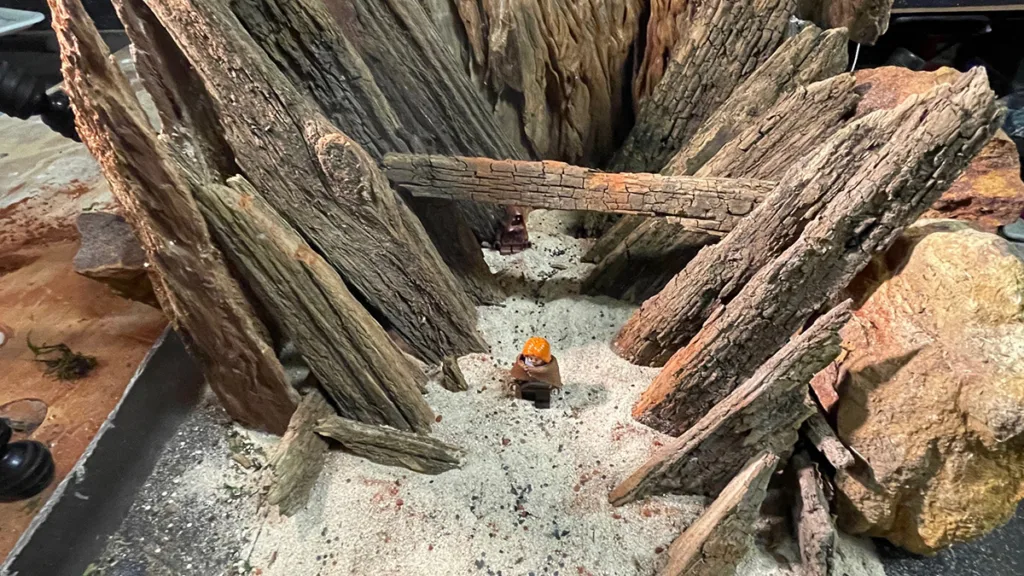
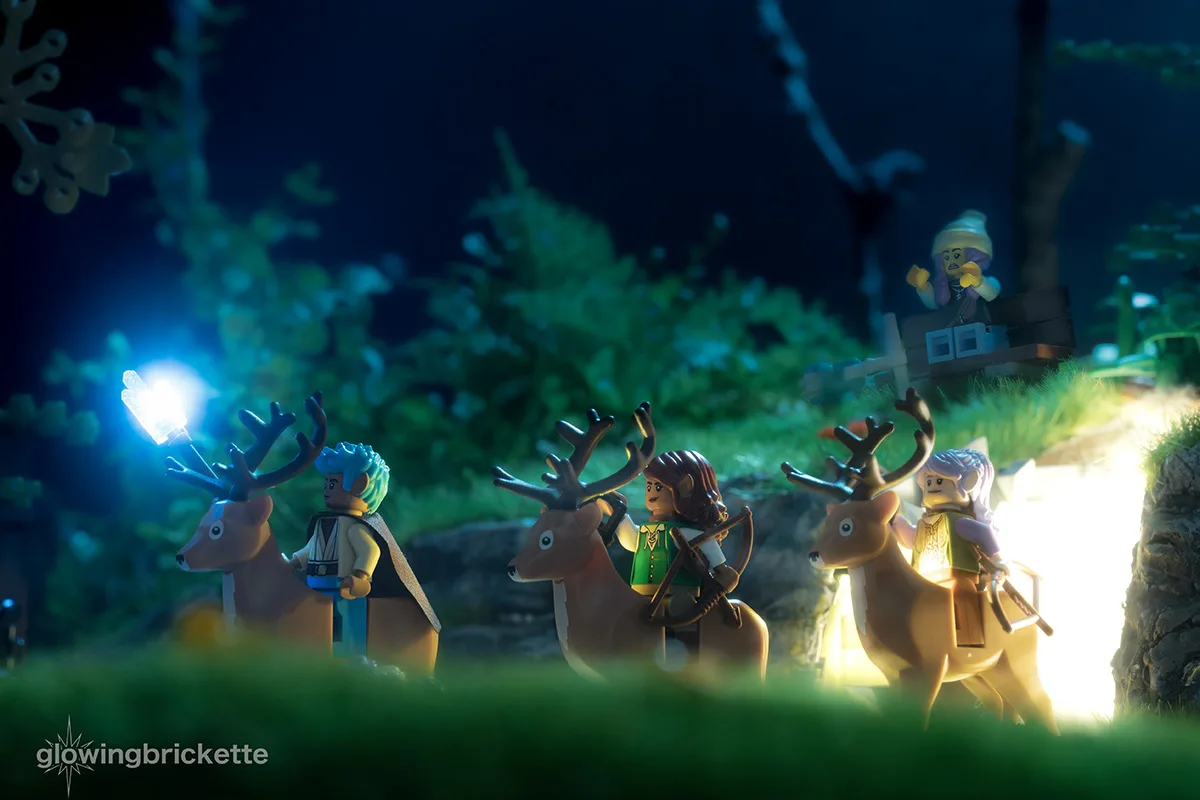
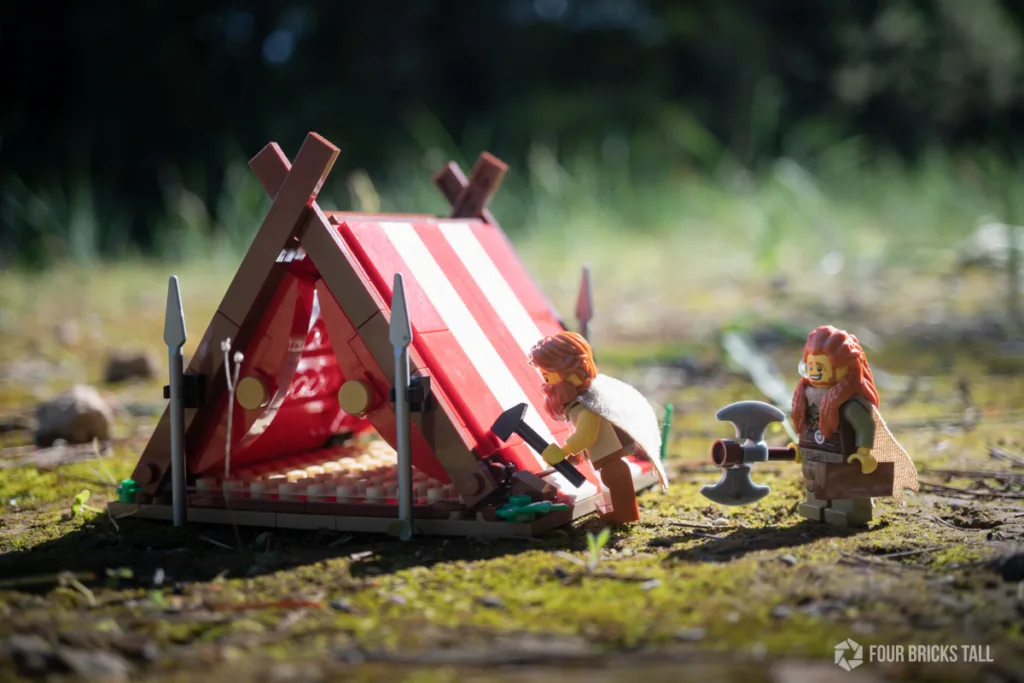
Crafted dioramas
Making a diorama may sound resource-intensive but pick up some twigs, rocks, and patches of moss and you can create a natural scene for your minifigs.
I carefully scraped off the moss that was growing on my brick patio, added some bark and other bits I found, and arranged them into a plastic tray. Then I just picked up the tray and put it where the light landed. When the light moved, I just moved with it. Perfect little portable and reusable environment.
You can do this indoors too for a studio setup. Old, rotten fence palings were salvaged and arranged in a tray to make this fantastic diorama full of texture.

Tip for phone photographers: Arranging materials to create boundaries around the frame is a great composition technique to contain a wide-angle lens like on a phone camera. Rather than build massive dioramas, just wall it in.
If you have a hard time keeping moss alive for a long time or can’t find suitable material around you to use, a good option is to make dioramas with train model materials. You can buy a variety of ready-to-use mats of landscape, trees, and even water effects in shops like Woodland Scenics that cater to train model hobbyists.
If you pop into your local pet shop and head to the aquarium and terrarium section, you can find some driftwood and fake plants to use in your diorama that will last a long time.

Whether it’s real or fake, simple or complicated, making a diorama is its own brand of fun and adds a lot of production value to your LEGO photography.
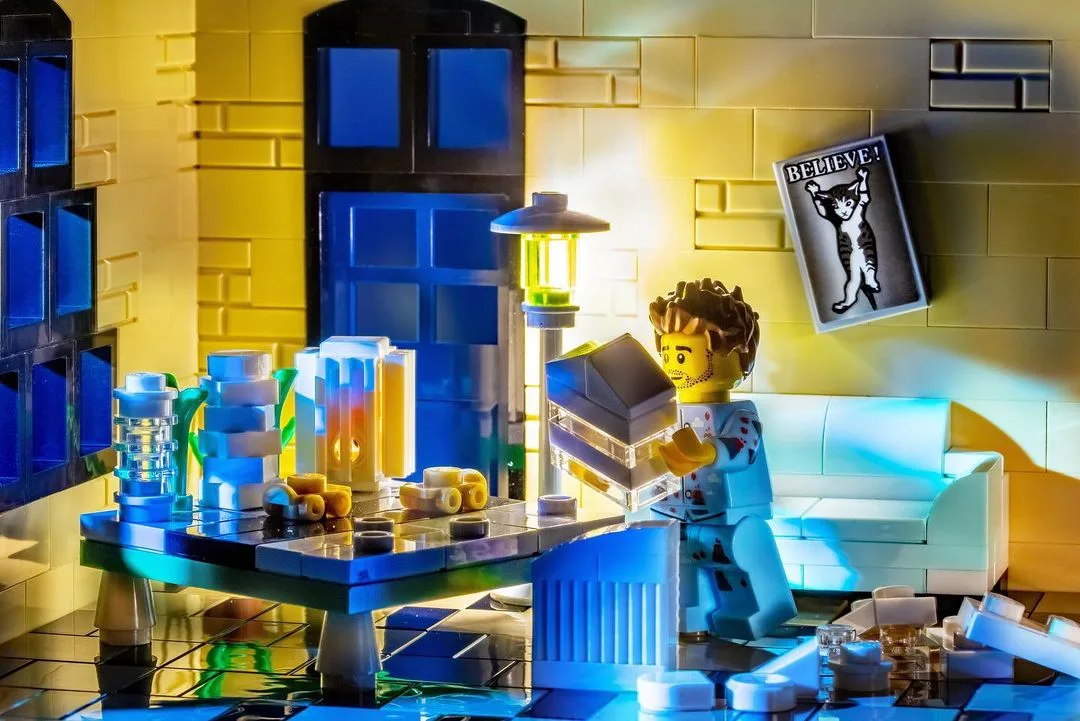
Digital backgrounds
A lot easier to do than creating a diorama is displaying a photo on a monitor or screen and using that as a background. This is a good alternative if the scene you want to create might be too difficult to craft or build, such as fairgrounds or a futuristic city at night.


You can even blur the photo shown on the screen instead of using aperture controls on your camera to create the effect of a shallow depth of field– useful for phone photographers.
I try to introduce small LEGO builds and practical lighting so there’s some additional production value, rather than just doing a simple portrait against a digital background.
LEGO building exteriors
A logical next step for many LEGO minifigure photographers is to use official LEGO sets as backgrounds. The facades are great, but I also turn the models around to use other walls as a setting and design features for storytelling.


The Medieval Castle 31120 had a loose well in the set that I placed behind the castle and lit up to create a magical scene. On the left side of the Boutique Hotel 10297 tucked behind the art gallery was a plain wall with a dumpster that worked great for the Raccoon Costume CMF.
Using LEGO building exteriors is the fastest route to shooting an entirely brick-built scene. They usually have props in the sets for your minifigs to interact with to help tell a story.
Interiors of official LEGO sets
Taking photos inside official sets is where things start to get really complicated. I wrote a separate article about how to shoot and light LEGO building interiors so check that out if you’re interested in this type of LEGO photography.

The gist of it is that you need more light, most likely artificial, to get into those tight, dark spaces and you might need to disassemble walls depending on your lens. Even when you do manage to get your lens close enough and light inside, LEGO sets are often designed with lots of details that can be distracting for photography.
If you’re shooting for yourself, then you can remove these distractions. But if you’re trying to show the set as is, then you have to work your composition skills much harder.

This photo inside the Jazz Club 10312 set works really well in part because the stage is one color and relatively featureless, so it’s a great background to use with a deeper depth of field. It’s a safe bet that the set was partially disassembled for this camera angle and the lighting.

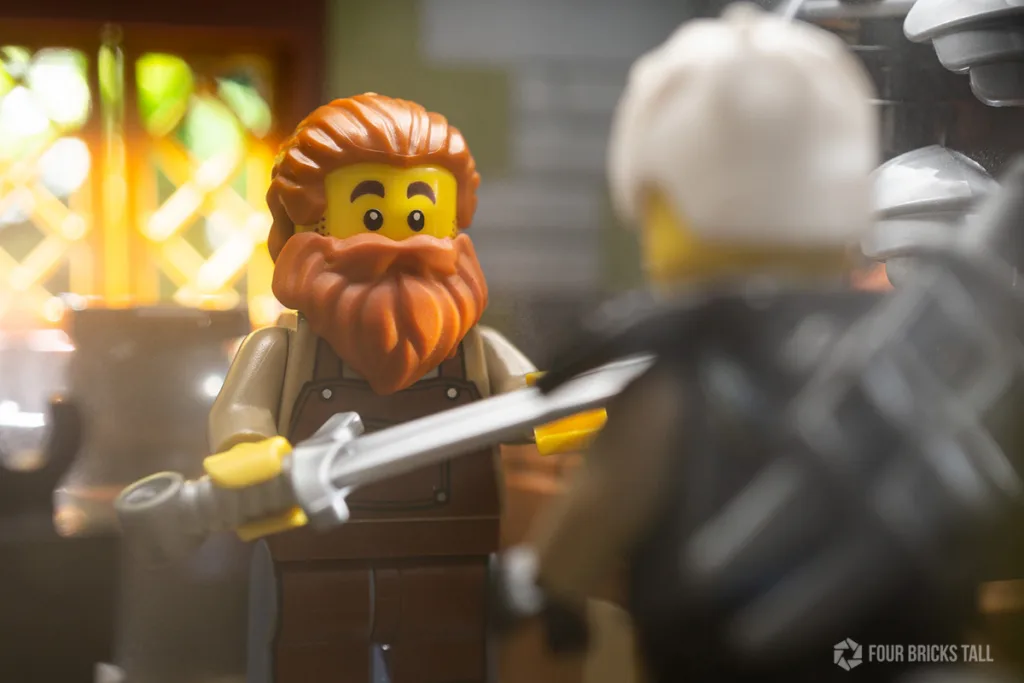
I took these photos through the doors and windows of the Medieval Blacksmith 21325 with my 30mm macro lens flush against the building. That’s also why the framing is quite tight.
The blacksmith is a modular building design like the Jazz Club so I could separate the levels to light from above, but I also lit through all the other windows.
A wider angle lens is better to use for these shots because it can capture more in the frame, but it also has the effect of pushing objects further apart from each other, making a cramped area look more spacious. In the second photo, the blacksmith is only 3 studs away from the warrior, but my 30mm macro lens made it seem like they were farther apart.
A phone camera can work very well too with interior shots since it’s got a wide-angle lens but it’s also small enough to fit inside a window frame.
The challenge with using a phone camera is isolating subjects since it captures everything relatively in focus from front to back. Keeping lines and perspectives straight can also be frustrating with a phone so I’d recommend working with a small tripod.
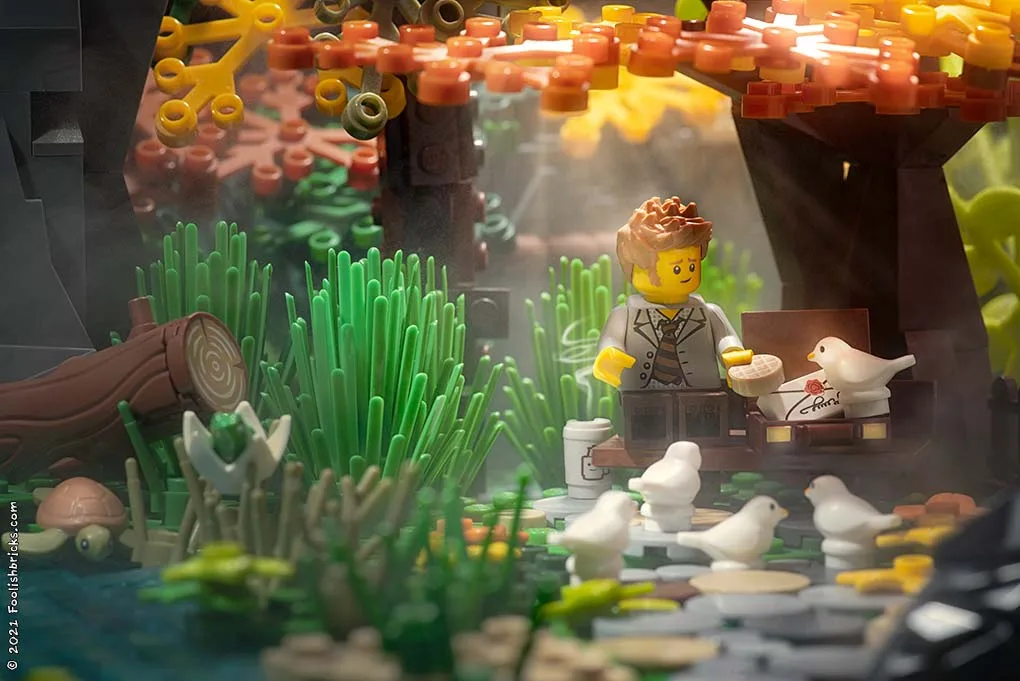
MOC dioramas
If you love the idea of shooting more freely in a completely brick-built world, creating a MOC diorama is an excellent way to go. Not only can you build whatever scene you want, you only need to build what the camera can see. It doesn’t have to be a complete model or even look like you would display it after.
MOC dioramas built for LEGO photography often have just one or two walls. The front is completely open so you can place your camera anywhere and easily reach inside to arrange objects as you see them through the lens. They’re also easier to light.
Experienced LEGO photographers who build MOC dioramas create their brick-built scenes not like an official LEGO set designer, but more like a movie set designer because they think like a director: Who is the character? What is the story? Where will the light go? How do I frame this?
It’s no surprise that brickfilmers, or LEGO stop motion movie makers, build their sets in a similar way.
Some MOC diorama builders will start creating the main structure, and then bring in their cameras before continuing with smaller builds and details. They check the composition as seen through the lens of the camera rather than just their eyes and make the necessary changes.
This kind of photography is also really challenging because you need to wear a lot of hats: builder, set designer, cinematographer, director, and photographer. You’re also the production assistant!
LEGO model photography
The majority of LEGO photography centers on minifigures, but buildings, cars, ships, animals, robots, and other brick-built models can be great subjects too.
Larger models are much easier to focus on and fill the frame with using a regular lens and have interesting shapes and details to capture. But they’re not as convenient to take outside so there’s a lot more planning involved.
Official retail sets
If you follow LEGO’s social media accounts, the kind of photography they like to showcase is mostly of models and build details with some storytelling.

Getting a background for a LEGO model is more challenging than finding one for a minifig because you need a lot more of it. The outdoors provides lots of good opportunities for backgrounds, but that can be easier said than done when you have more to carry.
Transporting the set intact is not nothing, especially when you’re packing other photography gear with you.
I’d advise scouting for locations in advance so you’re not just wandering around lugging a backpack and a box with delicate cargo shifting around inside. There is no greater frustration than arriving at the perfect spot, setting up, and then later finding that some bricks fell off the model and you don’t know where they go.


You also need to think about the time of day and weather conditions. The sun moves faster than you think so you need to be able to set up and shoot quickly. Clouds can cover the spot where you carefully placed your model and the highlights you sought are gone. Wind can knock over the set. Rain usually means you pack it up and go home. There’s a lot to plan for that you can’t really plan for!
Official LEGO models out in nature are impressive and still pretty rare to see, and that may be all the reason you need to try it. It’s not spontaneous shooting nor is it something you can do while enjoying another activity like hiking or cycling: this is a very intentional and focused kind of LEGO photography.
MOCs
LEGO model photography isn’t just limited to “in action” shots of retail sets but includes MOCs too. We’re not talking about the kind of MOC photography that looks like it belongs on LEGO Ideas, but a creative one.
MOCs are custom designs so they’re even rarer than seeing LEGO retail sets out in nature. When you do come across an artistic photo of a MOC, it commands attention.
MOCs don’t need to be large though, small MOCs also make fantastic subjects and are much more portable.
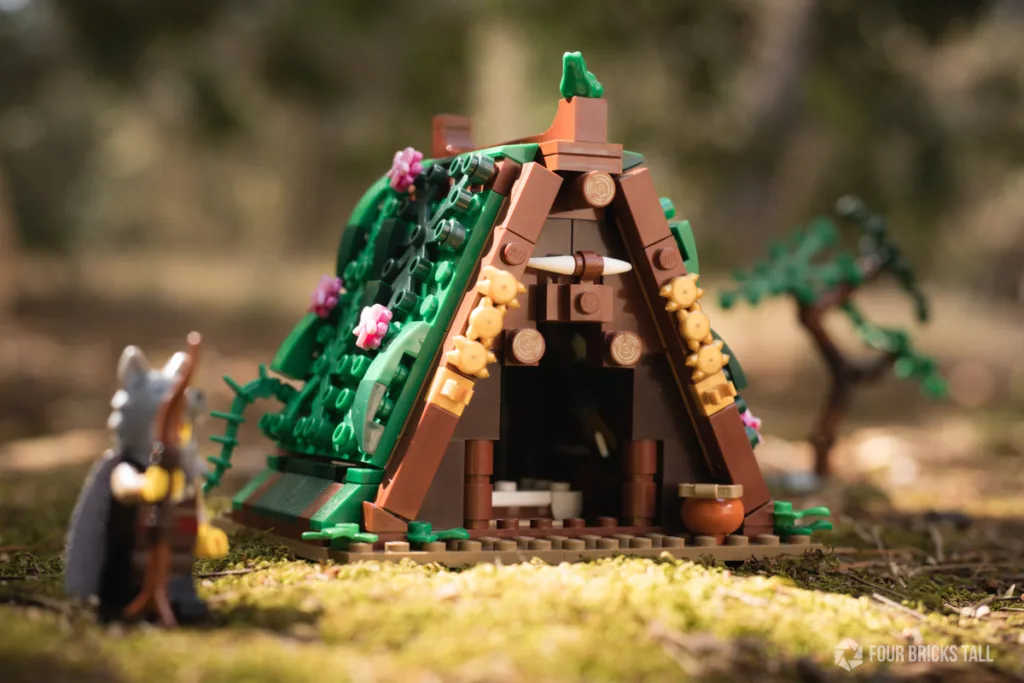
The first two are my own designs while the third one is a MOC I found on Rebrickable, a site where LEGO fans upload instructions and parts lists for their custom designs.
Shooting smaller MOCs outdoors is one of my favorite types of LEGO photography because it taps into several skills and gives me the most enjoyment from concept to completion. It also makes me go outside and explore, which creates opportunities for me to observe and notice the things around me.
I tend to stay awhile to take photos of insects, landscapes, or even just the light after I’ve wrapped up my LEGO photography shoot so that’s another plus.
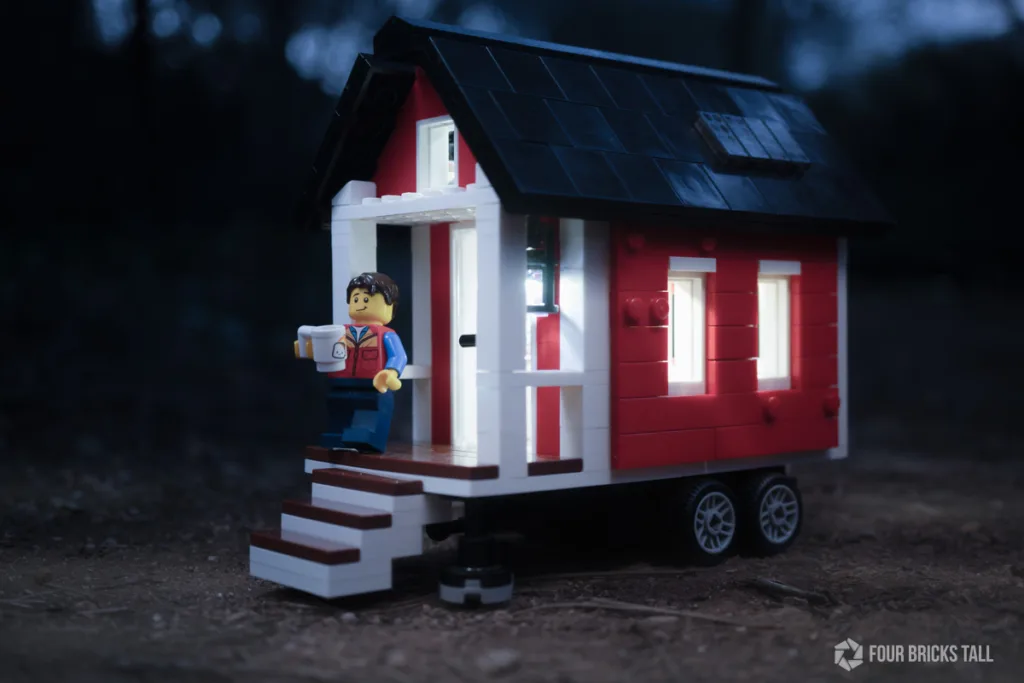
MODs
Somewhere in between a retail set and a MOC is the MOD, where you modify a retail set. I simply built out the back-half of the magic shop so it could be photographed from all angles.
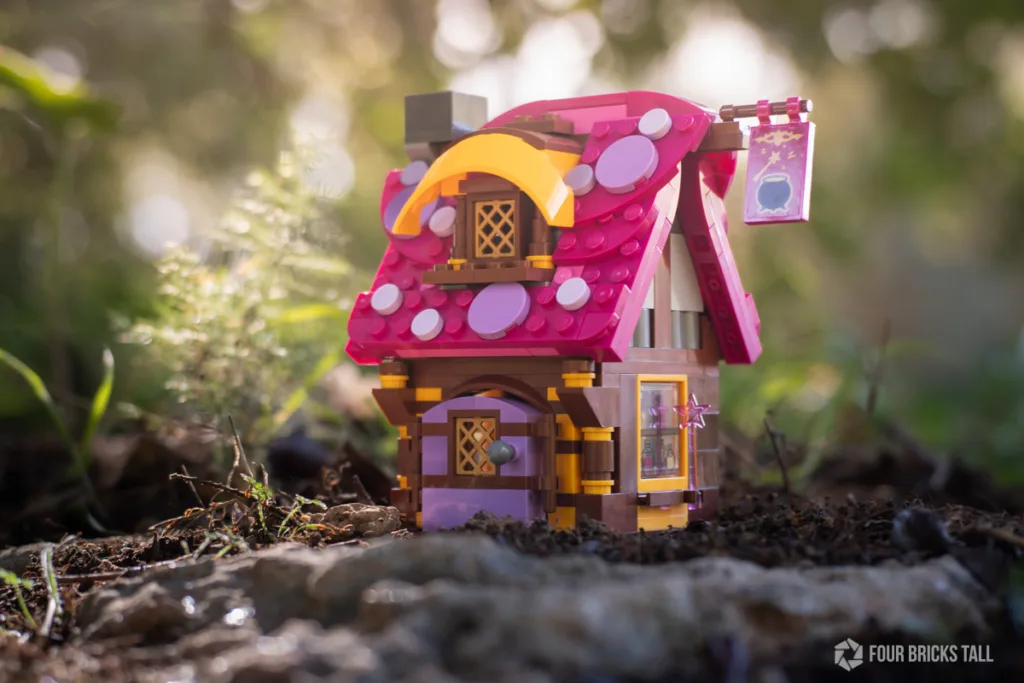
This is an easy way to get into custom building if you aren’t ready for MOCs. You can learn techniques from LEGO designers and supplement the design with your own bricks and ideas.
Combining types of LEGO photography
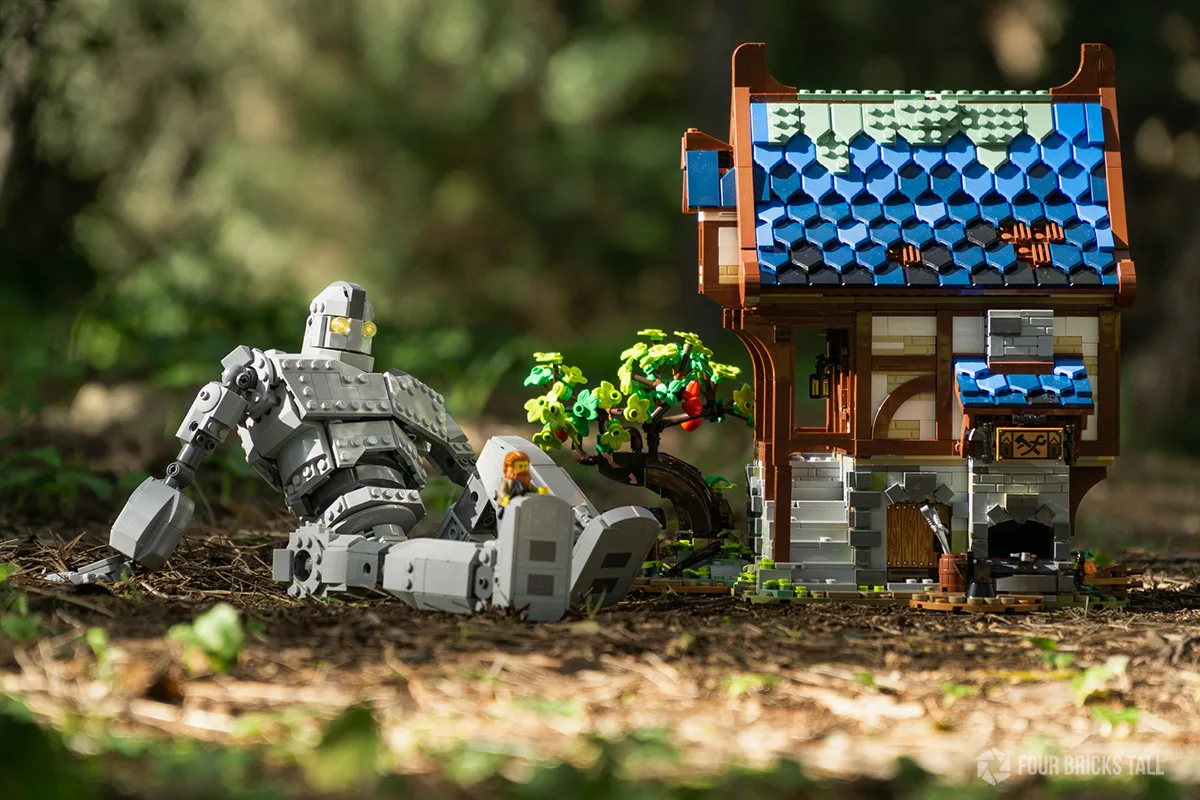
Of course, you can combine different types of photography too. The photo that leads this article is a two-fer in terms of subject because it’s a MOC and a retail set together in one shot taken outdoors.
The Iron Giant is a MOC that I built from purchased instructions. He’s visiting the Medieval Blacksmith, an official LEGO retail set, for a mani-pedi from the blacksmith himself.
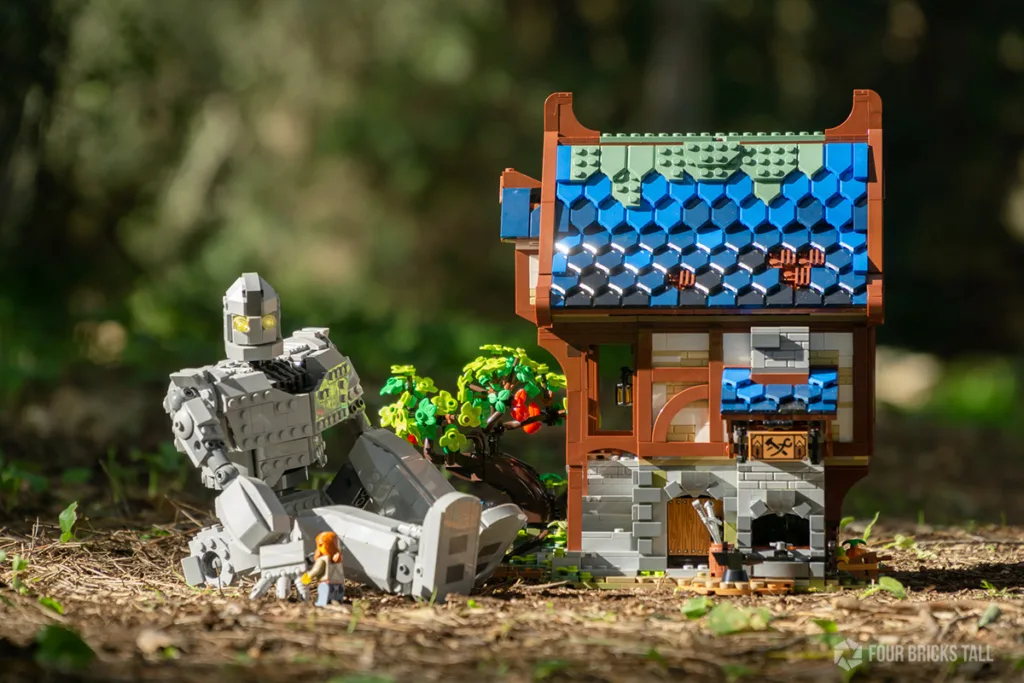


It was a lot more effort to plan, pack, and set up for this series but it was a good exercise in pushing myself creatively and I came away with unique photos.
Other types of LEGO photography
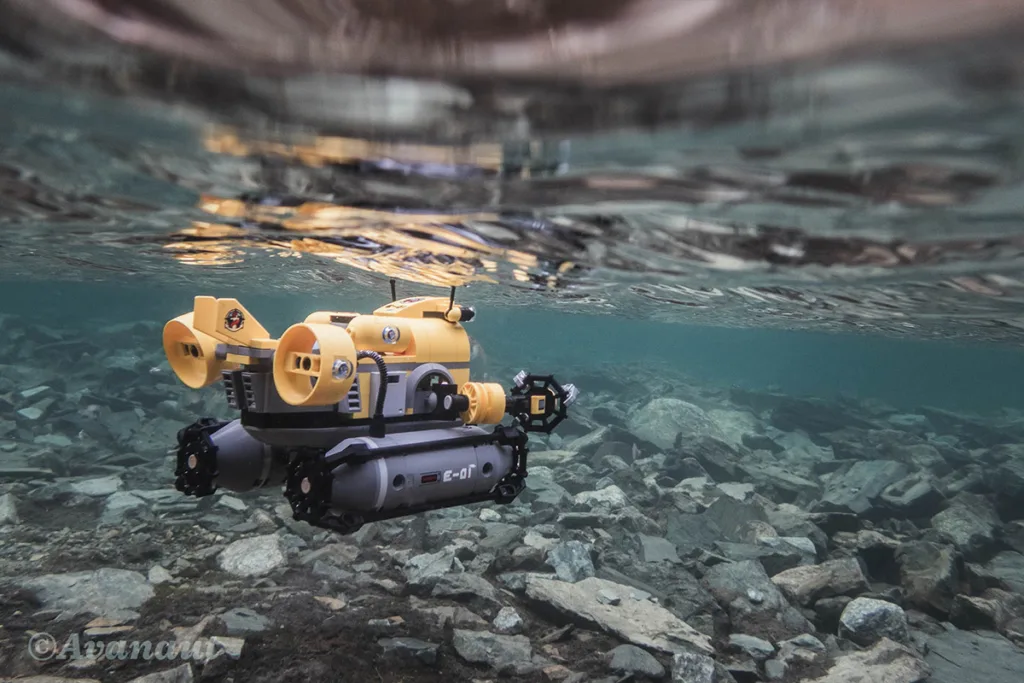
I’ve just covered the basic types of LEGO photography but there are more kinds of LEGO photography to explore such as long exposure, ultra-wide landscape, and underwater. I’ve tried all these and while they bring a new set of technical challenges, they’re a lot of fun.
LEGO toys for every type of photographer
The great thing about LEGO toys is that they’re so versatile in scale, style, and themes. Shoot a minifig or shoot a 58-inch tall brick-built replica of the Eiffel Tower. There are myriad composition choices to make and techniques to use because LEGO subjects are infinite.
For beginners, I’d recommend shooting minifigs outdoors and trying to match the scale. You’ll learn a lot about composition just by finding places where your minifigs would fit in.
For advanced photographers, shooting a set’s interior or taking a photo of the entire model outdoors are excellent experiences. You’ll learn how to avoid reflections in other bricks, be extra mindful of lining up verticals, and get better at lighting more precisely.
Whatever your budget, skill level, or personal style, there’s a LEGO photography type for you.