
The biggest challenge of using a phone camera for toy photography is controlling how much of the scene is in focus.
Photos taken with a phone camera typically have a deep focus: everything is relatively sharp from front to back. That can be a strength or a weakness depending on your creativity and storytelling.
We’ll explore how to control depth of field and other ways to make your toy subject stand out from the background with a phone in this primer.
But first, it’s helpful to know your gear so you can use it better. A photographer who knows what their gear can and can’t do is a photographer who can solve problems quickly and creatively.
A phone camera has a wide-angle lens
Many phones come with multiple cameras now but the default camera has a wide-angle lens.
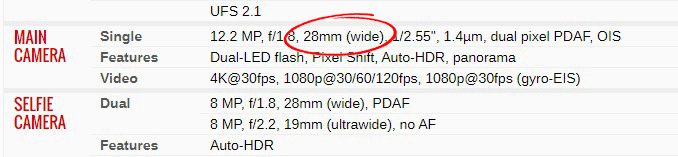
“Wide-angle” means a focal length anywhere between 24mm and 35mm. My phone has a 28mm lens on the main camera, as shown here on GSMarena.com. (These focal lengths are expressed as equivalents.)
The advantage of having a wide-angle lens is that you can capture more of the scene and most everything will be in focus. Wide-angle lenses appear to have a deep depth of field (DoF)–how much of the scene is acceptably sharp from front to back—which is why landscape photographers typically work with them.
We generally love this deep depth of field when we take photos of anything with our phone because it practically guarantees our subject will be in focus. That selfie with the Manhattan skyline clearly visible behind you? No problem with a phone camera.
However, that can be a downside for toy photography.
We want the Manhattan skyline in the selfie because that background provides important context. But what about when it doesn’t?
Getting an out-of-focus background
Many phone photographers want to know how to get a “blurred background” in their toy photos, specifically, a background that is out-of-focus while the subject is in sharp focus. They want a shallow depth of field, not a deep depth of field.
Generally, there are a few ways to get a shallow DoF:
- open the aperture wide
- use a lens with a longer focal length
- get close to the subject
- increase the distance between the subject and the background
Phones, however, have cameras with fixed aperture lenses so that first option isn’t available to phone photographers.
Here are some techniques and tricks you can try:
Switch to the telephoto camera
If you have multiple cameras, switch to the telephoto and images will appear to have a more shallow DoF. A telephoto lens is longer with about a 50mm focal length (you can check your phone’s camera specs on GSMarena.com).
Get close to the subject
Another easy way to throw the background out of focus is to place your subject as close to the lens as possible. The closer the subject is to the camera, the shallower the DoF.
Put distance between the subject and the background
The further the background is from the subject, the more out of focus it will be.
Combine DoF techniques
Try using your telephoto camera, putting your subject as close to it as possible while having a very distant background! You should be able to achieve an out-of-focus background.
However, if the effect you are going for is that razor-thin line of focus on your subject with everything else out of focus, you’d need a camera with a longer lens with a wide aperture. You’ll also need that if you want large bokeh balls: those out-of-focus circles of light in the background.
Use “portrait mode” or AI
Mirrorless and DSLR cameras can achieve a shallow DoF easier because you can use longer lenses and wide apertures with them. Phones can’t because their compact design dictates tiny sensors, short focal lengths, and fixed apertures, so phone manufacturers have invented “portrait mode” to compensate.
Portrait mode artificially blurs parts of the image that the AI determines are not the subject. This can be hit or miss depending on how complicated your background is and how defined your subject’s edges are though.
Most stock camera apps have depth control sliders so you can adjust the amount of blur in the photo to make it more subtle or more intense after you’ve taken the shot.
Personally, I’ve found that photos taken in portrait mode are pretty aggressive with the blur so I tend to dial that down.
Use a screen with a blurred photo as background
This trick involves using a tablet, laptop, TV, or other monitor with a photo background that is out-of-focus. If you already use digital backgrounds in your toy photography, this might be a small but interesting adjustment to your workflow.

Choose any photo you want to use as a background and then add blur to it in Photoshop or Photopea (a free online alternative). Then just display that blurred photo as your digital background.
If it’s large bokeh that you want, you can find plenty on sites like Pixabay, Freepik, and Unsplash. There are also thousands of natural, urban, industrial, space, or whatever context you might need available on those free photo sites.
Make sure to provide attribution to the photographer when needed.
Separating the subject from the background
Having a background that is out-of-focus is only one way to make a subject stand out from it. Composition and lighting are two other ways.
These two topics are dense and require several posts of their own so I’ll introduce just a few techniques in this primer.
Simplify the background
The biggest mistake phone photographers make is shooting their subjects against a very busy or cluttered background. A background with a lot going on creates competition for the subjects, making them more difficult to see.
The sky, for example, is a great background because it’s basically one color. Any subject placed against the sky will stand out. Depending on the size of your toy subject, anything can be considered a simple background, even a tree trunk.

The simpler the background, the more your subject will stand out from it.
Create space around your subject
If the environment is something like a forest which can be very busy, look for a clearing such as a gap between the trees to place your subject against in your composition. A break in the background can serve as a natural frame for your toy subject.
Move your eyes around your subject and look for any overlap with objects in front of and behind it, like blades of grass, weeds, or tree branches. Anything that invades the space of your subject is a potential distraction.
The same process can be applied to any environment in general: find spots that are more open, place your subjects in them, and remove or move overlapping objects.
This photo has Dumbledore standing out prominently while at the same time, not obstructing the sword, the desk, or Fawkes. There is a lot of detail and context, but Dumbledore has space around him and is not overlapping anything important.

Use color and contrast
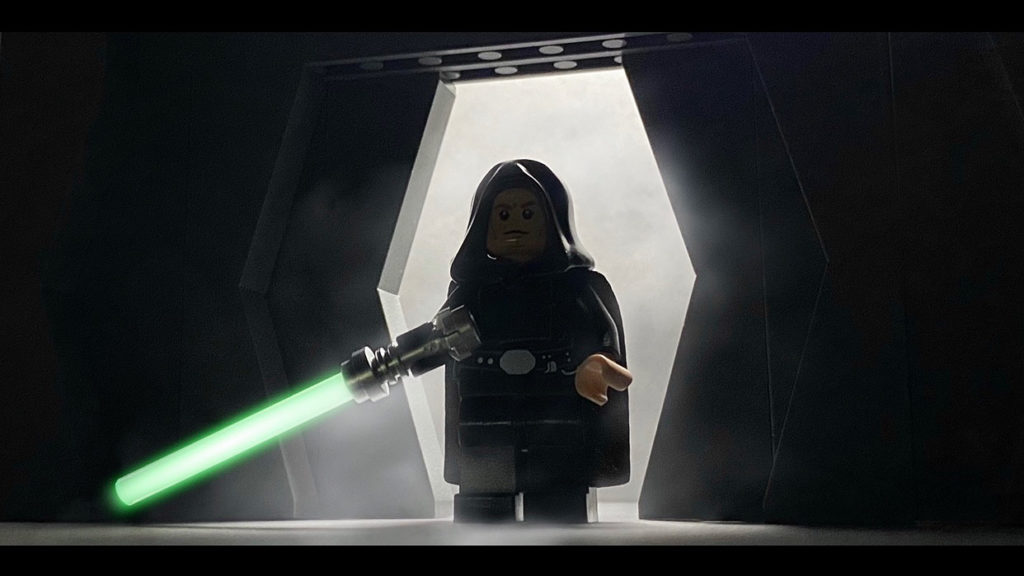
Darth Vader stands out in every scene not only because he looks very imposing, but because he’s a black figure against a light background. That’s contrast.
This LEGO recreation of “Batman Begins” is also a good example of using contrast:

Color is similarly easy to employ as a separation device: use complementary colors like a red subject and a green background. Or use analogous colors like red, orange, and yellow.
Use light
You can use light–natural or artificial–to separate your subject from your background or direct focus somewhere.
- Light the subject from behind or the side to create highlights on the edges. This is a great technique to use when you have a subject and background that’s a similar tone or color.
- Light the background behind the subject to create contrast.
- Use light as the background to create a silhouette.
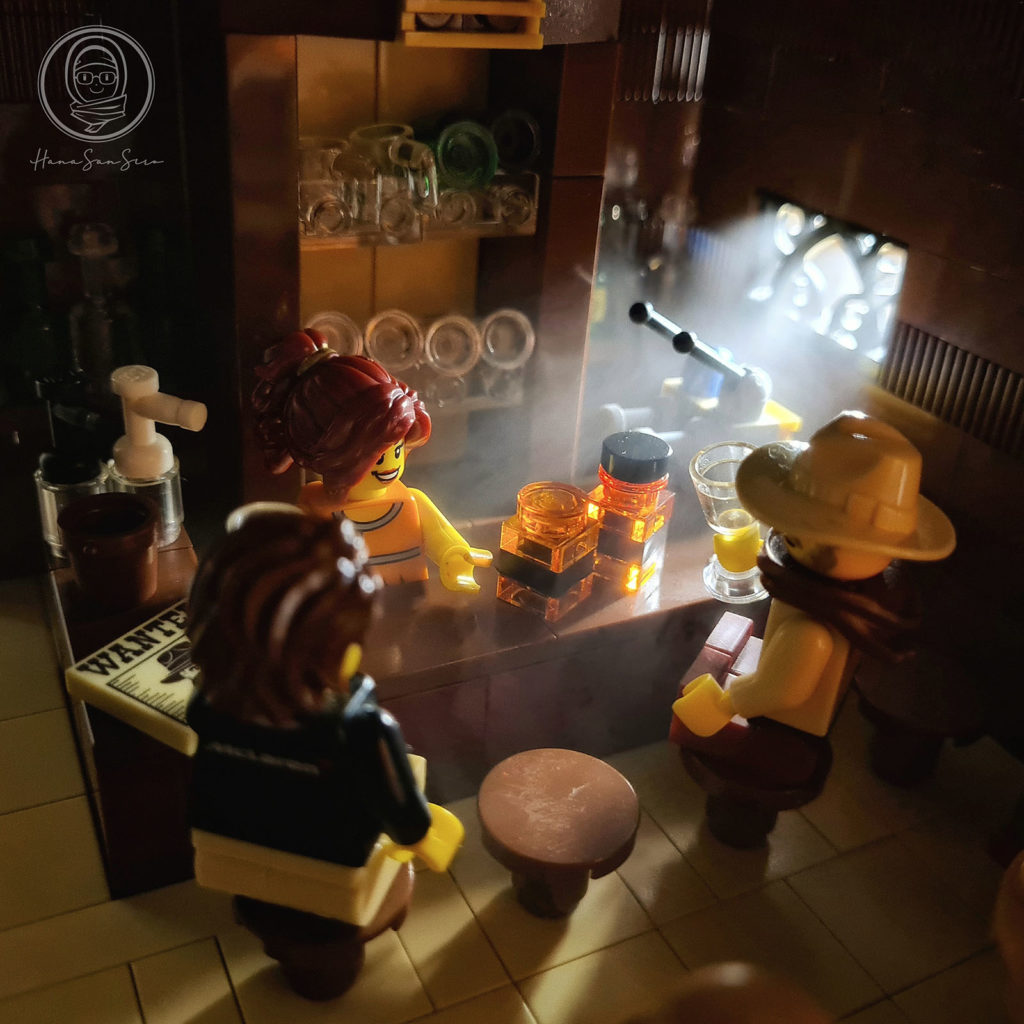
Light is used to create a silhouette around a dark subject in this photo:
This photo has deep focus, but the light pulls your attention to the bar.
Using foreground elements
So far, we’ve been exploring how to get your subject to stand out from the background. Another really smart way to create a shallow depth of field with your phone is to use out-of-focus foreground elements.
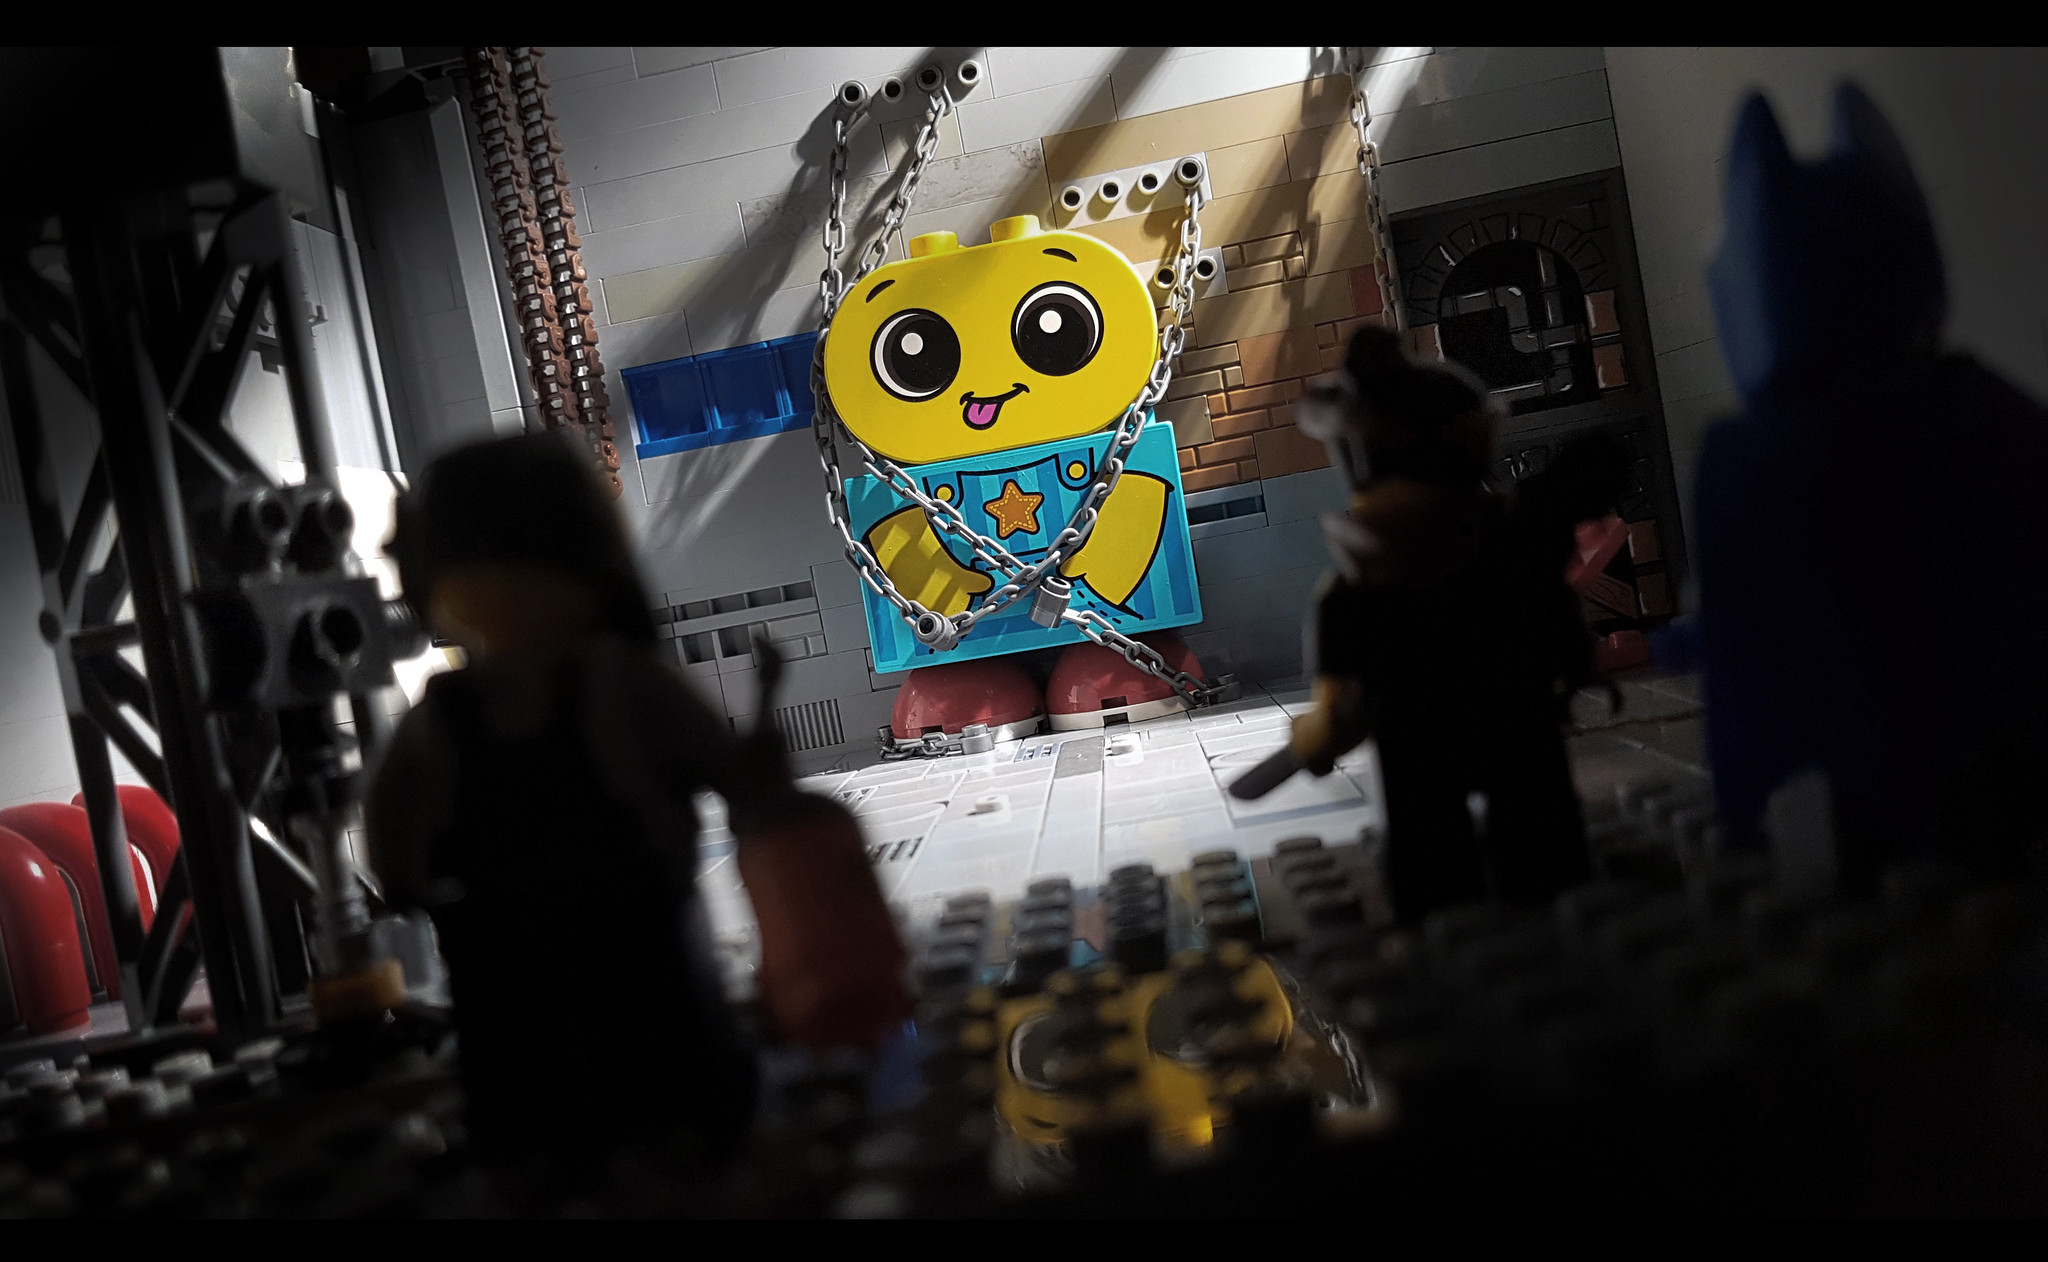
Bring these elements in close enough to the camera and it can’t focus on them. When using foreground elements this way, you should take care that you aren’t obstructing the subject.
Maximize your gear
Phones have great cameras and can capture fantastic photos, but you need to understand the physical and technical limitations so you can play to the camera’s strengths instead of highlighting its weaknesses.
A phone isn’t a mirrorless or DSLR camera, so you have fewer and more limited creative controls such as aperture, shutter speed, and focal lengths. So spend more time on other creative parts of the photo by preparing a story, building up an interesting scene, and applying art techniques.
With basic knowledge of composition and lighting, you can go pretty far in creating excellent toy photos with your phone.
Upgrade with a macro lens add-on
When you’ve done all you can with composition, lighting, and editing, try adding a macro lens to your phone. Apexel and Kase make great macro lenses that allow for a shallow depth of field, narrower fields of view, and higher magnification.