Photography doesn’t start when you pick up the camera. And for many photographers like myself, it doesn’t end when you press the shutter release button or put your camera back in your bag either.
It starts with the idea for the shoot and it ends when I save the final photo from Lightroom onto my computer. I might even say that it really ends when I share the photo online: on social media or here on my website.
I’ll take you through my toy photography workflow from where I get ideas and inspiration, to how I shoot and edit, and ultimately when, where, and if I decide to share my work. I’ll cover each step in some detail including lens selection, evaluating a location, and basic editing.
I am a LEGO photographer so there are some things in here that are specific to that toy, but most of the workflow can be adapted to action figure photography too. Because LEGO can be anything really.
I’ve divided my workflow up into 3 main sections:
Before the Shoot
I spend quite a bit of time on just preparing the subject since I like to shoot unique characters and objects. Apart from lighting, having unusual subjects is part of what makes my photography distinct from the now thousands of LEGO photographers out there.
I will only really shoot an official LEGO set or minifigure when I am doing a review for BrickCentral or special project for The LEGO Group. It’s rare that I’ll continue to use those in my own photography, unless I really love it.
Where to get ideas
Coming up with a photo idea usually starts with selecting a subject, whether that’s a character, an object, or even light itself.
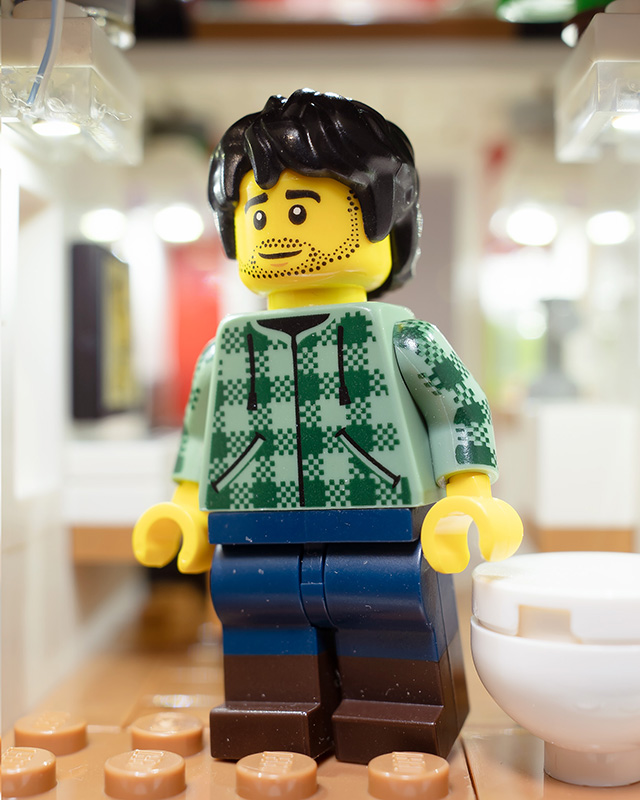
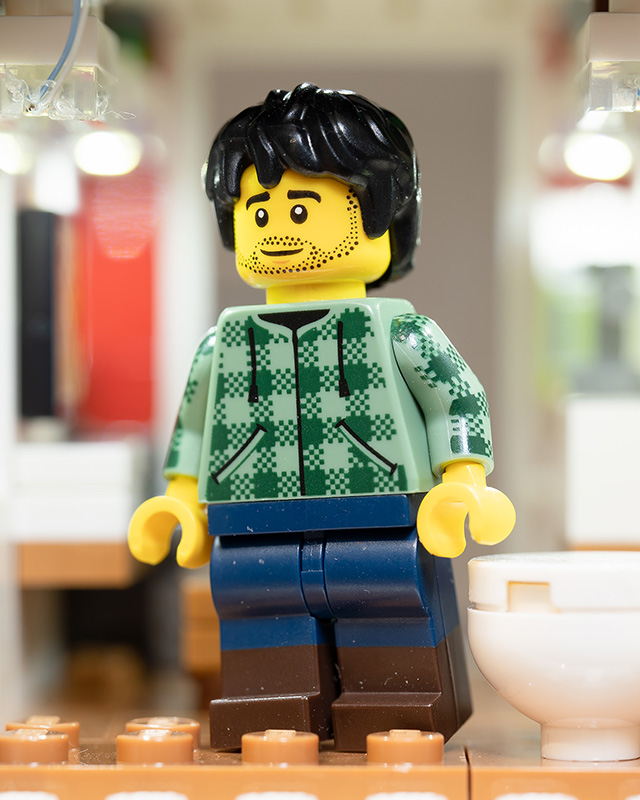
Creating unique characters
This is my favorite part of the planning stage. Before I even think about picking up a camera, I get right into the creative process by rummaging through all of my minifig parts and picking out the one thing I know I want to use as my seed: a head, a hairpiece, or a torso.
My goal is to invent a character that no one has ever seen before, and I usually do this by combining parts from a variety of LEGO themes.
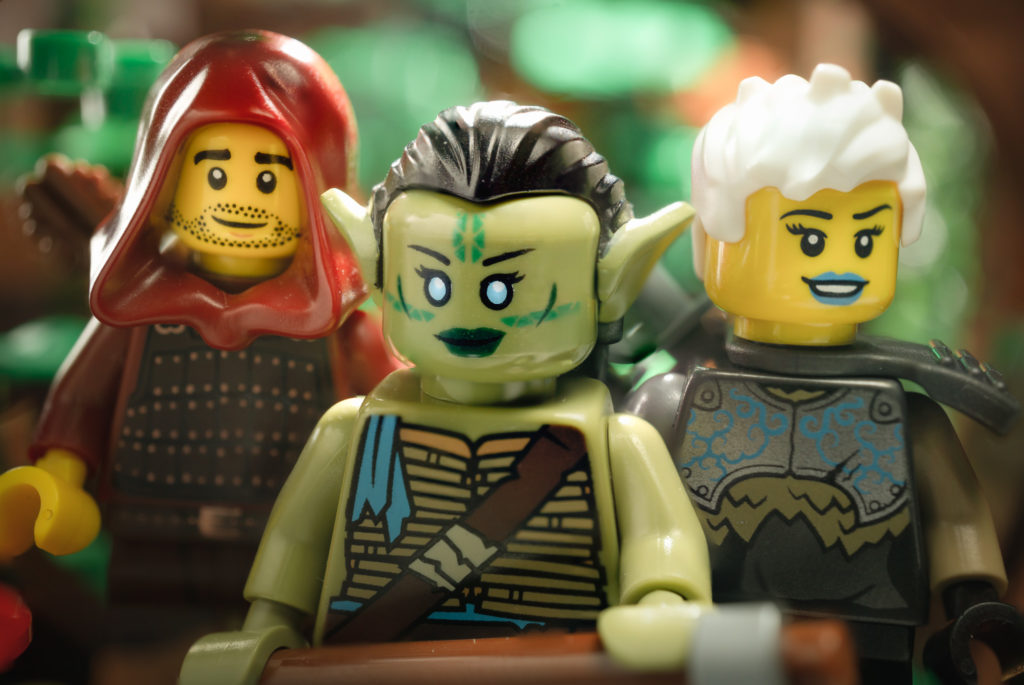
I’m always checking the minifigs on any new LEGO sets released for interesting parts, which is also really fun to do. I have drawers full of loose minifig parts from sets I own but mostly, from buying individual parts on BrickLink and Pick a Brick.
I also look through my collection of assembled minifigs, but I don’t enjoy doing that: it breaks my flow state if I have to disassemble them for a part. It’s also harder for me to envision them as something else if they are already part of another character.
Building small MOCs shared online
Small MOCs–LEGO jargon for when you design and build “My Own Creation” as opposed to assembling an official set–are another source of ideas.
I really like smaller builds as a LEGO fan and this comes through in my photography. These smaller models can be great subjects by themselves or make for an interesting prop or scene element.
Here’s an example of a speederbike MOC shared on Flickr that I used as inspiration to create a cyberpunk scene:
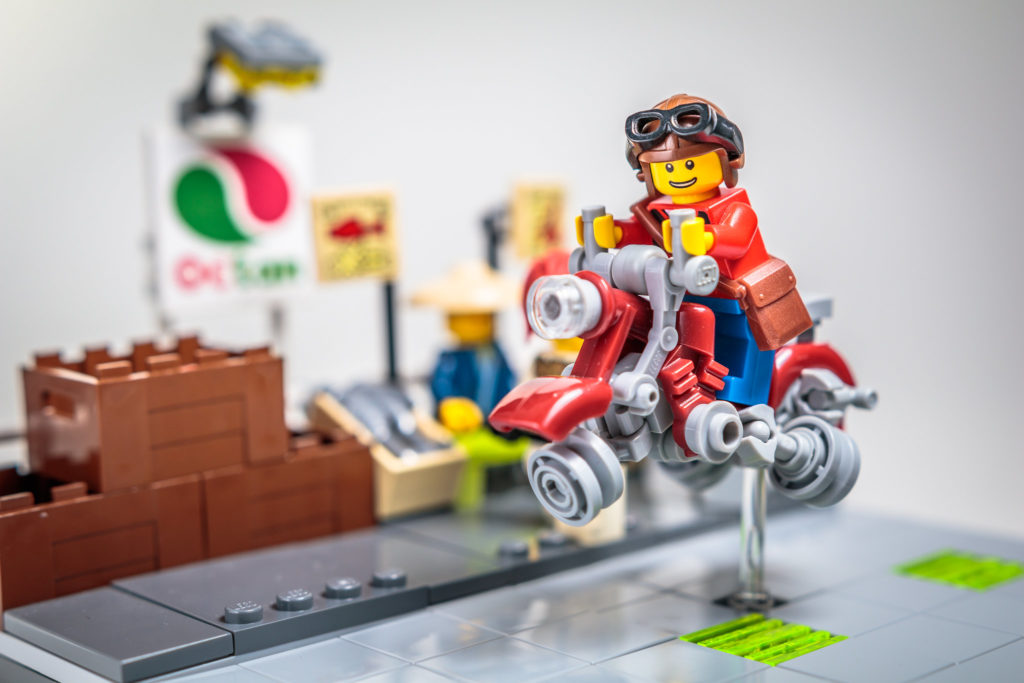
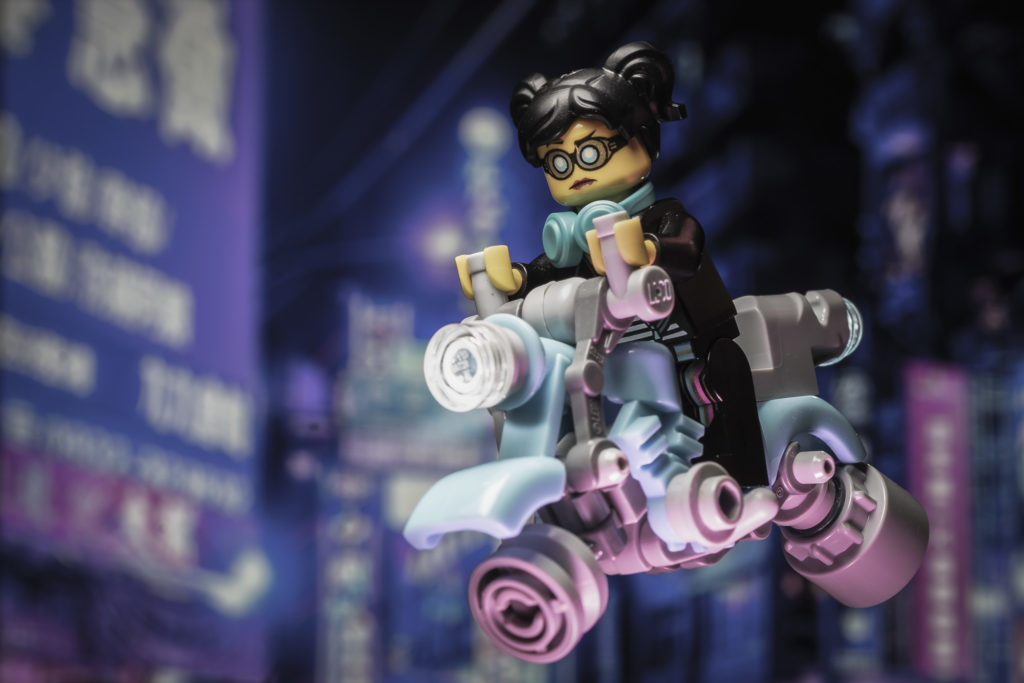
I modified the build a little bit to make it my own and also added a unique character made up of parts from 4 different LEGO themes.
There are so many talented MOC builders on Flickr and a few on Instagram to get ideas from. You’ll typically find hundreds of small-to-large models in Flickr groups. On Instagram, you can find step-by-step tutorials for smaller models or some building techniques to use in larger models.
Sites like Rebrickable have MOC instructions as PDFs that you can download for free or purchase.
Don’t forget to credit the person you were inspired by when you share your photo!
My own interests outside LEGO
What I watch, read, and experience are also good sources of ideas and inspiration.
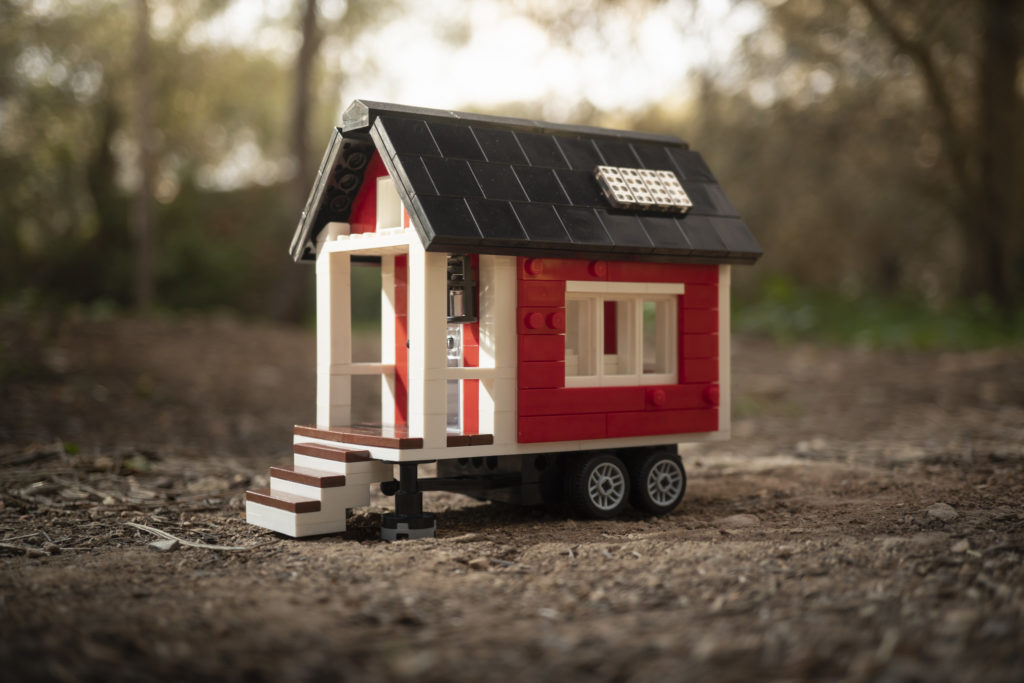
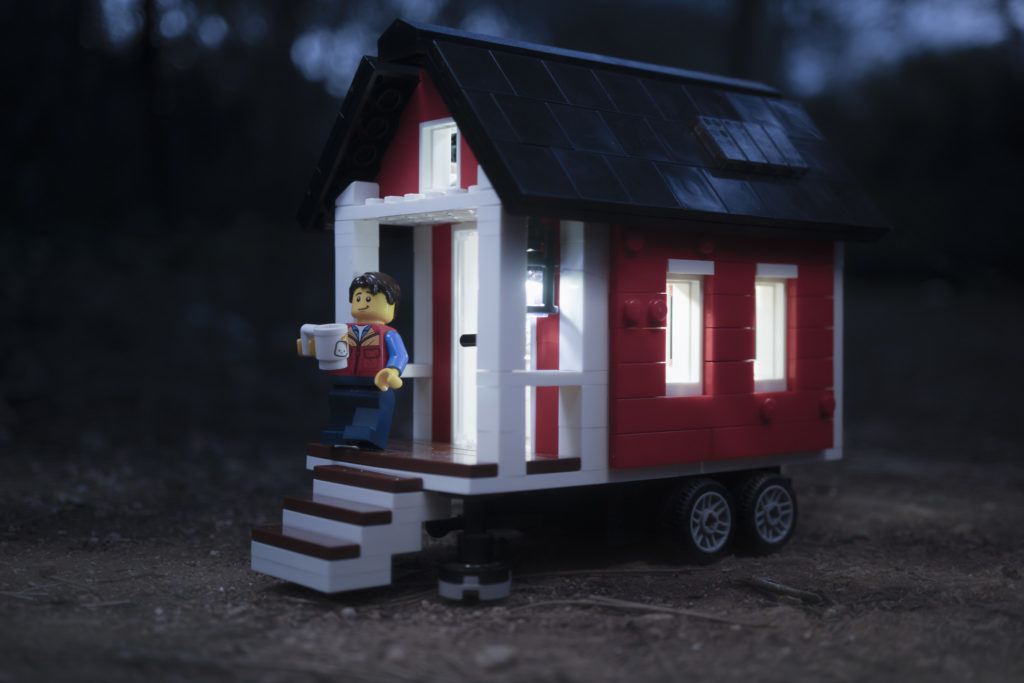
For example, I was really interested in the tiny house movement after reading news about how they can help solve homelessness in cities and then watched several tiny house lifestyle and transformation videos on YouTube.
I thought they were so adorable so I made one of my own in LEGO form. Here’s my Tiny Red House MOC that I used as a subject and as part of a scene:
Shooting indoors or outdoors
I’m comfortable shooting both in a studio and in the field so as I’m creating a unique minifig or building a MOC, I’m already thinking about what I want the setting to be: indoors or outdoors.
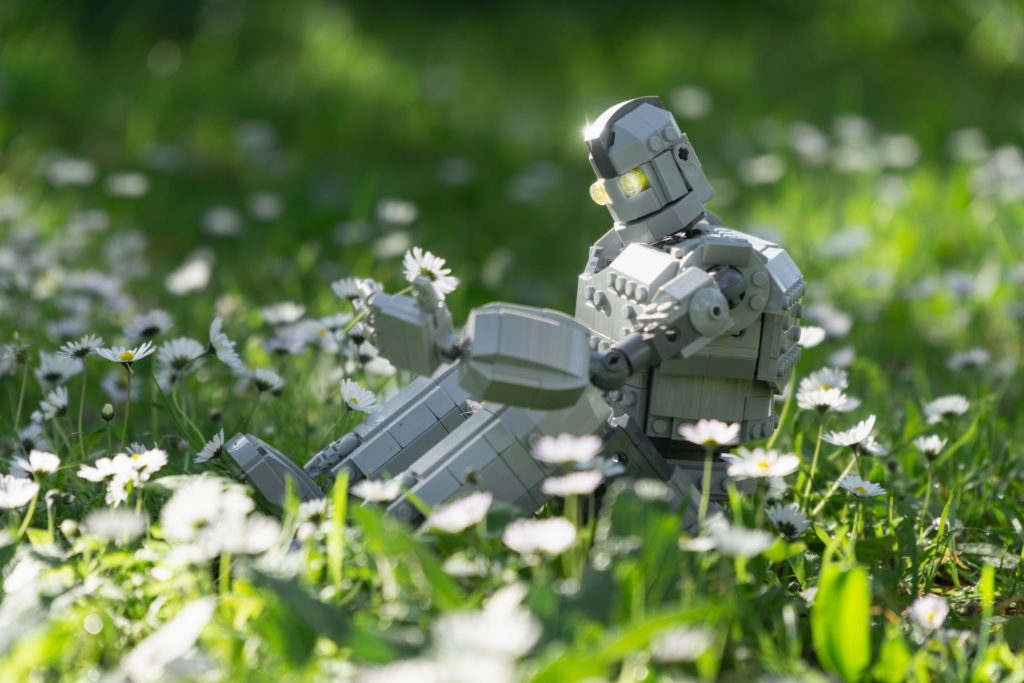
If it’s something I think belongs in a forest, beach, or other natural environments, I’ll typically shoot outdoors. I have to take advantage of the trees, moss, water, and other natural elements because I won’t be able to build all of that, especially if my LEGO subject is big. I just don’t have the time, space, skill, or quantity of LEGO bricks to do it.
If it’s something I want to shoot with complex lighting setups in a smaller brick-built environment, I’ll shoot in my little studio nook.
Deciding on a lens
If you’ve had a look at my toy photography gear page, you know that I have 6 macro lenses that I use for LEGO photography. Why do I have so many and how do I choose which one to use?
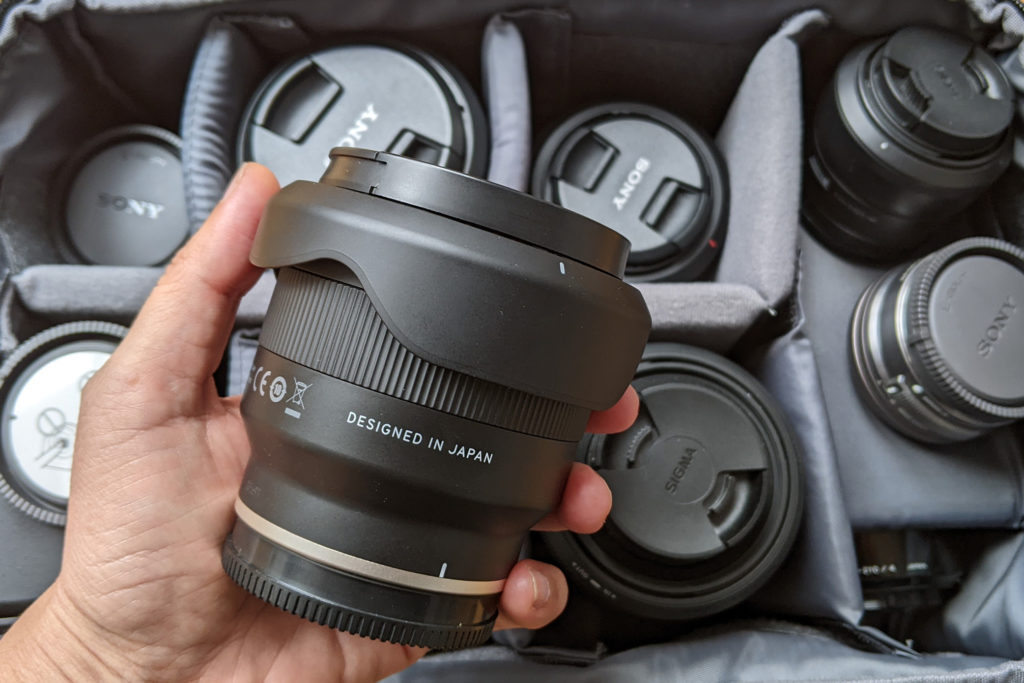
Before I jump into that, I think it’s important to understand that many macro lenses can be used as regular lenses too, not just for capturing small subjects or fine details. Photographers use them as portrait lenses and even landscape lenses.
They’re valued because of their edge-to-edge sharpness with no or very little distortion. When you are working with a subject that has very straight and defined lines like LEGO does, you really don’t want any distortion.
Obviously, though, the magnification is the big draw of a macro lens. But for LEGO photography, I tend to stay in the 1:3 or 1:2 ratio, not at true macro which is 1:1. If you shoot model train figures such as HO scale, you might want a macro lens with an even higher magnification like 2:1.
When choosing which macro lens to use, I consider the size of the subject, environmental factors, and what kind of look and feel I want to have in my images.
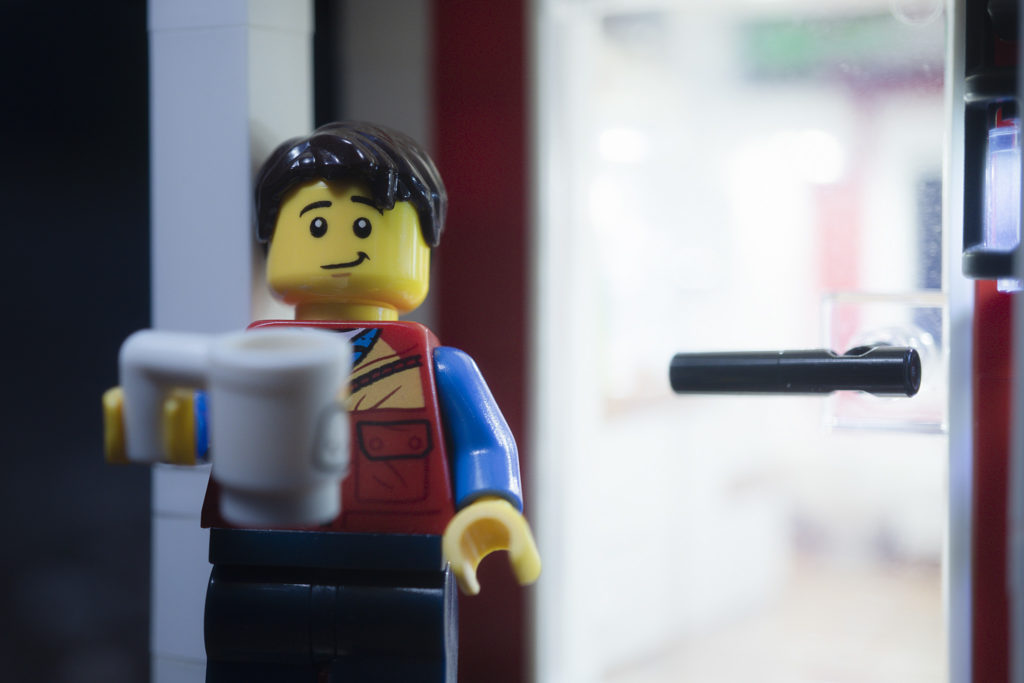
Lenses are storytelling devices: a change in focal length can affect the whole mood of a photo. It can pull the viewer into a scene and make it more intimate, or make that person feel like they are an observer at a distance.
Pay attention to the background in the images above as you slide the line left and right. Both photos were composed with the minifigure about the same size in the frame. The photo shot with the 24mm lens on the left shows a lot more of the background, but also makes it seem further away than the image shot with the 70mm lens on the right.
Notice how the composition changes too: in the right photo, the minifig is mostly framed by the door behind it. In the left photo, it’s not framed at all. Now guess which of the two photos was the first shot I took.
The characteristics of a lens also have an effect on your shooting workflow. Anyone who has ever shot with a phone knows it’s a different experience even just ergonomically.
So that’s why I have so many macro lenses: they have different focal lengths and dimensions (among other things) that create different looks and handle differently.
There a number of questions I ask myself to help me choose which of those lenses to use, especially outdoors:
How big is the subject?
I shoot LEGO minifigures as well as LEGO buildings so I’m typically working with subjects between 4cm/1.6 inches and 40cm/15 inches tall.
For smaller subjects like a minifigure, I’ll use a macro lens to fill the frame with them. Any macro lens with at least 1:2 magnification will do the job.
For larger subjects, I might use a wider angle macro or a regular zoom lens to get everything in the frame.
Is the environment relevant?
If what’s around the subject is important, I’ll typically use a lens with a shorter focal length (16-30mm) because the wider angle allows me to capture more of the environment in the frame.
If I don’t need or want the background, I’ll use a lens in the normal range like 40mm to 70mm or a short telephoto like 100mm to reduce the field of view and get a shallower depth of field.

If I want the quality of the out of focus areas to be creamy, I will also choose a lens with a wide aperture like f/2.8 or one with more rounded blades.
Will I be adding atmosphere?
If I’m going to spray anything at or kick up dust around my scene, I want to make sure my gear is safe. I might reach for a longer lens because it affords more distance between the camera and the subject where all those particles will be landing.
Other considerations when shooting outdoors
How much will I need to tweak the scene?
This is something I think about when I have more than just one subject with me. I’ll need to consider placing each in the scene, taking care to not obstruct anything else or create a distraction.
Macro lenses let me set up my camera close to the subjects so it’s easier to reposition elements as needed. I can be behind my camera looking at my LCD for composition and just reach into the scene to change anything.
A regular lens might have me positioned further back from the scene because they have a longer minimum focusing distance than a macro lens. I’d have to do a little bit of walking back and forth from the scene to my camera if I needed to adjust the composition.
How secure do I need the scene?
If I’m shooting something expensive or especially eye-catching or in an area with considerable foot traffic, I’ll want to take up as little space as necessary and be as close to my subjects as possible. I’ll choose a lens with a short minimum focusing distance, typically a macro lens.
If the location is remote enough, and I don’t have to worry about people taking photos, disturbing the scene, or even stealing the toys, then I don’t factor scene security into my lens selection at all.
Also, watch out for off-leash dogs!
How light do I want or need to keep my camera bag?
I will opt for a shorter, lighter lens over a longer lens so I won’t have to carry a tripod or beanbag. I’ll tend to keep my kit very small if I need to also carry another bag with a LEGO model inside with me.
Am I shooting at ground level?
A lens with a big diameter is more difficult to get to ground level, which means that there’s going to be a lot of foreground.
That’s the big issue with my 24mm macro: it’s got the biggest lens diameter of them all at 67mm. I shoot with crop in mind when I use that lens but that’s not ideal because it’s harder to compose.
If there’s a ledge or even tree root where my subject can be placed higher than my camera, then the lens diameter doesn’t matter as much.
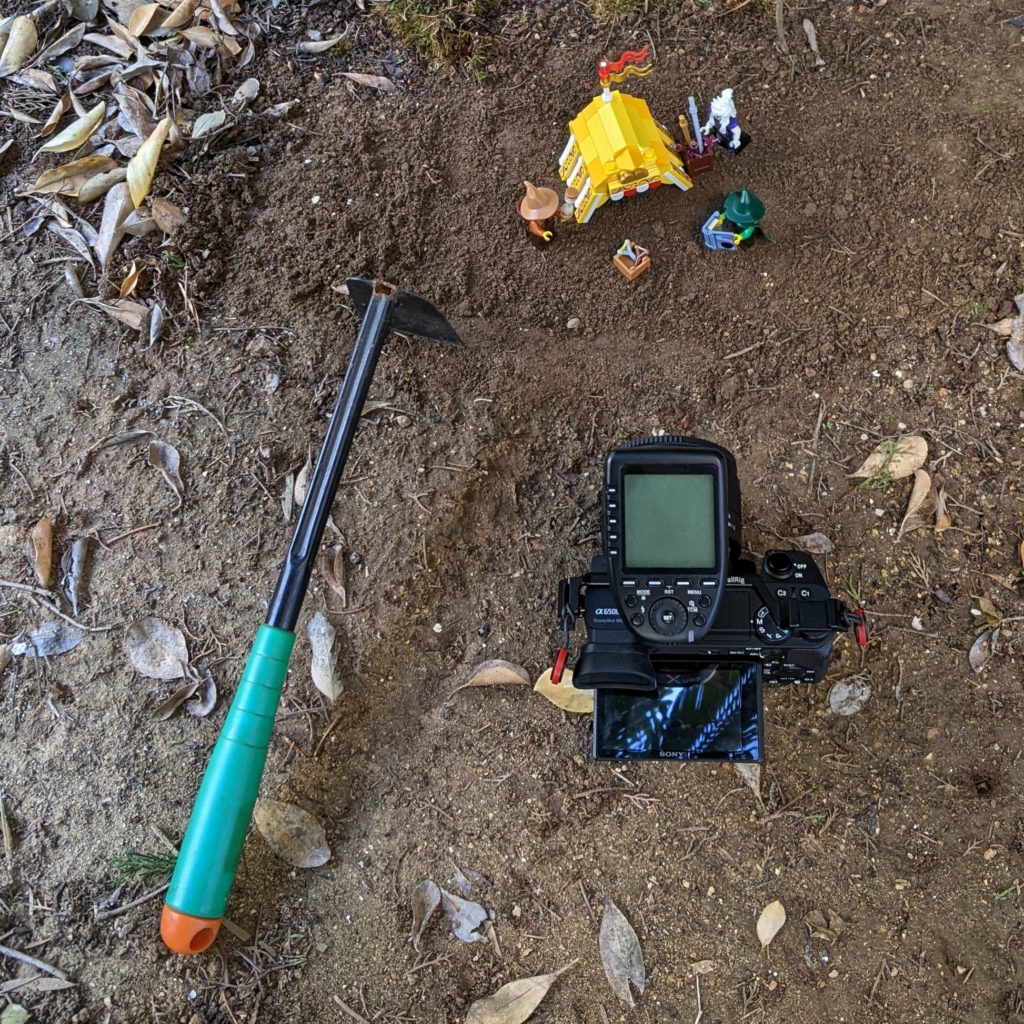
Making sure the camera is ready
I’ll check my camera to make sure there’s an SD card in the slot, the battery is full, and the exposure settings have been reset to f/4 and 1/160 shutter speed from the previous session. That’s just where I like to have them as a starting point for any genre of photography so have yours wherever you want them.
I’ll also double-check to see if my ISO has remained untouched at 100 and that my dial is set to M for manual. Sometimes I accidentally press buttons or move dials while I pack up my gear so I always just have a glance at these.
My camera allows me to recall these settings by customizing a button but in practice, I rarely do that and just have a habit of reviewing my entire camera before packing and again before actually shooting.
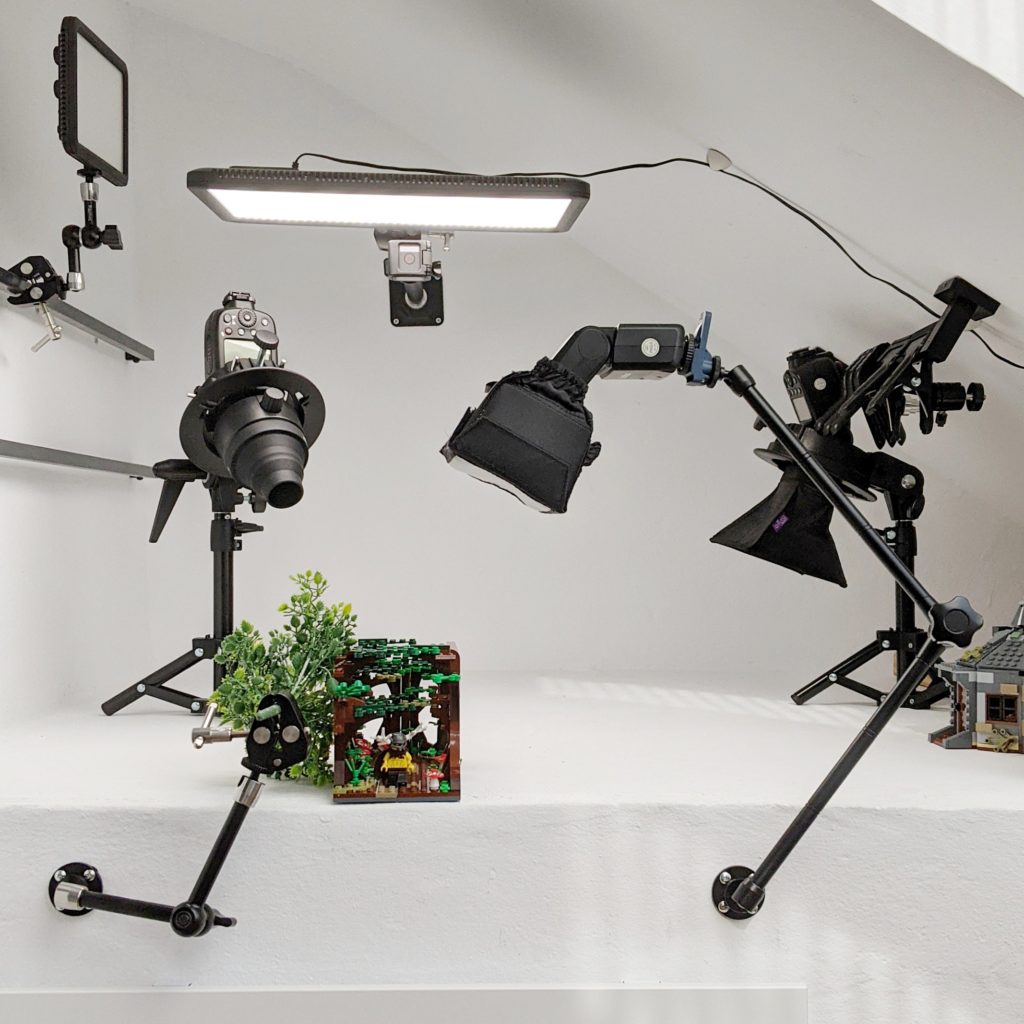
Using camera support
For toy photography, I almost always shoot with some kind of support under my camera. I like to focus precisely and have my hands free to add atmospheric effects or lighting.
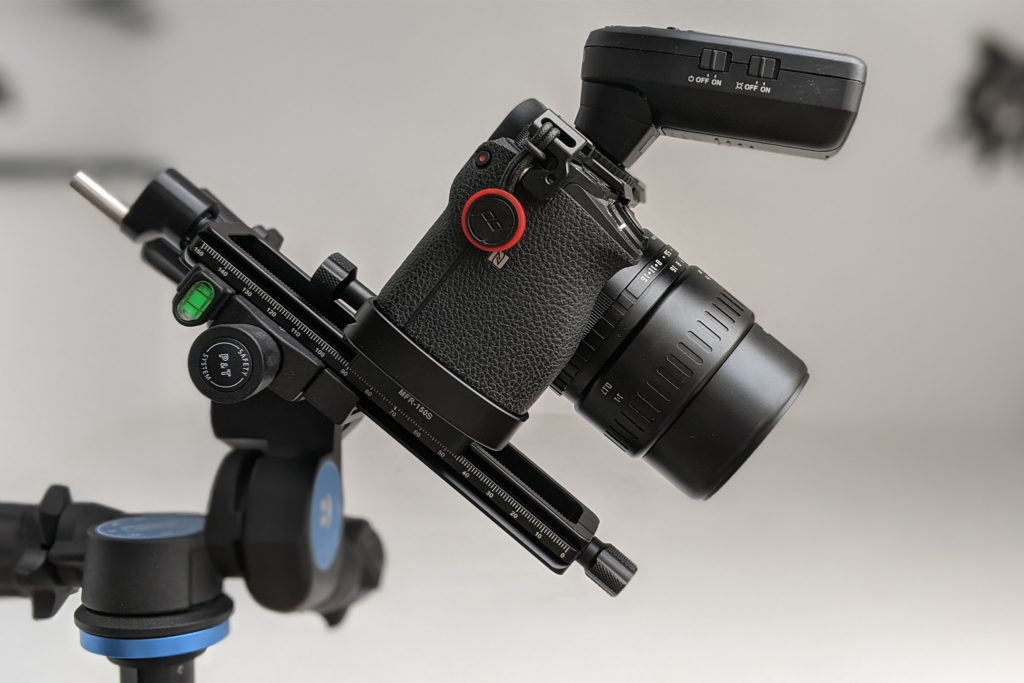
In the studio, my camera is on a tripod with a 3-geared head with macro rail for fine control.
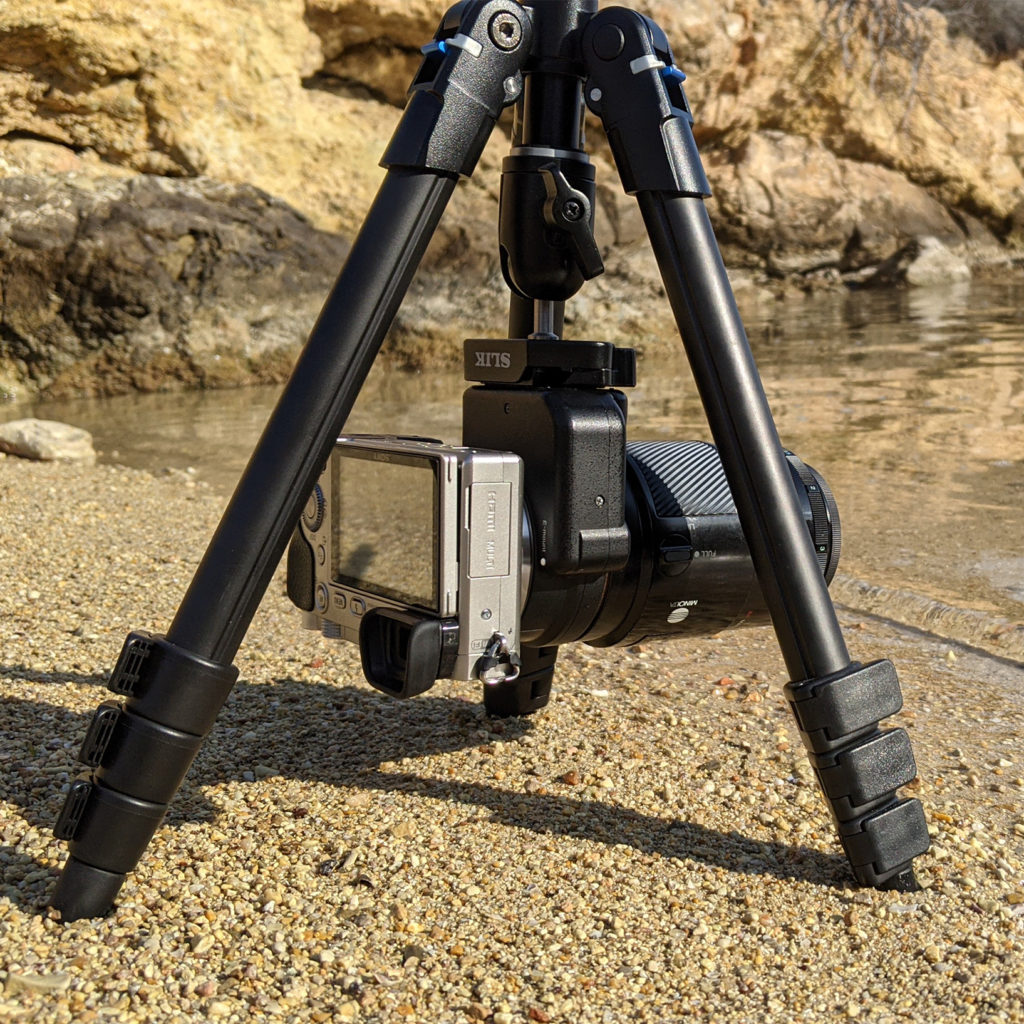
In the field, I usually have a Manfrotto Pocket Support attached if I have a lens on that is anything under 50mm focal length. Longer than that and I will use my mini tripod with an inverted column.
I’ve tried a few other supports too, but these are really my favorites for shooting outdoors.
Finding a location
In my studio, I can build out whatever I need for context but also to the field of view of any lens, that is, I can build wide or narrow. But outdoors requires a different process.
The obvious first step is to decide what kind of scenery is appropriate for my characters and go there: forest, beach, city, or what-have-you.
The choice of lens affects what kind of features I need to be looking for in a location: I have to pay a lot more attention to the background with a wide angle lens than I do with a longer lens. The distance from the subject to the background becomes really important when you want to create separation for your subjects.
With a longer lens, I only need to find just a tiny spot to serve as my location.
Scan for good lighting
I’ll scan the area for interesting light and shadows that I can take advantage of in my composition. I’ll look for pockets of light through tree leaves and branches if I’m in the forest or defined shadows on the pavement created by buildings if I’m in the city, for example.
I usually bring my own light anyway–a small flash and a reflector–but when and where I can use beautiful natural lighting as my main light source, I will. I’ll use the artificial light to lift shadows or add drama.
Look for level surfaces (if you have a building)
If I have a LEGO building with me that has a flat base, I need a location where the ground is pretty much level so I can set the model down without noticeable gaps underneath. A little bit of space is fine for me because my intention isn’t to try to create something very realistic.

Pavement is very easy to place buildings on, but puddles and sand are great too because the model’s base can be partially covered.
In a forest environment or any place where the ground is made of dirt, I’ll look for the flattest area that can accommodate the model and spend a little bit of time trying to level the dirt by just pushing it around with the bottom of my shoe. Then I fill gaps underneath the building with the loose dirt.
On my own property, I’ve used a garden hoe to create a level surface on the hard dirt.
During the Shoot
Getting everything into place
Once I have my location, I loosely set up my scene and then position my camera. I hardly ever shoot toys without some kind of support: either a Manfrotto Pocket Support or small tripod. I shoot handheld for many other kinds of photography genres but when I shoot toys, my priorities are precise focusing and having my hands free to add lighting or atmospheric effects.
I’ll check the LCD to see if everything is inside the frame and move the camera if it needs to be closer or further away.
Still behind my camera and looking at the LCD, I’ll inspect the background for opportunities to use silhouettes, color contrast, or other ways to separate my subject from the it.
Typically, I’ll put my subject in the spot where it can stand out the most from the background, and then begin framing it up by shifting my camera’s position again.
Focusing
The next thing I do is focus on the main subject using manual focus and focus peaking. I only use autofocus when I literally can’t see what I’m doing (or I’m shooting underwater).
Finalizing the composition
I’ll arrange any other elements around the subject if I am shooting more than just a minifig, making sure I’m not creating distractions. It’s not unusual for me to just start removing elements that I thought might look good in planning, but in practice made the scene way too busy.
Then I check the foreground to see if there are any blades of grass, stones, or even parts of my lighting kit that shouldn’t be in the scene.
Deciding on depth of field or long exposure
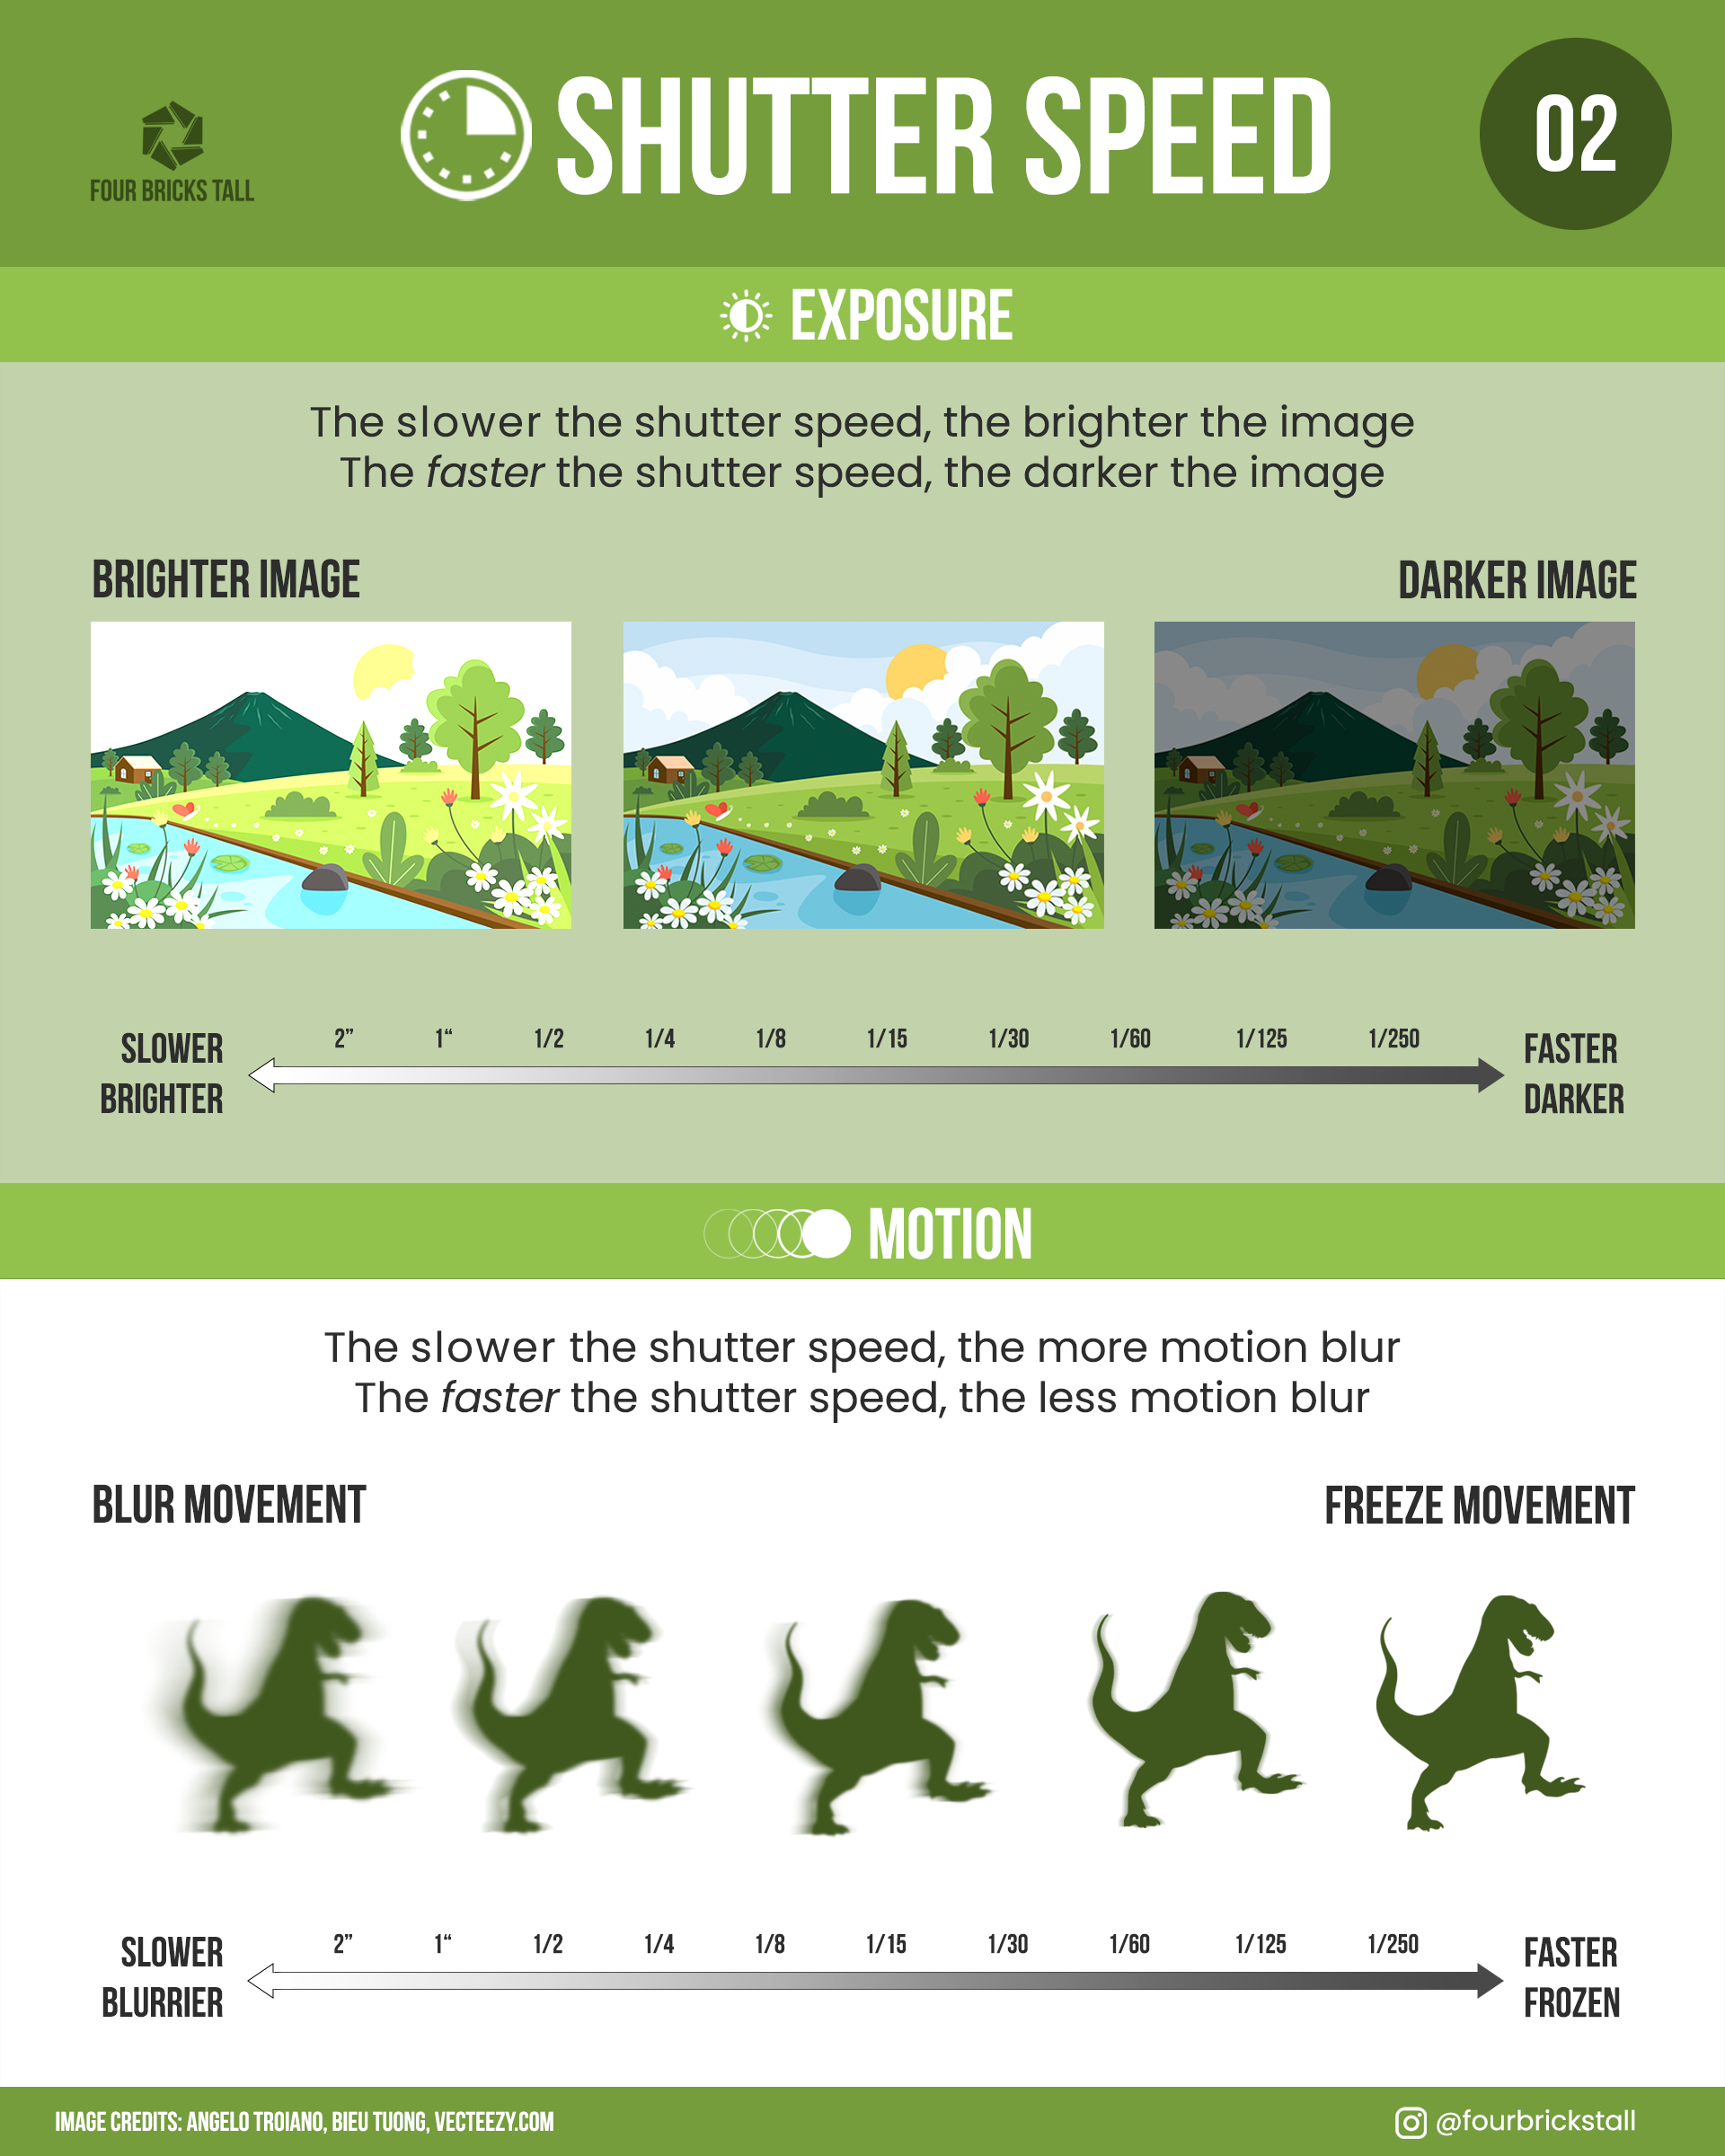
Once I think I have the composition, I’ll start adjusting the creative controls. I’ll decide if I want to have a specific depth of field or capture movement in my photo.
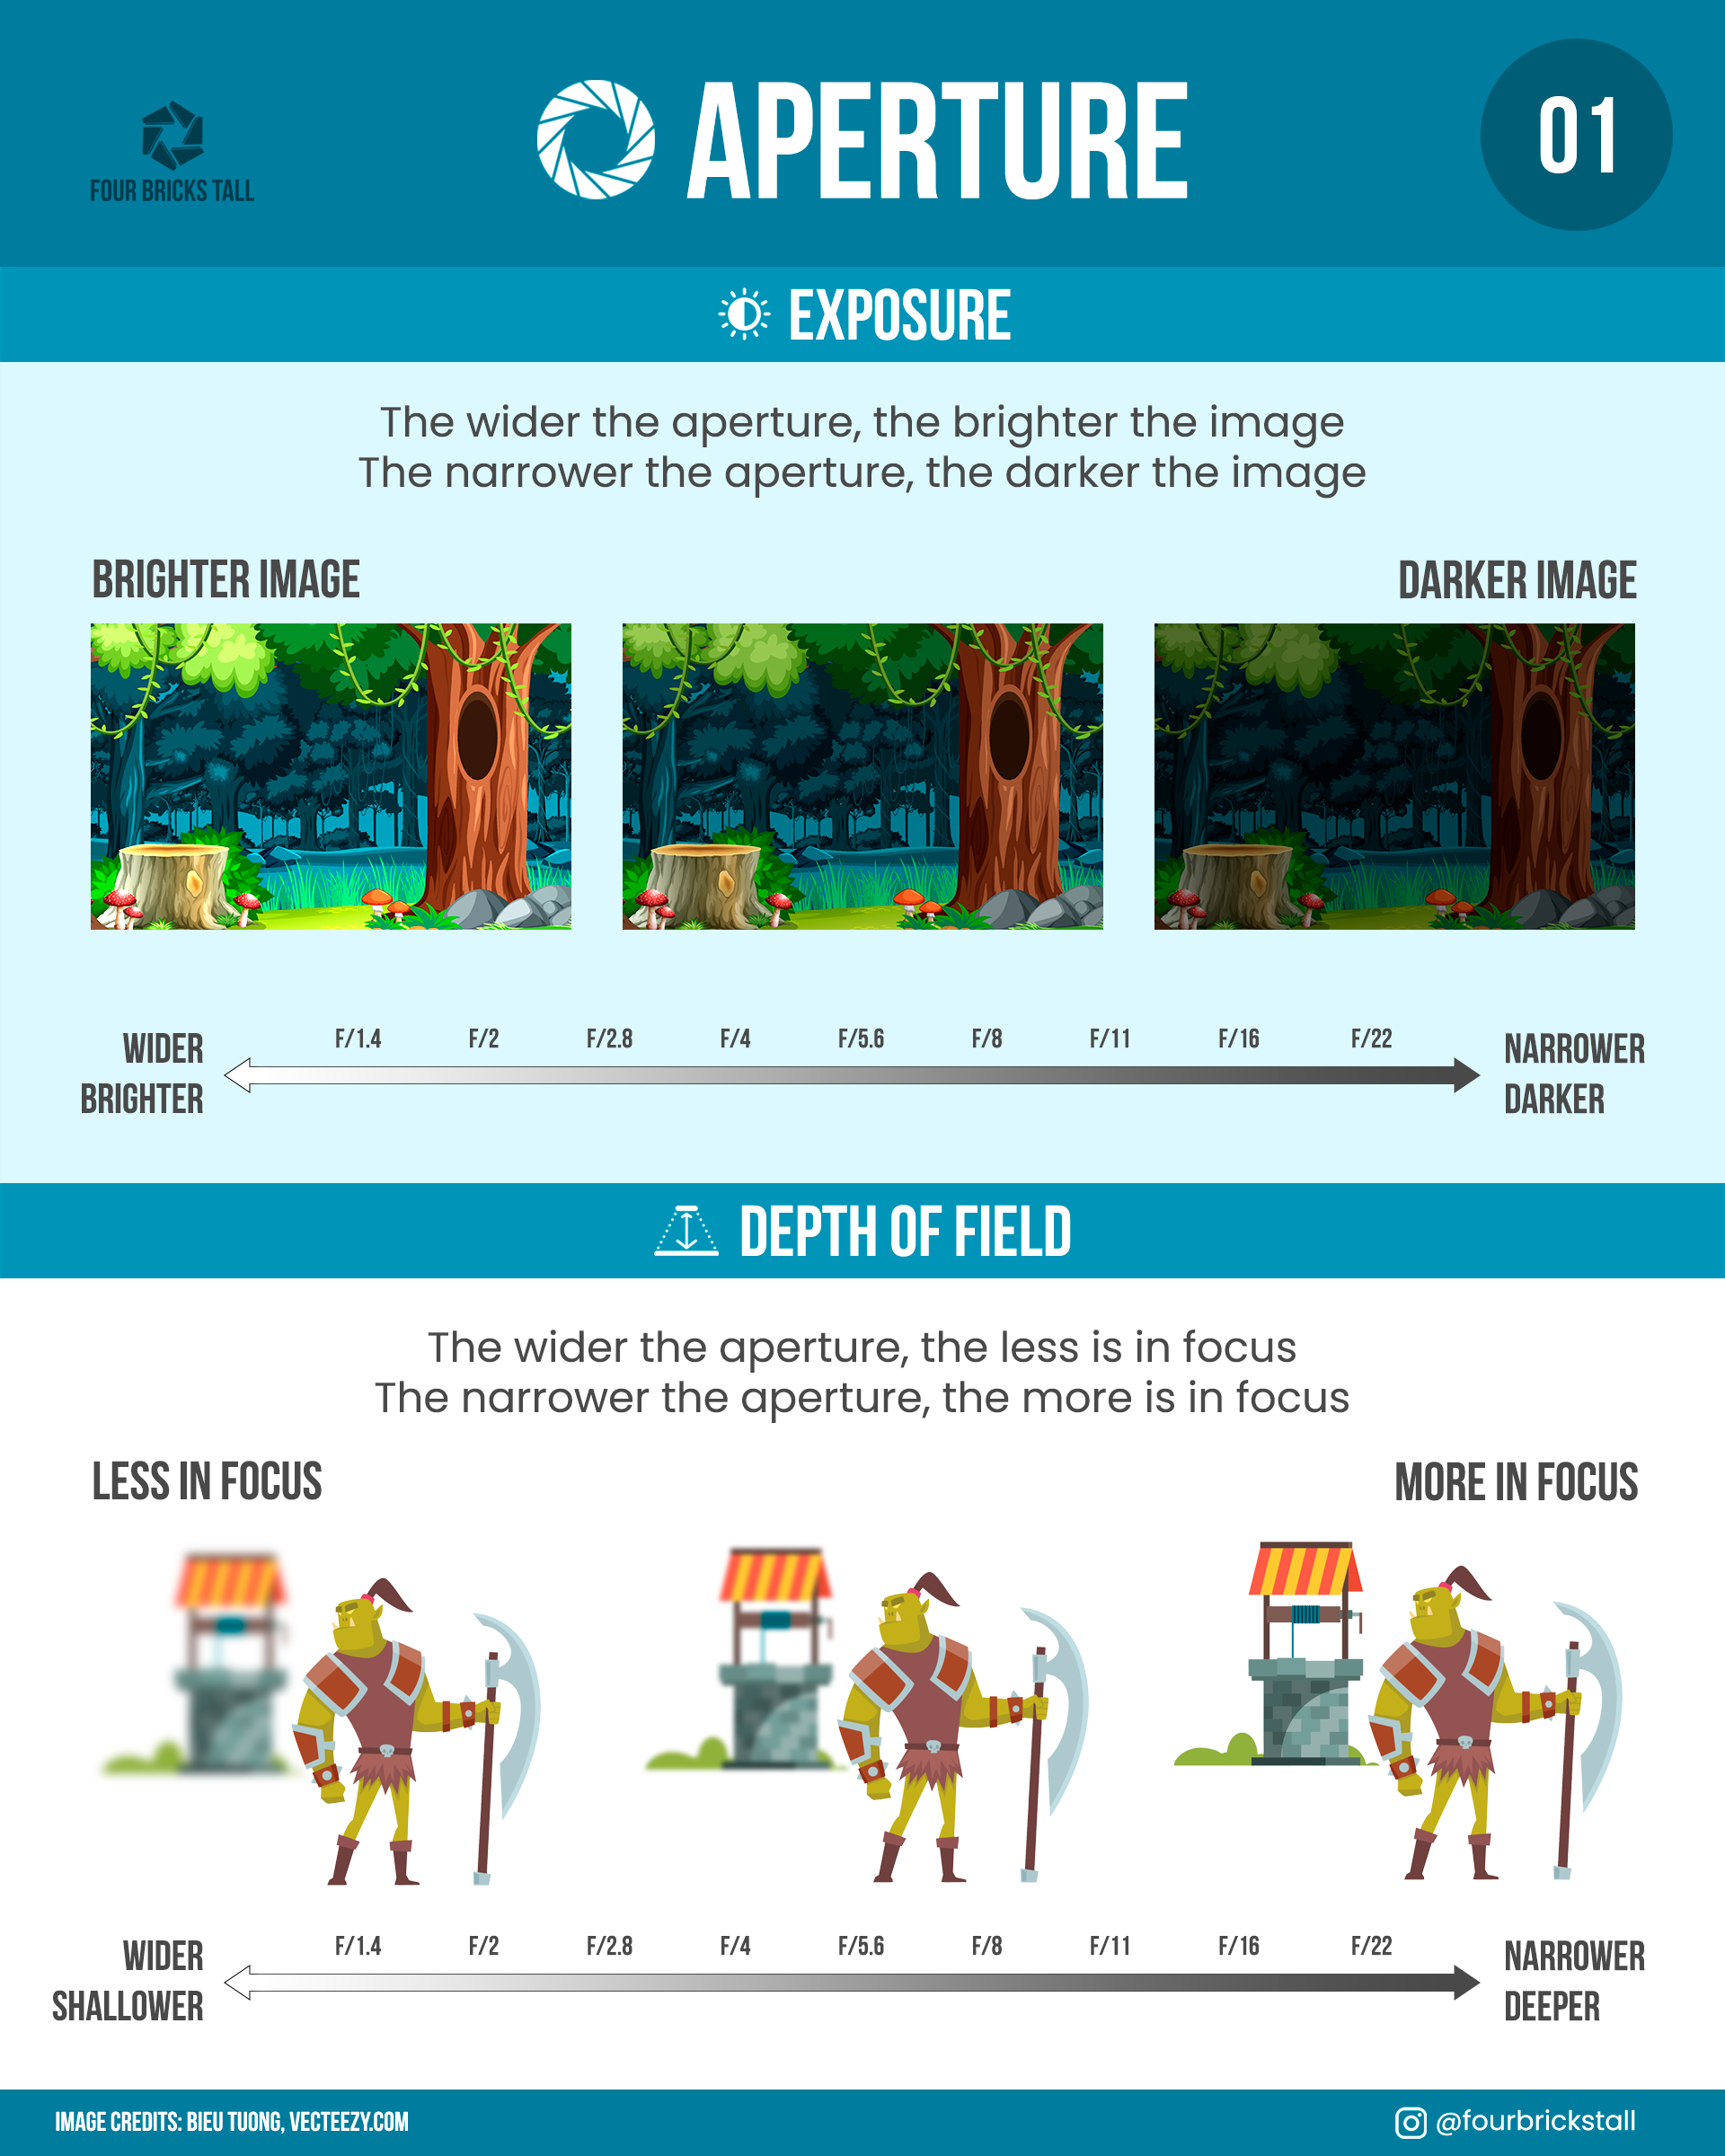
Usually it’s the depth of field I want to affect and the camera control for that is aperture. I’ll lock the aperture that gives me the amount of focus I am looking for, and then adjust my shutter speed to get the correct exposure.
However, when capturing movement is the goal, I’ll find the right shutter speed first, then compensate with aperture.
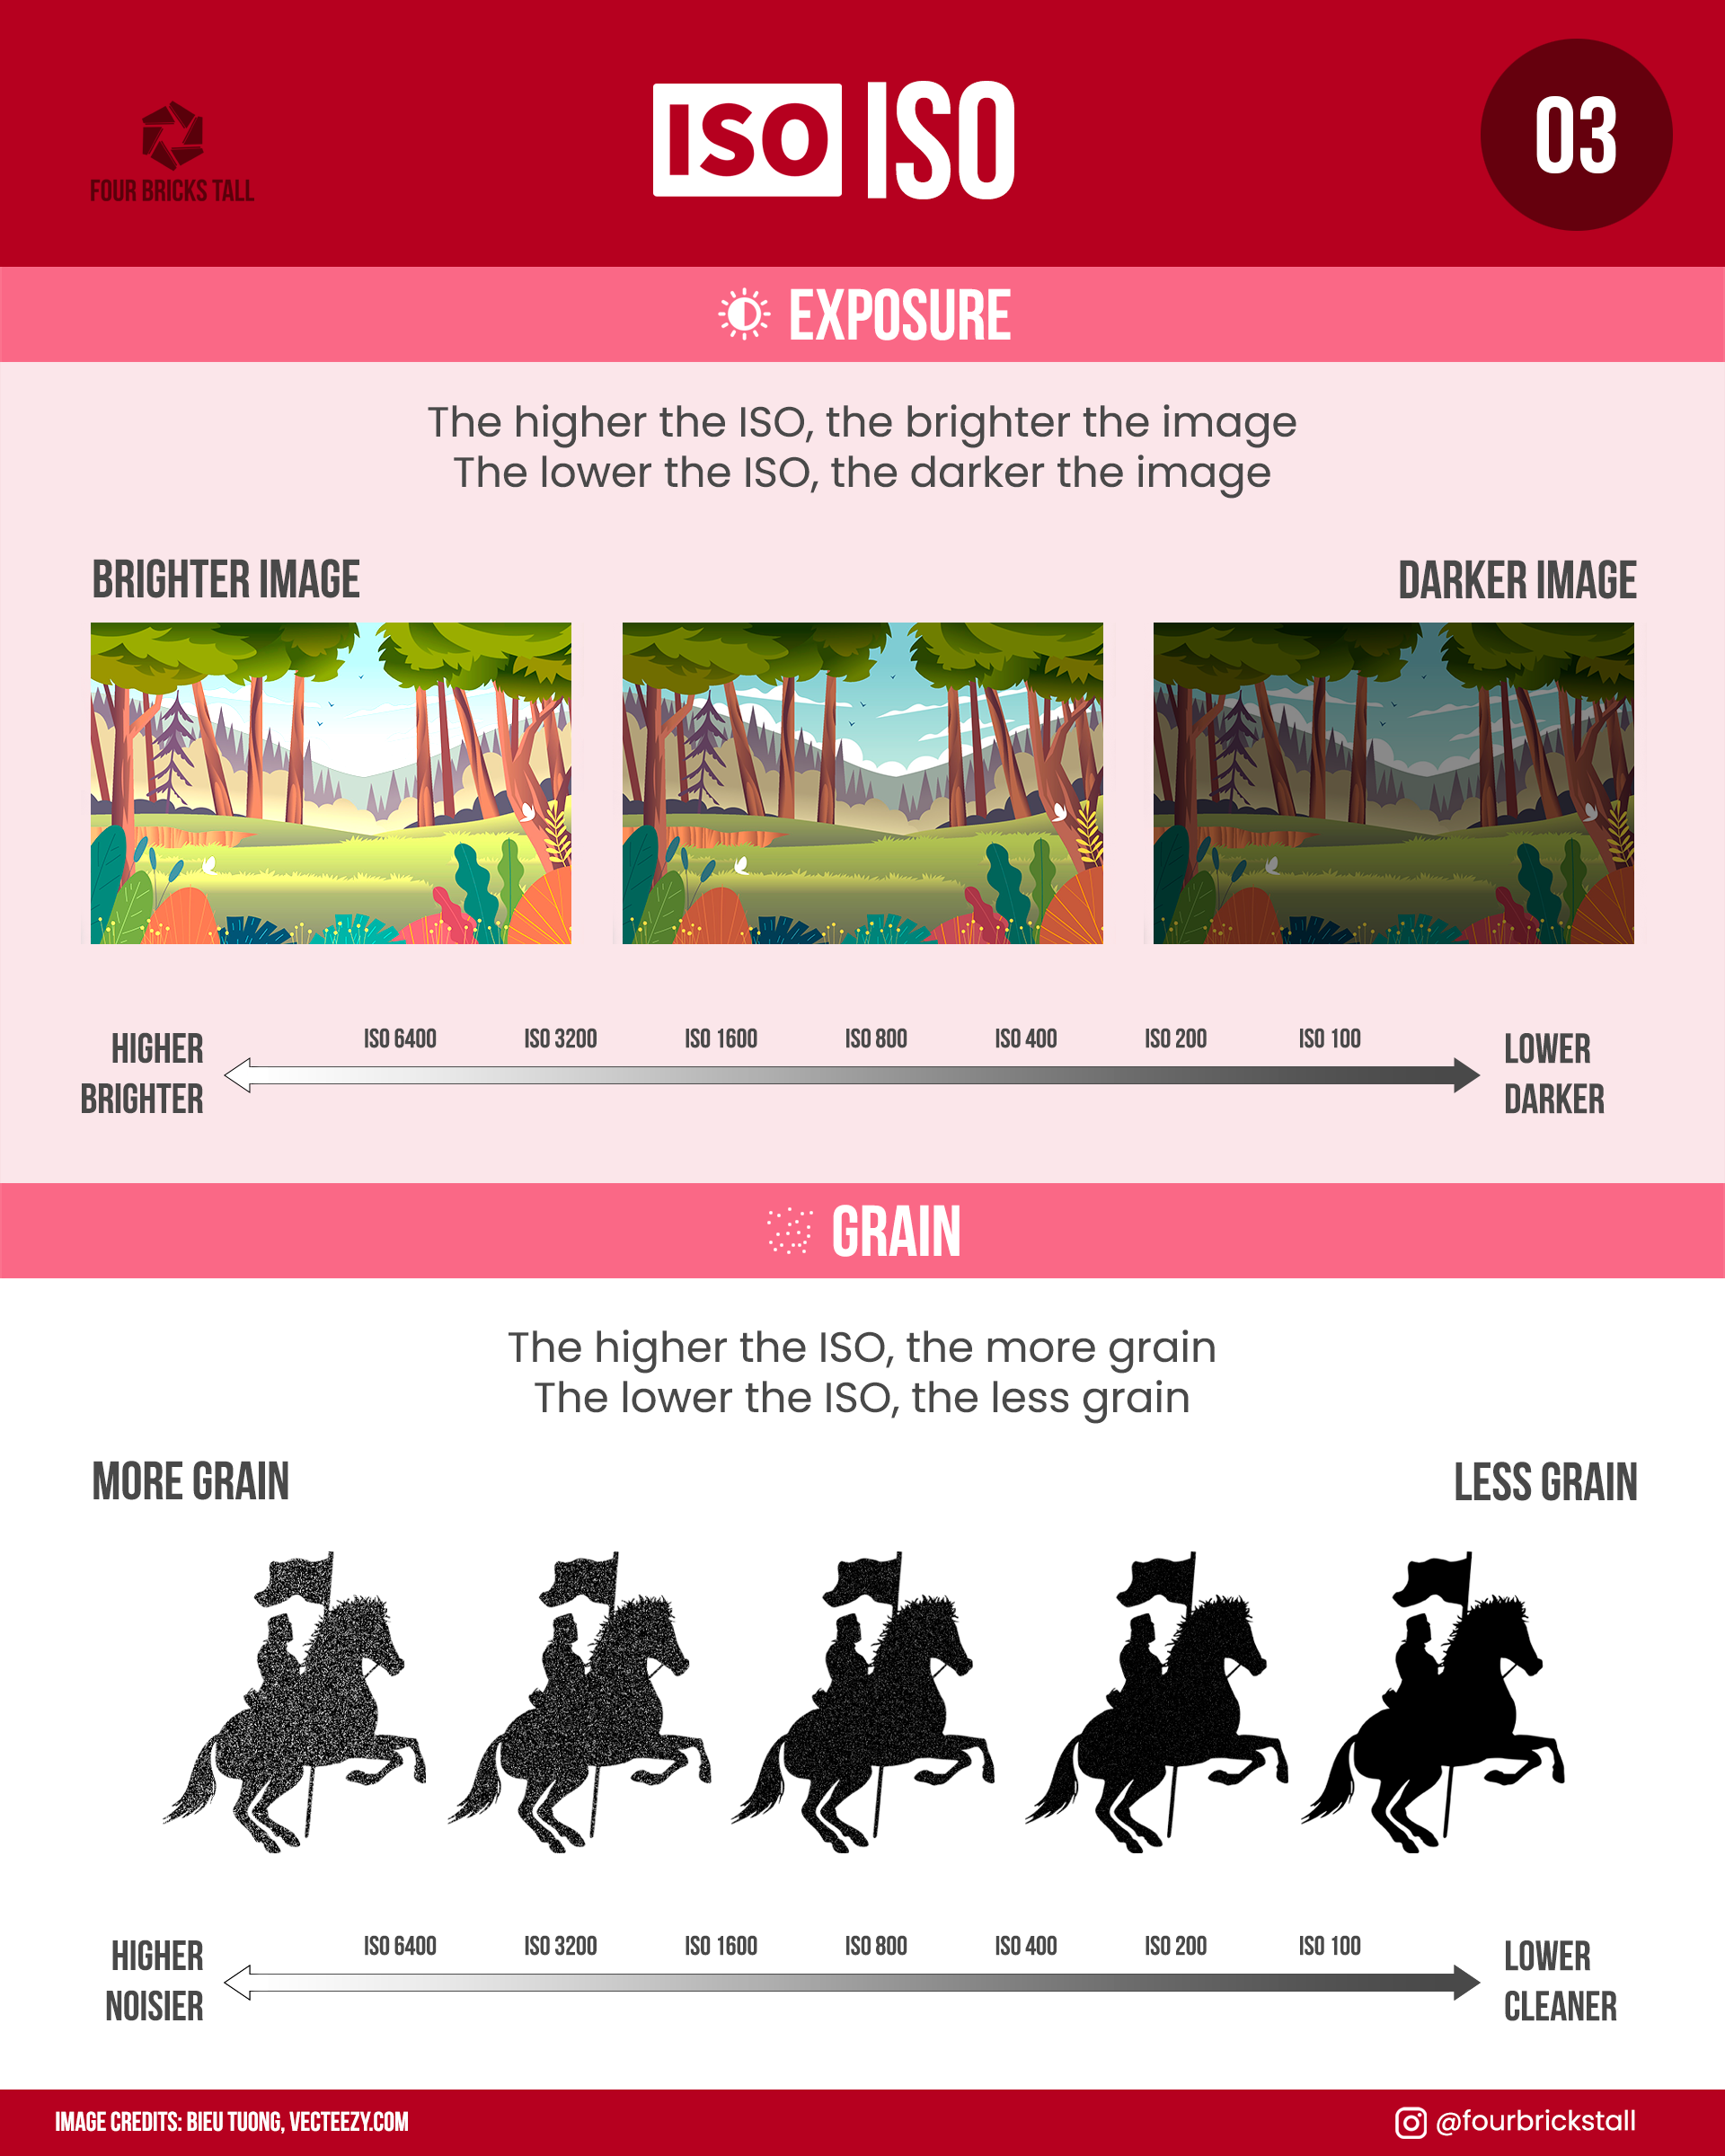
In either case, I rarely touch my ISO which is kept at 100, the lowest. I will only increase this when I’ve tried everything else, including returning at a different time of day, moving the whole scene to a brighter area and setting up again, or adding artificial light.
Getting the right exposure
Getting the amount of light I want for a scene comes after I decide on the creative effect I want, not the other way around.
I never use the image on the LCD monitor to determine if there’s enough light. It’s simply not a good tool for that. Instead, I read the histogram.
My histogram is always visible as an overlay on my LCD when I’m shooting. When I am focusing and composing, I look at the main part of the LCD. When I am adjusting a setting for brightness, I watch my histogram.
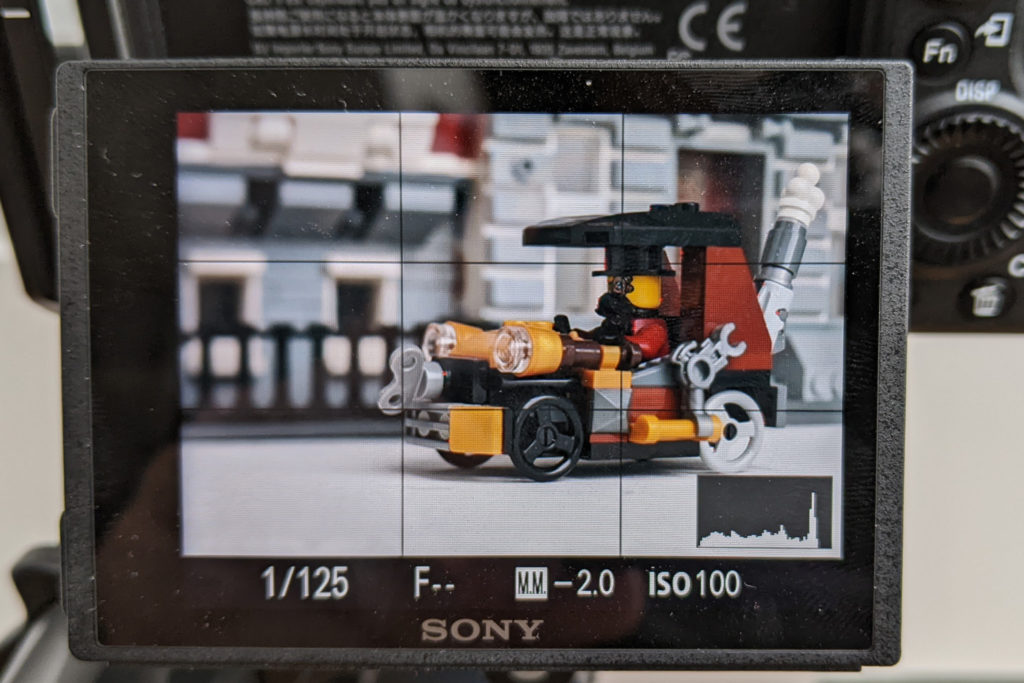
(Note: many cameras have live view histograms which let you see the histogram before you take a shot, but some cameras only let you see a histogram after you take the shot.)
Histograms are just there to help you make creative decisions. For example, even though my histogram might show that an image is underexposed, I’m not going to always try to get more brightness. Maybe the scene has more dynamic range than my camera can handle so I might want an underexposed shot for the highlights and then an overexposed shot for the shadows that I can blend later in editing.
I know a histogram looks scary but it’s a very simple and effective tool to help you get the exposure you want, so learn to read a histogram as early as possible.
Taking the shot
I like to use either a timer or a remote trigger to avoid introducing any camera shake from pressing the shutter release button.
As much as possible, I try not to touch the camera at all after I have all the settings and focus set.
I also stay completely still, especially indoors. I’ve ruined many shots just by taking a small step back which moved the floorboards underneath the tripod ever so slightly.
Working the scene
Whether indoors or outdoors, I will always take multiple shots of a scene before moving on. And before even thinking of packing up, I will physically walk around the scene looking for other angles to take.
It usually means going through the whole shooting process again but that’s working the scene.
Often, and especially on outdoors shoots, the shot that I pre-visualized isn’t what I ended up liking the most.
After the Shoot
Documenting the scene
Before I start packing everything away, I take a photo of the whole scene with my phone. That’s just something I try to do so I can share my process with photographers and teach. I also find the behind-the-scenes (BTS) photos are really helpful when I’m trying to locate the source of an odd reflection.

Editing
After the shoot, I import everything into Lightroom on my desktop and flag the keepers. Mine’s the paid version that comes with a subscription to Adobe but the Lightroom Mobile app is free (but requires you to register). Snapseed is also a good mobile editor with RAW editing support.
I start editing by selecting a lens profile to correct any distortions, reducing luminance noise, and sharpening. I have that set as a preset so it’s one-click.
From there, I will check the histogram in Lightroom again to make sure there aren’t any clipped blacks or blown highlights. The histogram in the camera is based on a JPG whereas the histogram in Lightroom is based on the RAW image, so there’s going to be a little difference.

If there’s some under- or over-exposure, I make an adjustment either on the curves panel or by dragging the exposure or other tone sliders.
I will almost always brighten my subject or a minifig’s face by at least 1/3 stop. I’ll either select the subject with the automated masking tool or draw a radial gradient over the face, then drag the exposure slider up to 0.30 or whatever I think it needs.
From there, I will treat each image differently and do color grading, add vignettes, change color temperature, etc. To learn more about that, I suggest watching one of my BTS videos.
Each photo is saved as a JPG with a maximum 2048 pixels on the longest side. My original RAW files aren’t affected, only the output JPG, so if I needed them at a higher resolution later, they are still there.
Sharing
Finally, I share the image on Instagram, Flickr, and Twitter Tumblr but at different times or even days. Instagram is kind of my catch-all, Tumblr is a mix of other stuff I like as well, and Flickr is where I am more discerning.
Why? Instagram forgives. I say this to mean that nobody on Instagram is poring over my photos so I am less careful about what goes up there. I imagine my pictures are seen for a split-second before they are scrolled away forever. If there’s a flaw in a photo, no one’s going to notice because the platform doesn’t encourage review or contemplation.
Flickr, on the other hand, will let you zoom in and pan around a photo. It’s a platform for photographers, so the audience is more thoughtful about the work that’s posted there.
The app is terrible but I hardly ever view Flickr on my phone anyway. I’m happy with the entirely different desktop experience.
Twitter is shaping up to be a pretty viable platform for photography now that they have full-width images. I post there sporadically but I’m mostly there for getting photography news and finding inspirational creators.
I recently went back to Tumblr and found that it’s a good platform to find a new audience. Unlike Instagram, its core is fandom and art, so a genre like toy photography is right at home.
Do I need to share on any of these platforms? I didn’t think so before, but now I just like the idea of holding myself accountable by publishing work publicly. It makes the whole photography experience complete for me to have it viewed by someone other than myself.
Download my free toy photography cheatsheets