
Getting feedback on your photos is crucial if you want to improve your LEGO photography skills. But finding someone to look at your work and give you a critique can be really difficult and scary.
Luckily, you already have a way to do it in your photography workflow: editing.
Editing is where you really dive into the details of your work and can see the mistakes you made much more clearly. When you’re doing nothing else but looking at your photos on a larger screen, you reflect on what you did well and what you could have done better.
The first step of editing is really an evaluation: you’re giving yourself feedback.
There’s no such thing as unedited
Contrary to popular belief, all photos are edited. Every camera out there converts the image captured on the sensor, runs it through an image processor to add saturation, apply contrast, reduce noise, and make a bunch of other adjustments, and then creates a JPG that you can share.
If you don’t want these automatic edits, switch to RAW format and make all the adjustments in Lightroom and/or Photoshop to your own tastes which contributes to your own style.
Either way, the image needs to be processed before it can be output. The only question is who does it: you or an algorithm?
How I evaluate during editing
After downloading my photos using Lightroom, I immediately start culling them. The best ones get flagged, and the rest are filtered out of my view. I tend to cull very quickly, usually paring everything down to a handful of winners in a matter of minutes.
I open each flagged winner so it takes up most of the Lightroom workspace, and then I sit back in my chair to take it in for a minute.
I don’t think too hard. I just let all my initial thoughts and doubts come in as I look intently at my photo and then respond to them with the relevant tool in Lightroom:
What if I framed this tighter? I reach for the crop tool.
This probably would be better if I slowed down my shutter speed or added more light. I move the exposure slider.
Damn, I missed that speck of dirt! I click on the clone tool.
I get to see very quickly where I can make improvements to my photo during the edit.
But if I find myself spending too much time in editing or am frustrated at all the things I missed, I unflag the photo as a winner and reshoot the photo instead. I’ve learned something during the edit and I want to apply it in-camera.
You don’t have to be the same way: feel free to carry on editing and output from Lightroom. You learn about yourself and your skills as a photographer both ways. There may be an advantage to continuing in Lightroom or Photoshop if editing is a skill you need to sharpen, so just go where you need to grow more.
The point is that I never would have evaluated my work like that had I not brought it into the post-processing phase. There’d be no need to think about the photo at all after pressing the trigger, and I’d probably just carry the same mistakes over to my next shot since they were never pointed out.
Revisiting old photos with editing
If you’ve never tried giving yourself a critique, one fun way to get into it is by editing an old photo you took.
For sure you’ll see problems if you’ve grown as a photographer, but playing with an old photo in post-processing with your developed photographer’s mind and eye makes giving yourself feedback much more comfortable and interesting. It’s great exercise.
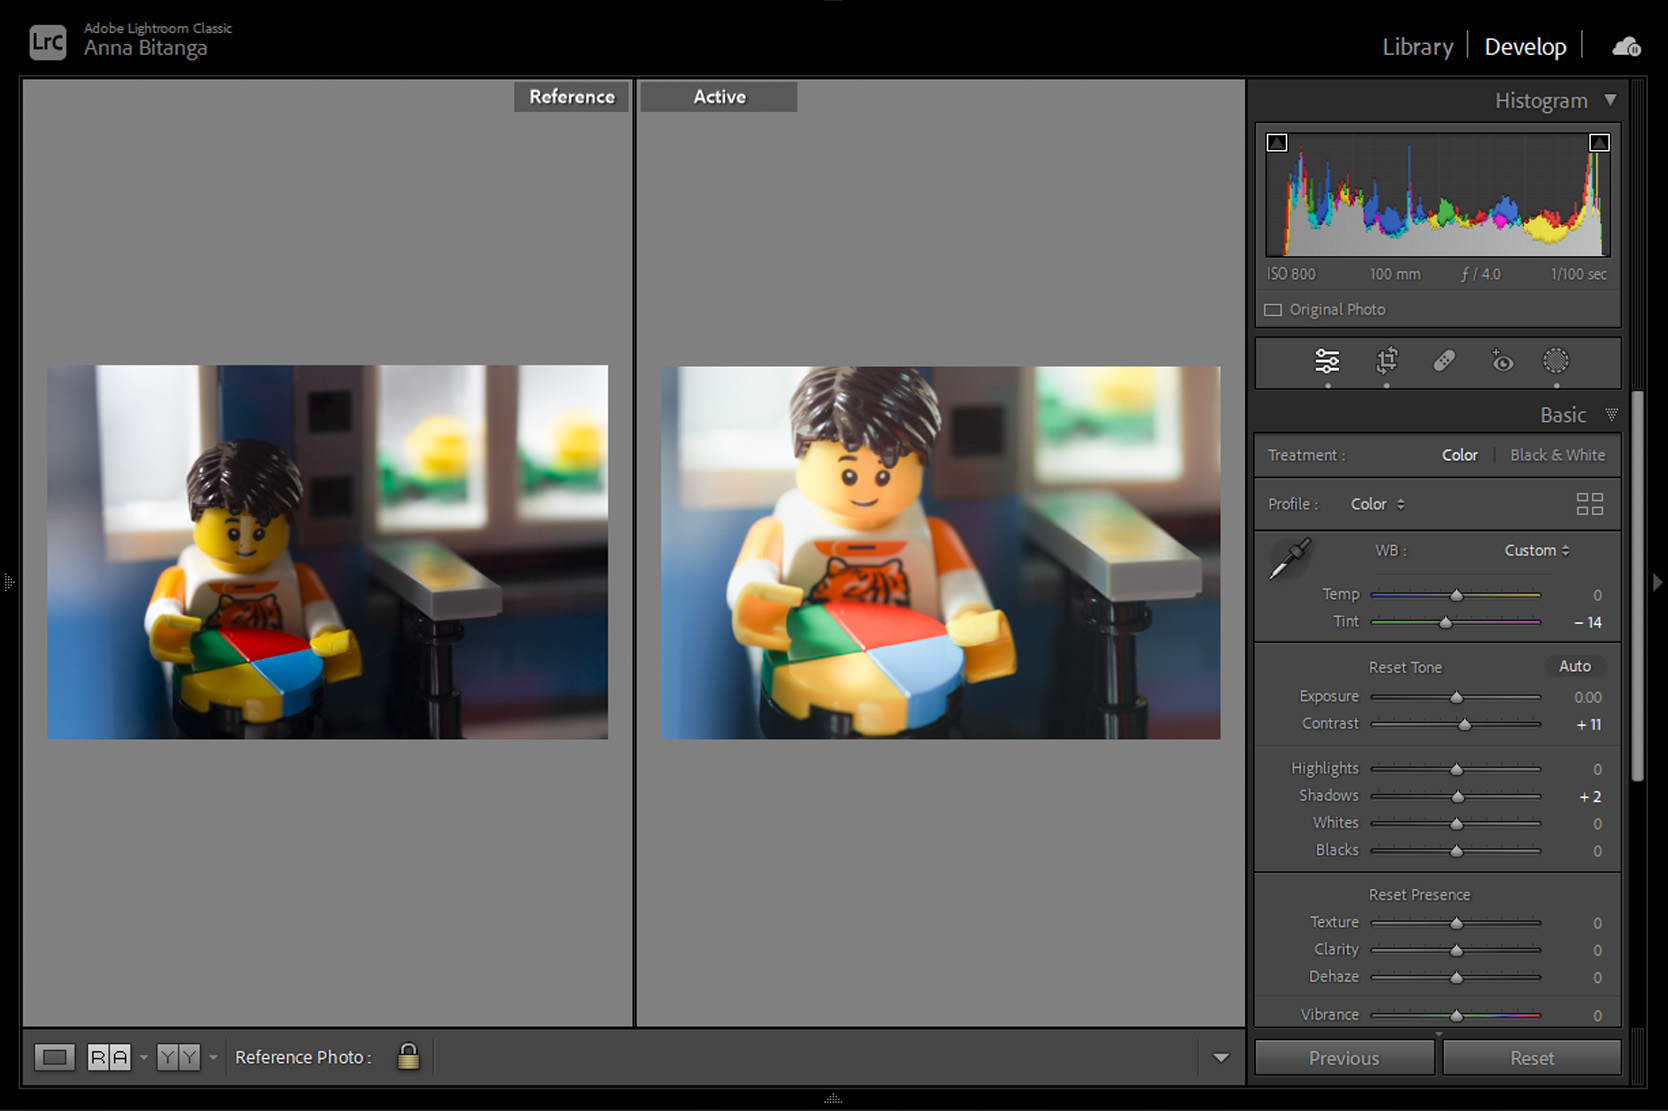
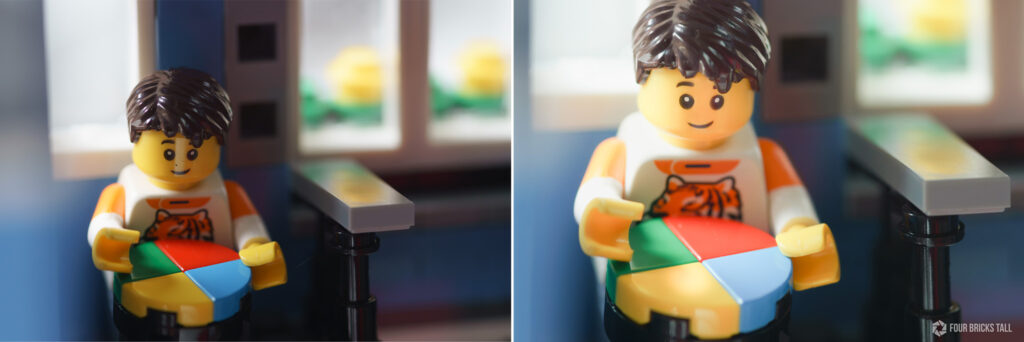
Let me show you how I edited the photo on the left that I took years ago and created the photo on the right in Lightroom:
This old image from my Simon photo session was rejected for an obvious reason: the reflection on the face. This was a test shot where I had set up a bounce card below and out of frame which is where that reflection came from.
It’s a glaring mistake, but there were other issues with the photo as well. I spotted a speck of dirt there too when viewing it on my computer monitor. I probably couldn’t see this on the minifig with my eyes or on the small LCD on my camera.
I noticed something else around the minifig too so I zoomed in a little and saw a thin spiderweb extending from its left hand to the— what’s that? The banister wasn’t even connected properly!
The spiderweb I could forgive but not the banister. That’s not something I could fix in post with my limited compositing skills either, then or now.
I also saw quite a bit of noise at this zoom level and checked the settings to find I had raised my ISO to 800— 3 full stops over what I normally shoot. I must not have had enough light.
At 1/100 shutter speed, I was following the reciprocal rule (i.e. 1 over focal length for sharpness) with my Minolta 100mm f/2.8 macro lens which meant I was shooting handheld. I must have been too lazy to get the tripod, didn’t want to deal with the slipping ballhead with the heavy lens, or didn’t have enough space by the windowsill of my NYC apartment.
Zoomed back out, I saw that I composed using the Rule of Thirds with the minifig along the first vertical line and the banister along the second. I don’t think the space to the right added anything useful to the photo though.

I also felt the photo should be brighter overall to match the lightness of the concept.
That’s a lot of reflection on technique and useful feedback I’ve just given myself!
If I had this scene setup still and working with the same gear I had back then, I’d easily fix these issues in a reshoot:
- wipe down the minifig to get rid of the speck of dirt and spiderweb
- put that banister together properly
- reposition the bounce card or the camera angle to avoid that glare
- use a tripod instead of shooting handheld for longer exposure rather than higher ISO to prevent noise
- line up the verticals
- frame tighter and close down the aperture to offset the shallower DoF from moving closer in
- increase the overall exposure
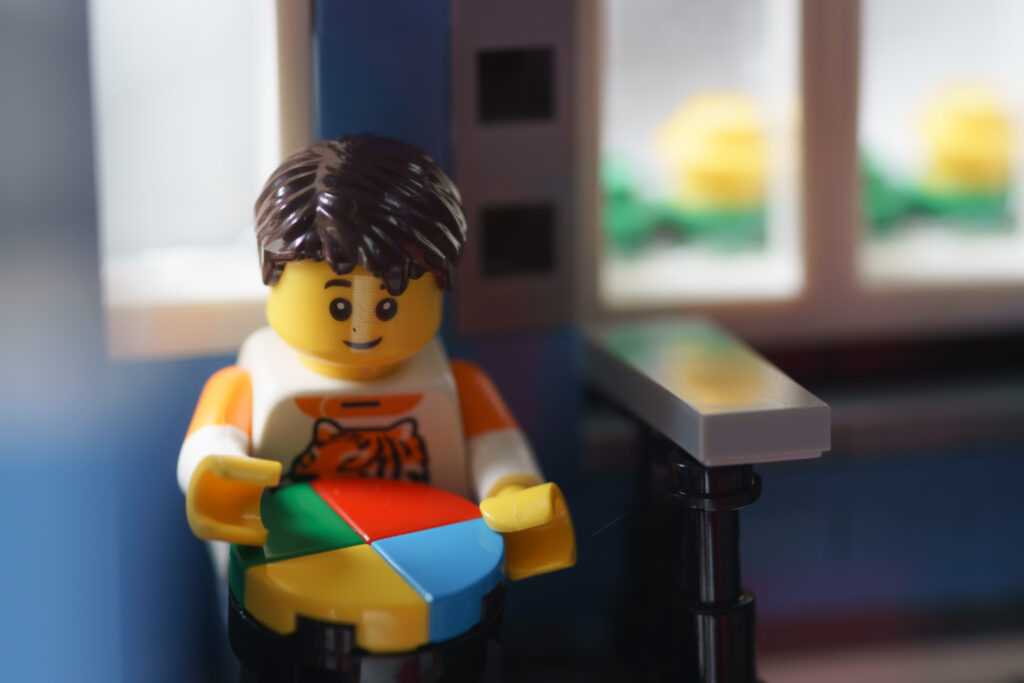
But that was 5 years ago so I’ve tediously edited the photo with those thoughts in mind instead:

It took significantly more time to do this in post, about half an hour, when it would have taken me just a few minutes to get it right in-camera.
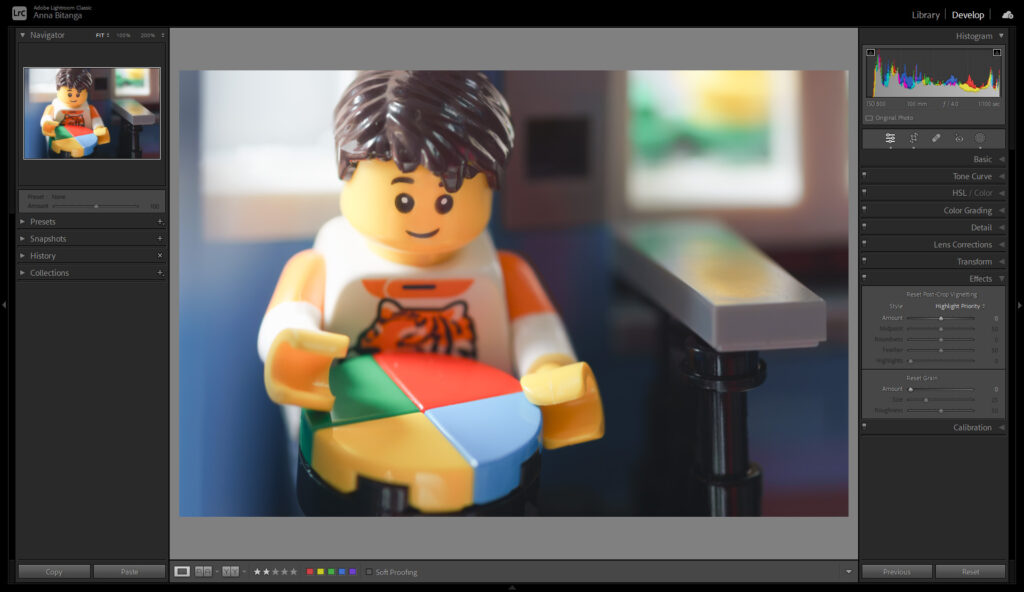
Bonus tip: Checking for legibility
I ultimately want to upload my photo to my website and social media, and because over 90% of people use the internet with their phones, I also check the navigator panel in Lightroom to see if the photo is legible on a small screen too. Here’s what I mean:
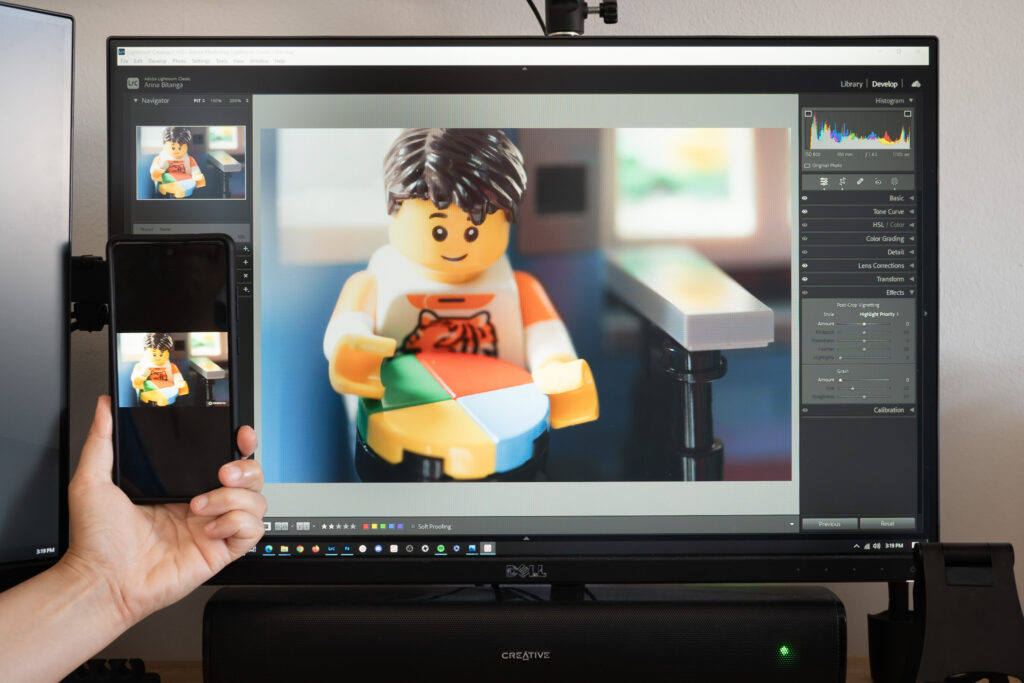
The image displayed on a phone is about the same size as the image in the navigator panel in the top left corner of the monitor. So if I can still identify what the image is by glancing at the navigator panel, I know I’m good to go on mobile.
Should you fix it in post?
I don’t usually edit photos to fix bad shooting decisions after the fact, but rather to enhance what was already there and do things that are too impractical to do physically. That’s my philosophy.
My typical editing session is a lot more minimal and looks like this:
Editing to such an extreme was a good exercise in self-critique and problem-solving nonetheless. I identified all the issues with my photo and how I would have redone it. I also forced myself to refine other skills outside my usual.
Making mistakes and then learning from them is how you grow. Post-processing is an opportunity to really examine your photo in detail and see your mistakes.
So if you’re one of those toy photographers who doesn’t include post-processing in your workflow, I think you’re missing out on a valuable tool for learning.
Even if you never alter your photos, post-processing forces a change in purpose, environment, and mindset that’s different from your shooting phase where you’re prone to make the most mistakes.
NOTE: This is an expanded article based on a toy photography tip I originally shared in a Take Better Toy Photos essay.